安装
环境变量
2
2
安装 Bind 9
2
3
2
3
安装 Webmin
2
3
4
5
6
7
2$ tar zxf webmin-1.881.tar.gz
3$ mv webmin-1.881 /usr/local/webmin
4$ cd /usr/local/webmin
5$ ./setup.sh
6
7
一路默认配置即可,注意最后要输入管理的账号密码,默认端口为10000,安装后管理地址为http://ip:端口。
DNS 服务配置
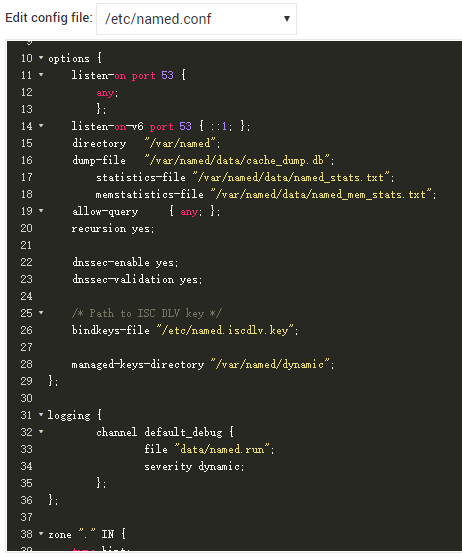
依次进入到【Servers】=>【BIND DNS Server】=>【Edit Config File】,将如下内容进行修改:
2
3
4
5
2
3allow-query { localhost; }; 修改为 allow-query { any; };
4
5
如下图所示:

配置文件
然后保存即可。
添加域名
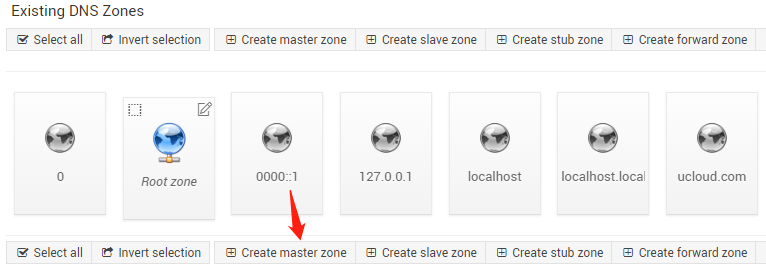
依次进入【Servers】=>【BIND DNS Server】=>【Create master zone】中

Master Zone
依次输入域名,主机,邮箱,然后创建即可:

新建域名
添加子域名
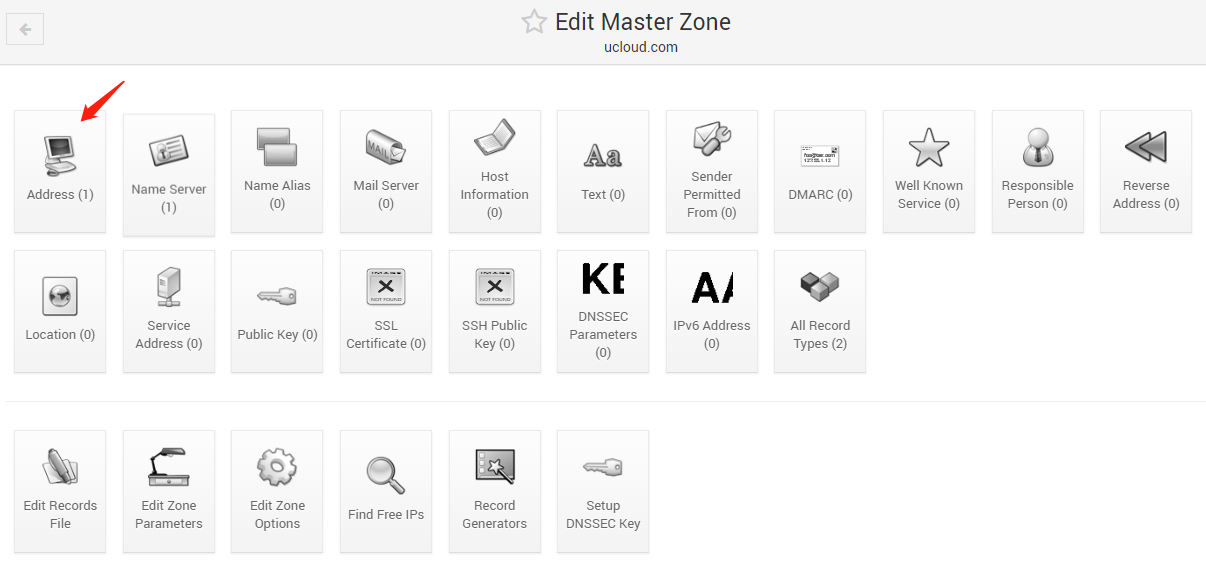
依次进入【Servers】=>【BIND DNS Server】=>【Edit Master Zone】中

Edit Master Zone
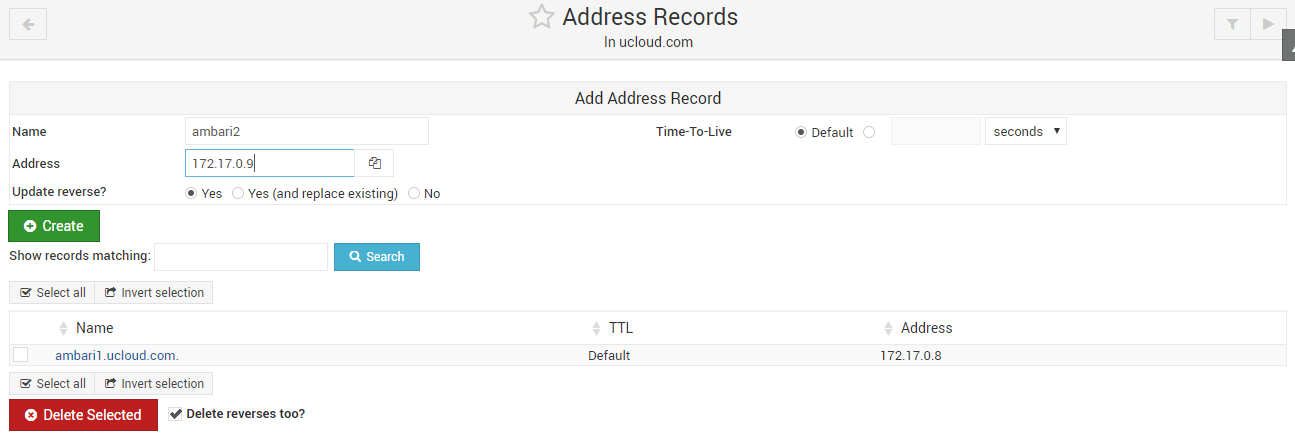
进入添加子域名界面,如下图:

添加新子域名
测试
DNS 默认端口 53 , webmin 默认端口 10000
查看DNS端口
2
3
4
5
6
7
8
9
10
11
12
13
14
15
16
17
2Active Internet connections (only servers)
3Proto Recv-Q Send-Q Local Address Foreign Address State PID/Program name
4udp 0 0 127.0.0.1:703 0.0.0.0:* 1797/rpc.statd
5udp 0 0 0.0.0.0:111 0.0.0.0:* 1775/rpcbind
6udp 0 0 0.0.0.0:631 0.0.0.0:* 1853/cupsd
7udp 0 0 0.0.0.0:10000 0.0.0.0:* 8721/perl
8udp 0 0 0.0.0.0:678 0.0.0.0:* 1775/rpcbind
9udp 0 0 0.0.0.0:47025 0.0.0.0:* 1797/rpc.statd
10udp 0 0 172.17.42.1:53 0.0.0.0:* 11786/named-sdb
11udp 0 0 172.22.20.206:53 0.0.0.0:* 11786/named-sdb
12udp 0 0 127.0.0.1:53 0.0.0.0:* 11786/named-sdb
13udp 0 0 :::56027 :::* 1797/rpc.statd
14udp 0 0 :::111 :::* 1775/rpcbind
15udp 0 0 :::678 :::* 1775/rpcbind
16
17
查看域名
2
3
4
5
6
7
8
9
2Using domain server:
3Name: 127.0.0.1
4Address: 127.0.0.1#53
5Aliases:
6
7ambari1.ucloud.com has address 172.17.0.8
8
9
