第一步:下载安装包
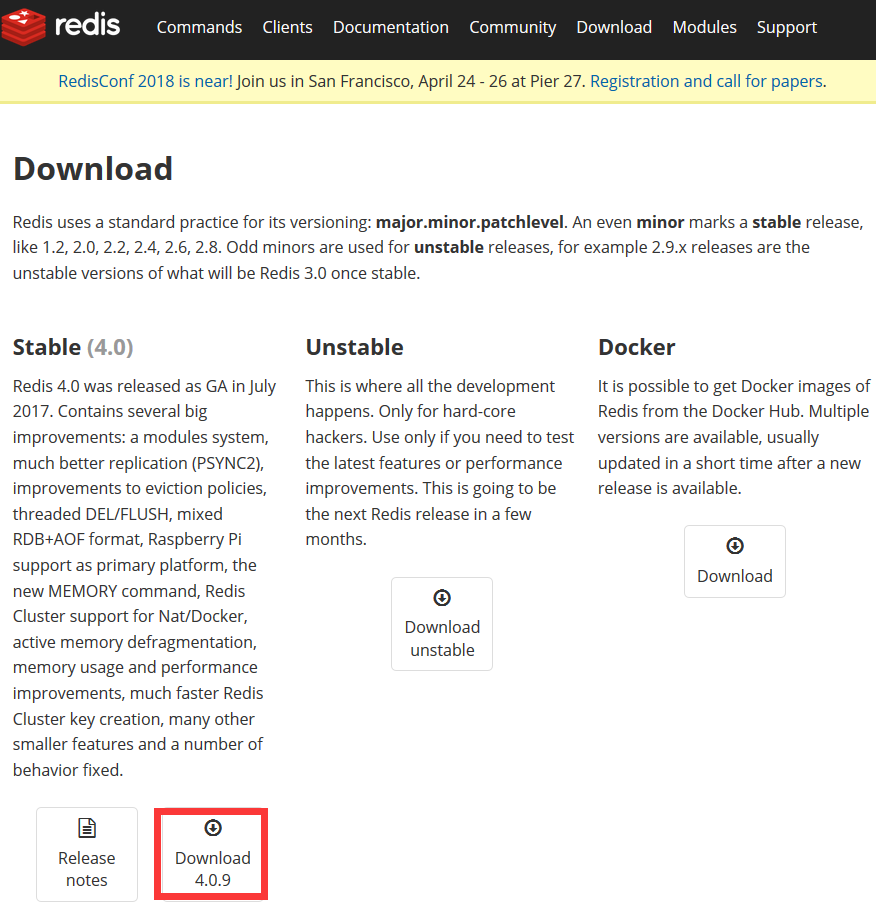
访问https://redis.io/download 到官网进行下载。这里下载最新的4.0版本.
第二步:安装
1.通过远程管理工具,将压缩包拷贝到Linux服务器中,执行解压操作

tar -zxf redis-4.0.9.tar.gz
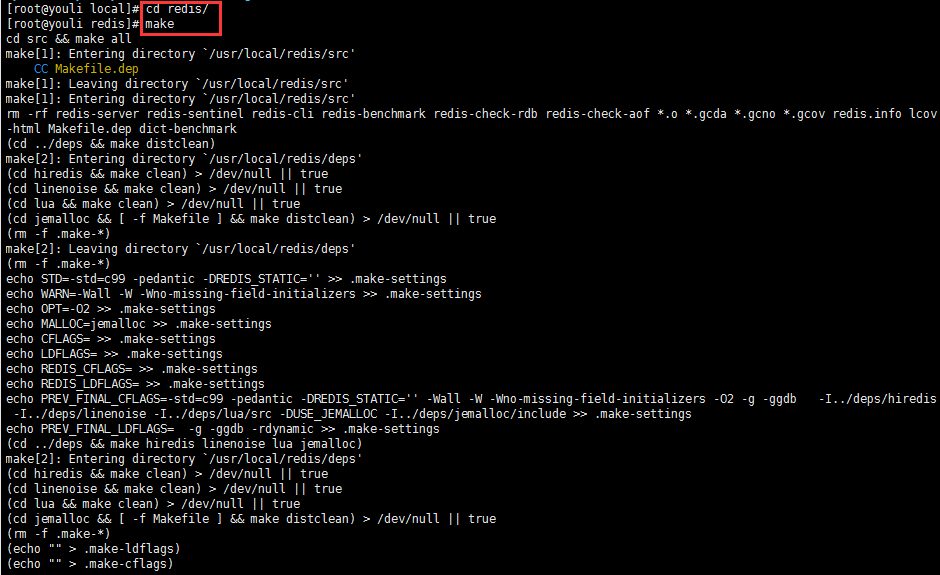
2.进入解压文件目录使用make对解压的Redis文件进行编译
图示:这里因为我redis的安装目录在 /usr/locat/ 目录下,因此会有如下操作

注:如果在编译过程中出现问题,有可能是安装包下载的有误,这里可以尝试的用别人下载的安装包或者直接用
wget http://download.redis.io/releases/redis-4.0.9.tar.gz
如果发现上述读不能解决问题,请参照该链接:https://www.cnblogs.com/liu2-/p/6914159.html
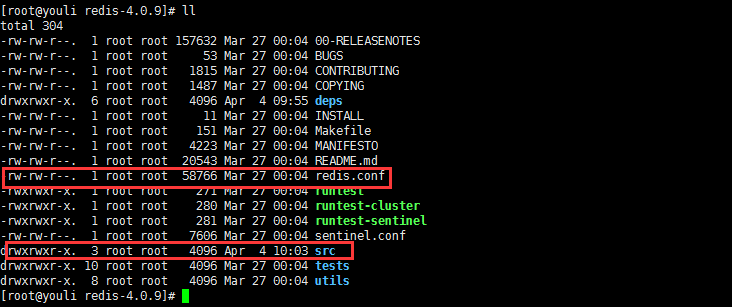
编译完成之后,可以看到解压文件redis-3.0.7 中会有对应的src、conf等文件夹
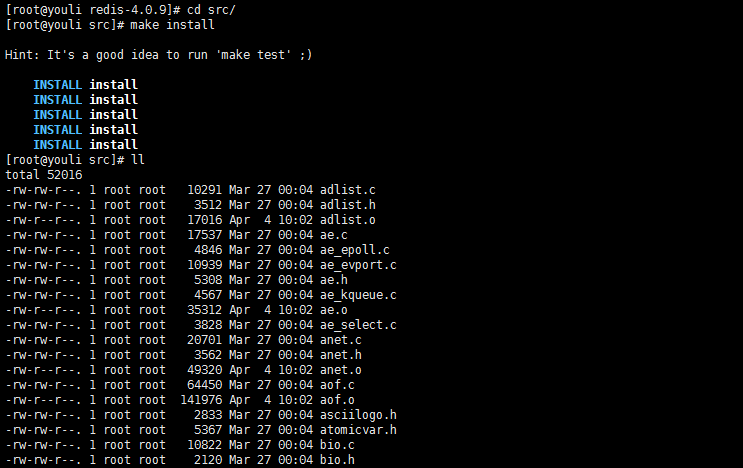
3.编译成功后,进入src文件夹,执行make install进行Redis安装。
如下图示安装完成,界面如下:
** 第三步:部署**
1.为了方便管理,将Redis文件中的conf配置文件和常用命令移动到统一文件中
1)、创建bin和etc文件
如图示:

2)、回到刚刚安装目录,找到redis.conf,将其复制移动到 /usr/local/redis/ect 下
执行命令如下:
mv redis.conf /usr/local/redis/etc/

进入src目录,移动mkreleasehdr.sh redis-benchmark redis-check-aof redis-check-rdb redis-cli redis-server到/usr/local/redis/bin/
执行命令 :mv mkreleasehdr.sh redis-benchmark redis-check-aof redis-check-rdb redis-cli redis-server /usr/local/redis/bin/
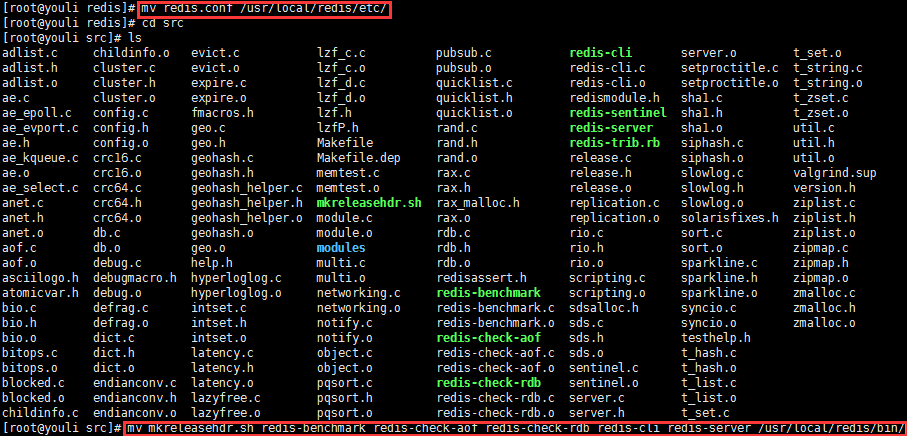
依次查看移动后文件

** 2、执行redis-server 启动redis**
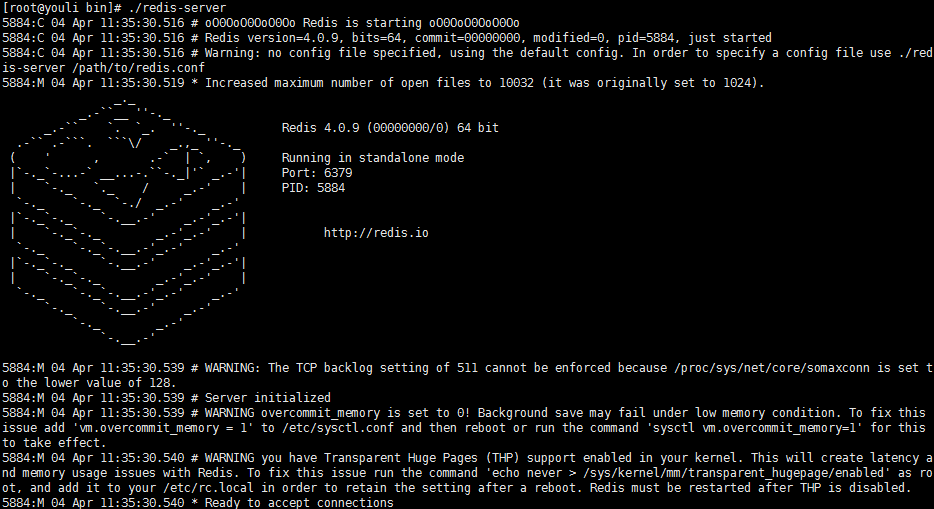
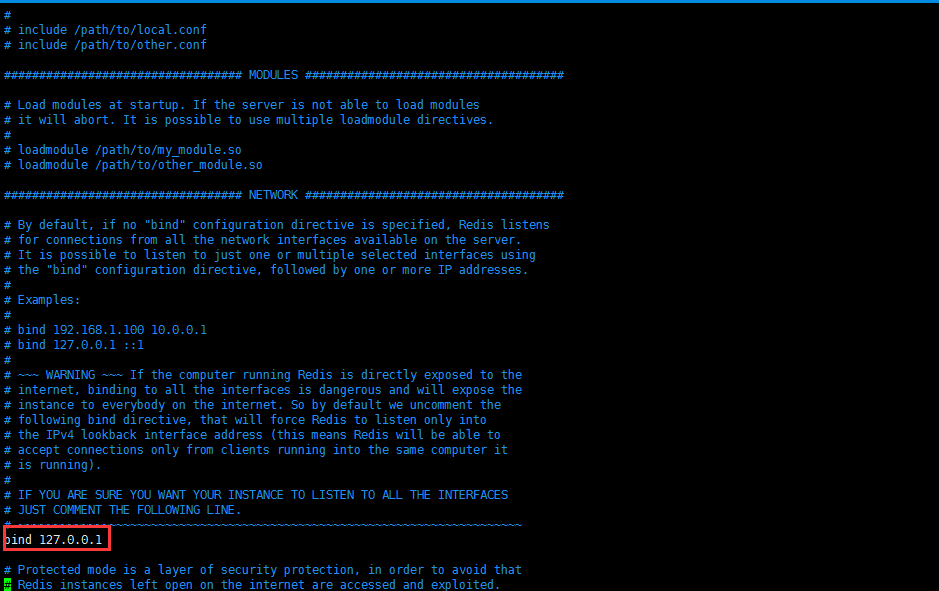
** 3、设置绑定ip(注:该步骤如果不需要可省略)**
**  **
**
如需要,可将上图绑定ip改为指定ip。
** 4、设置后台启动redis**
** ** 1)、首先编辑conf文件,将daemonize属性改为yes(表明需要在后台运行)
cd etc/
vim redis.conf
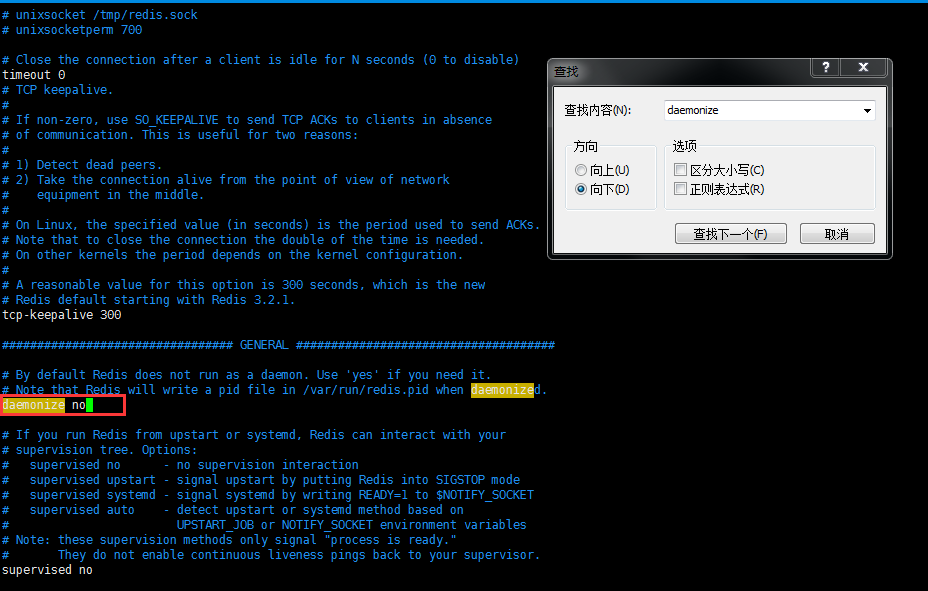
将no修改为yes
2)、再次启动redis服务,并指定启动服务配置文件
redis-server /usr/local/redis/etc/redis.conf

配置后台运行成功。
Redis安装不需要make install make之后即安装成功
配置Redis最大内存
设置Redis最大占用内存
Redis需要设置最大占用内存吗?如果Redis内存使用超出了设置的最大值会怎样?
设置Redis最大占用内存
Redis设置最大占用内存,打开redis配置文件,找到如下段落,设置maxmemory参数,maxmemory是bytes字节类型,注意转换。修改如下所示:
Vim
2
3
4
5
6
7
8
9
10
11
12
13
14
15
16
17
18
19
20
21
22
23
24
25
26
27
2
3
4# In short... if you have slaves attached it is suggested that you set a lower
5
6
7
8# limit for maxmemory so that there is some free RAM on the system for slave
9
10
11
12# output buffers (but this is not needed if the policy is 'noeviction').
13
14
15
16#
17
18
19
20# maxmemory <bytes>
21
22
23
24maxmemory 268435456
25
26
27
本机服务器redis配置文件路径:/etc/redis/6379.conf,由于本机自带内存只有1G,一般推荐Redis设置内存为最大物理内存的四分之三,所以设置0.75G,换成byte是751619276.
可以在CentOS下输入命令:find / -name redis查找redis目录:
[root@iZ94r80gdghZ ~]# find / -name redis
/usr/share/nginx/html/blog.tanteng.me/wp-content/cache/supercache/blog.tanteng.me/tag/redis
/etc/redis
/var/redis
Redis配置文件一般在etc下的redis安装目录下。
Redis使用超过设置的最大值
如果Redis的使用超过了设置的最大值会怎样?我们来改一改上面的配置,故意把最大值设为1个byte试试。
Vim
2
3
4
5
6
7
8
9
10
11
12
13
14
15
16
17
18
19
20
2
3
4# output buffers (but this is not needed if the policy is 'noeviction').
5
6
7
8#
9
10
11
12# maxmemory <bytes>
13
14
15
16maxmemory 1
17
18
19
20
打开debug模式下的页面,提示错误:OOM command not allowed when used memory > ‘maxmemory’.
设置了maxmemory的选项,redis内存使用达到上限。可以通过设置LRU算法来删除部分key,释放空间。默认是按照过期时间的,如果set时候没有加上过期时间就会导致数据写满maxmemory。
如果不设置maxmemory或者设置为0,64位系统不限制内存,32位系统最多使用3GB内存。
LRU是Least Recently Used 近期最少使用算法。
- volatile-lru -> 根据LRU算法生成的过期时间来删除。
- allkeys-lru -> 根据LRU算法删除任何key。
- volatile-random -> 根据过期设置来随机删除key。
- allkeys->random -> 无差别随机删。
- volatile-ttl -> 根据最近过期时间来删除(辅以TTL)
- noeviction -> 谁也不删,直接在写操作时返回错误。
如果设置了maxmemory,一般都要设置过期策略。打开Redis的配置文件有如下描述,Redis有六种过期策略:
Vim
2
3
4
5
6
7
8
9
10
11
12
13
14
15
16
17
18
19
20
21
22
23
24
25
26
27
28
2
3
4# volatile-lru -> remove the key with an expire set using an LRU algorithm
5
6
7
8# allkeys-lru -> remove any key accordingly to the LRU algorithm
9
10
11
12# volatile-random -> remove a random key with an expire set
13
14
15
16# allkeys-random -> remove a random key, any key
17
18
19
20# volatile-ttl -> remove the key with the nearest expire time (minor TTL)
21
22
23
24# noeviction -> don't expire at all, just returnan error on write operations
25
26
27
28
那么打开配置文件,添加如下一行,使用volatile-lru的过期策略:
Vim
| 1 | maxmemory-policy volatile-lru |
1 | 1 |
保存文件退出,重启redis服务。
info命令查看Redis内存使用情况
如服务器Redis所在目录:/usr/local/redis-3.0.7/src
在终端输入./redis-cli,打开Redis客户端,输入info命令。
出来如下信息:
[root@iZ94r80gdghZ src]# ./redis-cli
127.0.0.1:6379> info
# Server
redis_version:3.0.7
redis_git_sha1:00000000
redis_git_dirty:0
redis_build_id:f07a42660a61a05e
redis_mode:standalone
os:Linux 3.10.0-327.10.1.el7.x86_64 x86_64
arch_bits:64
multiplexing_api:epoll
gcc_version:4.8.5
process_id:2165
run_id:8ec8a8dc969d6e2f2867d9188ccb90850bfc9acb
tcp_port:6379
uptime_in_seconds:668
uptime_in_days:0
hz:10
lru_clock:15882419
config_file:/etc/redis/6379.conf
# Clients
connected_clients:1
client_longest_output_list:0
client_biggest_input_buf:0
blocked_clients:0
# Memory
used_memory:816232
used_memory_human:797.10K
used_memory_rss:7655424
used_memory_peak:816232
used_memory_peak_human:797.10K
used_memory_lua:36864
mem_fragmentation_ratio:9.38
mem_allocator:jemalloc-3.6.0
# Persistence
loading:0
rdb_changes_since_last_save:0
rdb_bgsave_in_progress:0
rdb_last_save_time:1458722327
rdb_last_bgsave_status:ok
rdb_last_bgsave_time_sec:-1
rdb_current_bgsave_time_sec:-1
aof_enabled:0
aof_rewrite_in_progress:0
aof_rewrite_scheduled:0
aof_last_rewrite_time_sec:-1
aof_current_rewrite_time_sec:-1
aof_last_bgrewrite_status:ok
aof_last_write_status:ok
# Stats
total_connections_received:1
total_commands_processed:0
instantaneous_ops_per_sec:0
total_net_input_bytes:14
total_net_output_bytes:0
instantaneous_input_kbps:0.00
instantaneous_output_kbps:0.00
rejected_connections:0
sync_full:0
sync_partial_ok:0
sync_partial_err:0
expired_keys:0
evicted_keys:0
keyspace_hits:0
keyspace_misses:0
pubsub_channels:0
pubsub_patterns:0
latest_fork_usec:0
migrate_cached_sockets:0
# Replication
role:master
connected_slaves:0
master_repl_offset:0
repl_backlog_active:0
repl_backlog_size:1048576
repl_backlog_first_byte_offset:0
repl_backlog_histlen:0
# CPU
used_cpu_sys:0.30
used_cpu_user:0.29
used_cpu_sys_children:0.00
used_cpu_user_children:0.00
# Cluster
cluster_enabled:0
# Keyspace
db0:keys=1,expires=1,avg_ttl=425280
其中used_memory:816232,仅用了0.7M左右。
转载:https://blog.tanteng.me/2016/03/redis-maxmemory/
Redis配置
Redis可以在没有配置文件的情况下通过内置的配置来启动,但是这种启动方式只适用于开发和测试。
合理的配置Redis的方式是提供一个Redis配置文件,这个文件通常叫做 redis.conf。
redis.conf文件中包含了很多格式简单的指令如下:
2
2
keyword argument1 argument2 … argumentN
关键字 参数1 参数2 … 参数N
如下是一个配置指令的示例:
2
3
2
3
如果参数中含有空格,那么可以用双引号括起来,如下:
2
3
2
3
这些指令的配置,意义以及深入使用方法都能在每个Redis发布版本自带的的redis.conf文档中找到。
- 自描述文档 redis.conf for Redis 2.8
- 自描述文档 redis.conf for Redis 2.6.
- 自描述文档 redis.conf for Redis 2.4.
通过命令行传参
自Redis2.6起就可以直接通过命令行传递Redis配置参数。这种方法可以用于测试。 以下是一个例子:这个例子配置一个新运行并以6380为端口的 Redis实例,使配置它为127.0.0.1:6379Redis实例的slave。
2
3
2
3
通过命令行传递的配置参数的格式和在redis.conf中设置的配置参数的格式完全一样, 唯一不同的是需要在关键字之前加上 前缀–。
需要注意的是通过命令行传递参数的过程会在内存中生成一个临时的配置文件(也许会直接追加在 命令指定的配置文件后面),这些传递的参数也会转化为跟Redis配置文件一样的形式。
运行时配置更改
Redis允许在运行的过程中,在不重启服务器的情况下更改服务器配置,同时也支持 使用特殊的CONFIG SET和 CONFIG GET命令用编程方式查询并设置配置。
并非所有的配置指令都支持这种使用方式,但是大部分是支持的。更多相关的信息请查阅CONFIG SET和 CONFIG GET页面。
需要确保的是在通过CONFIG SET命令进行的设置的同时,也需在 redis.conf文件中进行了相应的更改。 未来Redis有计划提供一个CONFIG REWRITE命令在不更改现有配置文件的同时, 根据当下的服务器配置对redis.conf文件进行重写。
配置Redis成为一个缓存
如果你想把Redis当做一个缓存来用,所有的key都有过期时间,那么你可以考虑 使用以下设置(假设最大内存使用量为2M):
2
2
maxmemory 2mb
maxmemory-policy allkeys-lru
以上设置并不需要我们的应用使用EXPIRE(或相似的命令)命令去设置每个key的过期时间,因为 只要内存使用量到达2M,Redis就会使用类LRU算法自动删除某些key。
相比使用额外内存空间存储多个键的过期时间,使用缓存设置是一种更加有效利用内存的方式。而且相比每个键固定的 过期时间,使用LRU也是一种更加推荐的方式,因为这样能使应用的热数据(更频繁使用的键) 在内存中停留时间更久。
基本上这么配置下的Redis可以当成memcached使用。
当我们把Redis当成缓存来使用的时候,如果应用程序同时也需要把Redis当成存储系统来使用,那么强烈建议 使用两个Redis实例。一个是缓存,使用上述方法进行配置,另一个是存储,根据应用的持久化需求进行配置,并且 只存储那些不需要被缓存的数据。
请注意:用户需要详细阅读示例redis.conf文件来决定使用什么内存上限处理策略。
