释放双眼,带上耳机,听听看~!
一、首先我们使用Centos架设memcached服务器,我们使用Docker来架设Memcached服务
-
拉取镜像
2
2
-
启动容器
2
2
好了,使用docker架设memcached服务器就完成了。
二、建立一个Springboot项目。
-
增加pom依赖
2
3
4
5
6
7
8
9
10
11
12
13
2 <groupId>commons-pool</groupId>
3 <artifactId>commons-pool</artifactId>
4 <version>1.5.6</version>
5 </dependency>
6
7 <!-- memcached -->
8 <dependency>
9 <groupId>com.danga</groupId>
10 <artifactId>java_memcached-release</artifactId>
11 <version>2.6.6</version>
12 </dependency>
13
**注意:**这样做你会发现依赖库根本找不到。这是因为maven中心仓库根本就没有。
我们可以在网上搜索commons-pool-1.5.6.jar和java_memcached-release_2.6.6.jar,解压到指定文件夹,然后在该文件夹下执行cmd命令:
2
3
4
2
3mvn install:install-file -DgroupId=com.danga -DartifactId=java_memcached-release -Dversion=2.6.6 -Dpackaging=jar -Dfile=java_memcached-release_2.6.6.jar
4
这两个包就被安装到了你本地的maven仓库中,然后刷新一下项目pom依赖,就正常了。
-
修改port
-
创建两个文件
MemCachedConfig.java用来配置memcached
2
3
4
5
6
7
8
9
10
11
12
13
14
15
16
17
18
19
20
21
22
23
24
25
26
27
28
29
30
31
32
33
34
35
36
37
38
39
40
41
42
43
44
45
46
47
48
49
50
51
52
53
54
55
56
57
2
3import com.danga.MemCached.MemCachedClient;
4import com.danga.MemCached.SockIOPool;
5import org.springframework.context.annotation.Bean;
6import org.springframework.context.annotation.Configuration;
7
8/**
9 * create by: Chris Chan
10 * create on: 2019/11/28 17:04
11 * use for: MemCached配置
12 */
13@Configuration
14public class MemCachedConfig {
15 private static String[] MEM_SERVERS = {"192.168.0.108:11211"};//服务器
16 private static Integer[] MEM_SERVERS_WEIGHT = {1};//权重
17
18 @Bean
19 public SockIOPool sockIOPool() {
20 //建立通信的连接池
21 SockIOPool pool = SockIOPool.getInstance();
22 //设置连接池可用cache服务器列表,服务器构成形式:ip地址+端口号
23 pool.setServers(MEM_SERVERS);
24 //设置连接池可用cache服务器的权重,和server数组的位置一一对应
25 pool.setWeights(MEM_SERVERS_WEIGHT);
26 //设置初始连接数
27 pool.setInitConn(100);
28 //设置最小连接数
29 pool.setMinConn(20);
30 //设置最大连接数
31 pool.setMaxConn(100);
32 //设置可用连接的最长等待时间
33 pool.setMaxIdle(1000 * 30 * 30);
34 //设置连接池维护线程的睡眠时间,设置为0,维护线程不启动
35 pool.setMaintSleep(50);
36 //设置Nagle算法,设置为false,因为通讯数据量比较大要求响应及时
37 pool.setNagle(false);
38 //设置socket读取等待超时时间
39 pool.setSocketTO(3000);
40 //设置连接等待超时值
41 pool.setSocketConnectTO(0);
42 //失效转移机制
43 pool.setFailover(true);
44 //状态检测机制
45 pool.setAliveCheck(true);
46 //设置完参数后,启动pool
47 pool.initialize();
48 return pool;
49 }
50
51 @Bean
52 public MemCachedClient memCachedClient() {
53 return new MemCachedClient();
54 }
55}
56
57
TestApi.java用来编写测试接口
2
3
4
5
6
7
8
9
10
11
12
13
14
15
16
17
18
19
20
21
22
23
24
25
26
27
28
29
30
31
32
33
34
35
36
37
38
39
40
41
42
43
44
45
46
47
48
49
50
51
52
53
54
55
56
57
58
59
60
61
62
63
2
3import com.danga.MemCached.MemCachedClient;
4import org.springframework.beans.factory.annotation.Autowired;
5import org.springframework.web.bind.annotation.RequestMapping;
6import org.springframework.web.bind.annotation.RestController;
7
8/**
9 * create by: Chris Chan
10 * create on: 2019/11/28 17:04
11 * use for: 测试接口
12 */
13@RestController
14@RequestMapping("/test")
15public class TestApi {
16 @Autowired
17 MemCachedClient memCachedClient;
18
19 /**
20 * 综合测试
21 *
22 * @return
23 */
24 @RequestMapping("/test")
25 public String test() {
26 // 放入缓存
27 boolean flag = memCachedClient.set("username", "kalychen");
28 System.out.println(flag);
29 // 取出缓存
30 Object value = memCachedClient.get("username");
31 System.out.println(value);
32 return String.valueOf(value);
33 }
34
35 /**
36 * 写缓存
37 *
38 * @param k
39 * @param v
40 * @return
41 */
42 @RequestMapping("/put")
43 public Boolean put(String k, String v) {
44 // 放入缓存
45 boolean flag = memCachedClient.set(k, v);
46 return flag;
47 }
48
49 /**
50 * 读缓存
51 *
52 * @param k
53 * @return
54 */
55 @RequestMapping("/get")
56 public String get(String k) {
57 // 取出缓存
58 Object value = memCachedClient.get(k);
59 return String.valueOf(value);
60 }
61}
62
63
三、测试一下。
将服务运行起来。在浏览器输入调用。
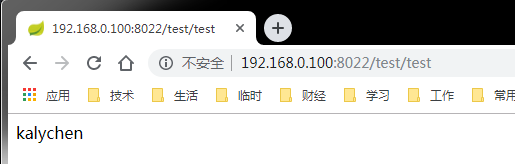
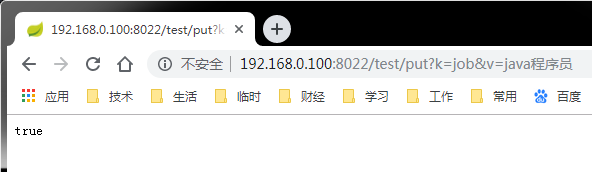
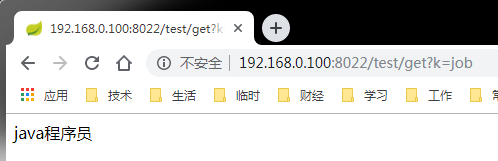
可以看到,得到的就是我们想要的结果。
参考资料:
https://www.cnblogs.com/GregZQ/p/8365276.html
