前言
本篇文章主要讲述SpringBoot整合Jsp,实现一个简单的用户增删改查示例工程。若需工程源代码,可以直接跳到底部,通过链接下载工程代码。
SpringBoot整合Jsp
开发准备
环境要求
JDK: 1.8
SQL: MySql
这里我们需要在mysql中建立一张用户表,用于存储用户的信息。
数据库脚本如下:
2
3
4
5
6
7
8
9
2 `id` bigint(32) NOT NULL AUTO_INCREMENT COMMENT '自增id',
3 `username` varchar(10) DEFAULT NULL COMMENT '用户名',
4 `sex` int(1) DEFAULT NULL COMMENT '性别,0:女, 1:男',
5 `password` varchar(50) DEFAULT NULL COMMENT '密码',
6 `age` int(3) DEFAULT NULL COMMENT '年龄',
7 PRIMARY KEY (`id`) USING BTREE
8) ENGINE=InnoDB AUTO_INCREMENT=8 DEFAULT CHARSET=utf8 ROW_FORMAT=COMPACT;
9
新建好表之后,我们再来创建工程。
我们的这个工程是通过maven创建一个普通的web工程。
创建好工程之后,我们需要下载相应的jar包,然后再来进行相关的开发。
这些jar包我们在pom.xml文件中添加springBoot和Jsp相关的jar即可。
相关的注释以及写在其中了,这里就不在过多讲述了。
Maven依赖如下:
2
3
4
5
6
7
8
9
10
11
12
13
14
15
16
17
18
19
20
21
22
23
24
25
26
27
28
29
30
31
32
33
34
35
36
37
38
39
40
41
42
43
44
45
46
47
48
49
50
51
52
53
54
55
56
57
58
59
60
61
62
63
64
65
66
67
2 <!-- Spring Boot Web 依赖 核心 -->
3 <dependency>
4 <groupId>org.springframework.boot</groupId>
5 <artifactId>spring-boot-starter-web</artifactId>
6 <version>2.0.1.RELEASE</version>
7 </dependency>
8 <!-- Spring Boot 热部署 class文件之后会自动重启 -->
9 <dependency>
10 <groupId>org.springframework.boot</groupId>
11 <artifactId>spring-boot-devtools</artifactId>
12 <version>2.0.1.RELEASE</version>
13 <optional>true</optional>
14 </dependency>
15 <!-- Spring Boot Test 依赖 -->
16 <dependency>
17 <groupId>org.springframework.boot</groupId>
18 <artifactId>spring-boot-starter-test</artifactId>
19 <version>2.0.1.RELEASE</version>
20 <scope>test</scope>
21 </dependency>
22 <!-- Spring Boot JPA -->
23 <dependency>
24 <groupId>org.springframework.boot</groupId>
25 <artifactId>spring-boot-starter-data-jpa</artifactId>
26 <version>2.0.1.RELEASE</version>
27 </dependency>
28 <!-- Spring Boot Mybatis 依赖 -->
29 <dependency>
30 <groupId>org.mybatis.spring.boot</groupId>
31 <artifactId>mybatis-spring-boot-starter</artifactId>
32 <version>${mybatis-spring-boot}</version>
33 </dependency>
34 <dependency>
35 <groupId>mysql</groupId>
36 <artifactId>mysql-connector-java</artifactId>
37 <version>5.1.25</version>
38 </dependency>
39 <!--fastjson 依赖-->
40 <dependency>
41 <groupId>com.alibaba</groupId>
42 <artifactId>fastjson</artifactId>
43 <version>1.2.14</version>
44 </dependency>
45
46 <!--JSP 依赖 -->
47 <!-- servlet依赖. -->
48 <dependency>
49 <groupId>javax.servlet</groupId>
50 <artifactId>jstl</artifactId>
51 <version>1.2</version>
52 </dependency>
53 <dependency>
54 <groupId>javax.servlet</groupId>
55 <artifactId>javax.servlet-api</artifactId>
56 <version>3.1.0</version>
57 <scope>provided</scope>
58 </dependency>
59 <!-- tomcat的支持.-->
60 <dependency>
61 <groupId>org.apache.tomcat.embed</groupId>
62 <artifactId>tomcat-embed-jasper</artifactId>
63 <version>8.5.15</version>
64 <scope>provided</scope>
65 </dependency>
66 </dependencies>
67
相关的Jar包下载完毕之后,我们再来确认项目的工程结构。
首先是后台相关包说明:
2
3
4
5
6
7
8
9
2com.dwqin.controller - Controller层
3com.dwqin.dao - 数据操作层 DAO
4com.dwqin.pojo - 实体类
5com.dwqin.service - 业务逻辑层
6com.dwqin.StartApplication - 应用启动类
7src/main/java/resources
8application.yml - 应用配置文件,应用启动会自动读取配置
9
前端的相关文件存放说明:
2
3
4
2pages - JSP文件的存放路径
3WEB-INF - web.xml web相关的核心配置
4
整体工程结构图:

工程结构确认之后,我们再来添加相应的配置。
只需在application.yml 添加相应的配置即可。
数据源的配置和之前的差不多,需要注意的是Jsp的相关配置。
由于springBoot默认的支持的模版是Thymeleaf,所以这里我们需要进行相应的更改。
配置如下:
2
3
4
5
6
7
8
9
10
11
12
13
14
15
16
17
18
19
20
21
22
23
24
2server:
3 port: 8082
4spring:
5 application:
6 name: springboot-jsp-thymeleaf
7 mvc:
8 view:
9 prefix: /pages/
10 suffix: .jsp
11 datasource:
12 url: jdbc:mysql://127.0.0.1:3306/dwqin?useSSL=false&characterEncoding=utf-8
13 username: root
14 password: root
15 driver-class-name: com.mysql.jdbc.Driver
16 jpa:
17 show-sql: true # 打印sql
18 generate-ddl: false # 自动建表
19 database: MySQL # 数据库类型
20 hibernate:
21 naming:
22 physical-strategy: org.hibernate.boot.model.naming.PhysicalNamingStrategyStandardImpl
23
24
代码编写
其实这里的代码和之前文章讲述的基本一致,唯一有点区别的是,这里我是用JPA实现对数据库进行操作的(也就是顺便说下JPA这个框架的使用)。
首先是实体类,这里因为用了JPA,所以和之前的有点不同,添加了一些注解。
Entity:表示这是个实体类。
Table:该实体类映射的数据表名。
Column:指定该字段的属性,nullable 表示是否非空,unique 表示是否是唯一。
那么实体类的代码如下:
2
3
4
5
6
7
8
9
10
11
12
13
14
15
16
17
18
19
20
21
22
23
24
25
26
27
28
29
30
31
32
33
34
35
36
37
38
39
40
41
42
43
44
45
46
47
48
2@Table(name = "tb_user")
3public class User implements Serializable {
4 @Id
5 @GeneratedValue(strategy = GenerationType.IDENTITY)
6 private Long id;
7 @Column(name = "username")
8 private String username;
9 @Column(name = "sex")
10 private Integer sex;
11 @Column(name = "password")
12 private String password;
13 @Column(name = "age")
14 private Integer age;
15
16 public Long getId() {
17 return id;
18 }
19 public void setId(Long id) {
20 this.id = id;
21 }
22 public String getUsername() {
23 return username;
24 }
25 public void setUsername(String username) {
26 this.username = username;
27 }
28 public Integer getSex() {
29 return sex;
30 }
31 public void setSex(Integer sex) {
32 this.sex = sex;
33 }
34 public String getPassword() {
35 return password;
36 }
37 public void setPassword(String password) {
38 this.password = password;
39 }
40 public Integer getAge() {
41 return age;
42 }
43 public void setAge(Integer age) {
44 this.age = age;
45 }
46}
47
48
由于用的是JPA,dao层这块只需继承JpaRepository该类即可,需要指定实体类和主键类型。
dao层代码如下:
2
3
4
5
2
3}
4
5
业务层这块和之前一样调用即可,虽然用的是JPA,但是方法也是很简单的,新增和修改就用save,删除就是delete,findOne就是通过ID查找,findAll就是查询所有等等。
services代码如下:
2
3
4
5
6
7
8
9
10
11
12
13
2 public boolean addUser(User user);
3
4 public boolean updateUser(User user);
5
6 public boolean deleteById(Long id);
7
8 public User findUserById(Long id);
9
10 public List<User> findAll();
11}
12
13
2
3
4
5
6
7
8
9
10
11
12
13
14
15
16
17
18
19
20
21
22
23
24
25
26
27
28
29
30
31
32
33
34
35
36
37
38
39
40
41
42
43
44
45
46
47
48
49
50
51
52
53
54
55
56
57
2public class UserServiceImpl implements UserService {
3
4 @Autowired
5 private UserDao userDao;
6
7 @Override
8 public boolean addUser(User user) {
9 boolean flag = false;
10 try {
11 userDao.save(user);
12 flag = true;
13 } catch (Exception e) {
14 System.out.println("新增失败!");
15 e.printStackTrace();
16 }
17 return flag;
18 }
19
20 @Override
21 public boolean updateUser(User user) {
22 boolean flag = false;
23 try {
24 userDao.save(user);
25 flag = true;
26 } catch (Exception e) {
27 System.out.println("修改失败!");
28 e.printStackTrace();
29 }
30 return flag;
31 }
32
33 @Override
34 public boolean deleteById(Long id) {
35 boolean flag = false;
36 try {
37 userDao.deleteById(id);
38 flag = true;
39 } catch (Exception e) {
40 System.out.println("删除失败!");
41 e.printStackTrace();
42 }
43 return flag;
44 }
45
46 @Override
47 public User findUserById(Long id) {
48 return userDao.findById(id).get();
49 }
50
51
52 @Override
53 public List<User> findAll() {
54 return userDao.findAll();
55 }
56}
57
到了控制层这块,这里提供还是提供接口给Jsp进行调用,不过这里类的注解就不能用之前的RestController这个注解,这个注解以json的格式返回数据,但是我们有时返回的时候需要跳转界面,所以应该使用Controller这个注解。如果想在某个方法中返回的数据格式是json的话,在该方法上加上ResponseBody这个注解即可。
控制层代码如下:
2
3
4
5
6
7
8
9
10
11
12
13
14
15
16
17
18
19
20
21
22
23
24
25
26
27
28
29
30
31
32
33
34
35
36
37
38
39
40
41
42
43
44
45
46
47
48
49
50
2public class UserController {
3
4 @Autowired
5 private UserService userService;
6
7 @RequestMapping(value = "/index")
8 public ModelAndView sign_demo() {
9 return new ModelAndView("/index");
10 }
11
12 @RequestMapping("/list")
13 public String list(Model model) {
14 List<User> userList = userService.findAll();
15 model.addAttribute("userList", userList);
16 return "user/list";
17 }
18
19 @RequestMapping("/toAdd")
20 public String toAdd() {
21 return "user/userAdd";
22 }
23
24 @RequestMapping(value = "/add")
25 public String add(User user) {
26 userService.addUser(user);
27 return "redirect:/list";
28 }
29
30 @RequestMapping("/toEdit")
31 public String toEdit(Model model, Long id) {
32 User user = userService.findUserById(id);
33 model.addAttribute("user", user);
34 return "user/userEdit";
35 }
36
37 @RequestMapping("/edit")
38 public String edit(User user) {
39 userService.updateUser(user);
40 return "redirect:/list";
41 }
42
43 @RequestMapping("/toDelete")
44 public String delete(Long id) {
45 userService.deleteById(id);
46 return "redirect:/list";
47 }
48}
49
50
启动类:
2
2
2
3
4
5
6
7
8
9
10
11
12
13
14
2public class StartApplication extends SpringBootServletInitializer {
3 public static void main(String[] args) {
4 SpringApplication springApplication = new SpringApplication(StartApplication.class);
5 springApplication.run(args);
6 }
7
8 @Override
9 protected SpringApplicationBuilder configure(SpringApplicationBuilder builder) {
10 return builder.sources(StartApplication.class);
11 }
12}
13
14
前端jsp代码如下:
index.jsp
2
3
4
5
6
7
8
9
10
11
12
13
14
2<%@ taglib prefix="c" uri="http://java.sun.com/jsp/jstl/core" %>
3<!DOCTYPE html PUBLIC "-//W3C//DTD HTML 4.01 Transitional//EN" "http://www.w3.org/TR/html4/loose.dtd">
4<html>
5<head>
6 <meta http-equiv="Content-Type" content="text/html; charset=utf-8">
7 <title>index</title>
8</head>
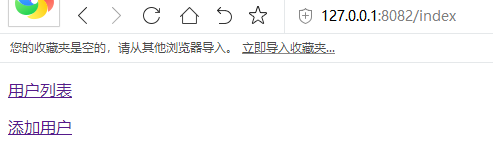
9<body>
10 <p><a href="<%=request.getContextPath()%>/list">用户列表</a></p>
11 <a href="<%=request.getContextPath()%>/toAdd">添加用户</a>
12</body>
13</html>
14
list.jsp
2
3
4
5
6
7
8
9
10
11
12
13
14
15
16
17
18
19
20
21
22
23
24
25
26
27
28
29
30
31
32
33
34
35
36
37
38
39
40
41
42
43
44
45
46
47
48
49
50
51
2<%@ taglib prefix="c" uri="http://java.sun.com/jsp/jstl/core" %>
3<!DOCTYPE html PUBLIC "-//W3C//DTD HTML 4.01 Transitional//EN" "http://www.w3.org/TR/html4/loose.dtd">
4<html>
5<head>
6 <meta http-equiv="Content-Type" content="text/html; charset=utf-8">
7 <title>list</title>
8 <style>
9 .tb {
10 border-collapse: collapse;
11 }
12 .tb tr th, .tb tr td {
13 border: 1px solid #666666;
14 text-align: center;
15 }
16 </style>
17</head>
18<body>
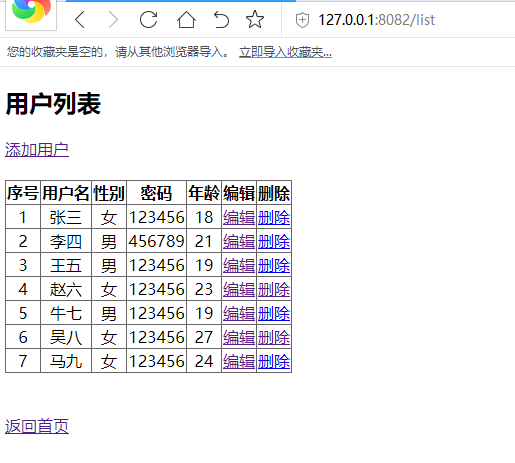
19<h2>用户列表</h2>
20<a href="<%=request.getContextPath()%>/toAdd">添加用户</a>
21<br/><br/>
22<table class="tb">
23 <tr>
24 <th>序号</th>
25 <th>用户名</th>
26 <th>性别</th>
27 <th>密码</th>
28 <th>年龄</th>
29 <th>编辑</th>
30 <th>删除</th>
31 </tr>
32 <c:forEach items="${userList}" var="userItem" varStatus="userStatus">
33 <tr>
34 <td>${userItem.id}</td>
35 <td>${userItem.username}</td>
36 <c:choose>
37 <c:when test="${userItem.sex eq '1'}"><td>男</td></c:when>
38 <c:otherwise><td>女</td></c:otherwise>
39 </c:choose>
40 <td>${userItem.password}</td>
41 <td>${userItem.age}</td>
42 <td><a href="<%=request.getContextPath()%>/toEdit?id=${userItem.id}">编辑</a></td>
43 <td><a href="<%=request.getContextPath()%>/toDelete?id=${userItem.id}">删除</a></td>
44 </tr>
45 </c:forEach>
46</table>
47<br/><br/>
48<div><a href="<%=request.getContextPath()%>/index">返回首页</a></div>
49</body>
50</html>
51
userAdd.jsp
2
3
4
5
6
7
8
9
10
11
12
13
14
15
16
17
18
19
20
21
22
23
24
25
26
27
28
29
30
31
32
33
34
35
36
37
2<%@ taglib prefix="c" uri="http://java.sun.com/jsp/jstl/core" %>
3<!DOCTYPE html PUBLIC "-//W3C//DTD HTML 4.01 Transitional//EN" "http://www.w3.org/TR/html4/loose.dtd">
4<html>
5<head>
6 <meta http-equiv="Content-Type" content="text/html; charset=utf-8">
7 <title>add</title>
8</head>
9<body>
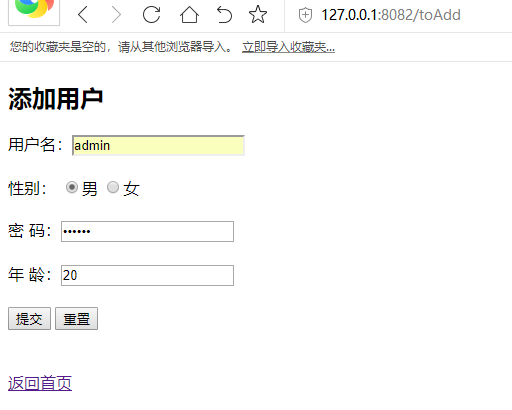
10<h2>添加用户</h2>
11<form action="<%=request.getContextPath()%>/add" method="post">
12 <label>
13 用户名:<input type="text" name="username">
14 </label>
15 <br/><br/>
16 <label>
17 性别:
18 <input type="radio" name="sex" value="1">男
19 <input type="radio" name="sex" value="0">女
20 </label>
21 <br/><br/>
22 <label>
23 密 码:<input type="password" name="password">
24 </label>
25 <br/><br/>
26 <label>
27 年 龄:<input type="text" name="age">
28 </label>
29 <br/><br/>
30 <input type="submit" value="提交">
31 <input type="reset" value="重置">
32</form>
33<br/><br/>
34<div><a href="<%=request.getContextPath()%>/index">返回首页</a></div>
35</body>
36</html>
37
userEdit.jsp
2
3
4
5
6
7
8
9
10
11
12
13
14
15
16
17
18
19
20
21
22
23
24
25
26
27
28
29
30
31
32
33
34
35
36
37
2<%@ taglib prefix="c" uri="http://java.sun.com/jsp/jstl/core" %>
3<!DOCTYPE html PUBLIC "-//W3C//DTD HTML 4.01 Transitional//EN" "http://www.w3.org/TR/html4/loose.dtd">
4<html>
5<head>
6 <meta http-equiv="Content-Type" content="text/html; charset=utf-8">
7 <title>edit</title>
8</head>
9<body>
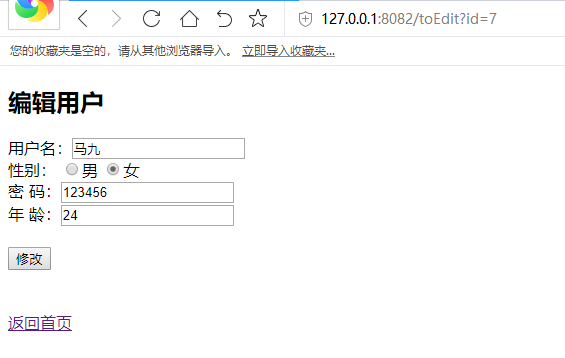
10<h2>编辑用户</h2>
11<form action="<%=request.getContextPath()%>/edit" method="post">
12 <input type="hidden" name="id" value="${user.id}">
13 <label>
14 用户名:<input type="text" name="username" value="${user.username}">
15 </label>
16 <br/>
17 <label>
18 性别:
19 <input type="radio" name="sex" ${user.sex eq '1' ? 'checked="checked"':""} value="1">男
20 <input type="radio" name="sex" ${user.sex eq '0' ? 'checked="checked"':""} value="0">女
21 </label>
22 <br/>
23 <label>
24 密 码:<input type="text" name="password" value="${user.password}">
25 </label>
26 <br/>
27 <label>
28 年 龄:<input type="text" name="age" value=${user.age}>
29 </label>
30 <br/><br/>
31 <input type="submit" value="修改">
32</form>
33<br/><br/>
34<div><a href="<%=request.getContextPath()%>/index">返回首页</a></div>
35</body>
36</html>
37
功能测试
我们直接点击StartApplication启动项目,在浏览器上输入地址查看效果。
1.主界面: http://localhost:8082/index
2.列表页:http://localhost:8082/list
3.添加页面:http://localhost:8082/toAdd
4. 编辑页面:http://127.0.0.1:8082/toEdit?id=7
源代码下载地址: https://download.csdn.net/download/qq_35161159/11966735
