SpringBoot整合RabbitMq
1.介绍
1.1 RabbitMQ
MQ全称为Message Queue,即消息队列, RabbitMQ是由erlang语言开发,基于AMQP(Advanced Message
Queue 高级消息队列协议)协议实现的消息队列,它是一种应用程序之间的通信方法,消息队列在分布式系统开
发中应用非常广泛。RabbitMQ官方地址:http://www.rabbitmq.com/
开发中消息队列通常有如下应用场景:
1、任务异步处理。
将不需要同步处理的并且耗时长的操作由消息队列通知消息接收方进行异步处理。提高了应用程序的响应时间。
2、应用程序解耦合
MQ相当于一个中介,生产方通过MQ与消费方交互,它将应用程序进行解耦合。
市场上还有哪些消息队列?
ActiveMQ,RabbitMQ,ZeroMQ,Kafka,MetaMQ,RocketMQ、Redis。
为什么使用RabbitMQ呢?
1、使得简单,功能强大。
2、基于AMQP协议。
3、社区活跃,文档完善。
4、高并发性能好,这主要得益于Erlang语言。
5、Spring Boot默认已集成RabbitMQ
1.2rabbitmq工作原理

组成部分说明如下:
Broker:消息队列服务进程,此进程包括两个部分:Exchange和Queue。
Exchange:消息队列交换机,按一定的规则将消息路由转发到某个队列,对消息进行过虑。
Queue:消息队列,存储消息的队列,消息到达队列并转发给指定的消费方。
Producer:消息生产者,即生产方客户端,生产方客户端将消息发送到MQ。
Consumer:消息消费者,即消费方客户端,接收MQ转发的消息。
消息发布接收流程:
—–发送消息—–
1、生产者和Broker建立TCP连接。
2、生产者和Broker建立通道。
3、生产者通过通道消息发送给Broker,由Exchange将消息进行转发。
4、Exchange将消息转发到指定的Queue(队列)
3.安装与使用
1)下载erlang
地址如下:
http://erlang.org/download/otp_win64_20.3.exe
以管理员方式运行此文件,安装。
2)安装RabbitMQ
https://github.com/rabbitmq/rabbitmq-server/releases/tag/v3.7.4
安装完成后可在服务中启动

当然也可以进入安装目录以命令行的方式启动
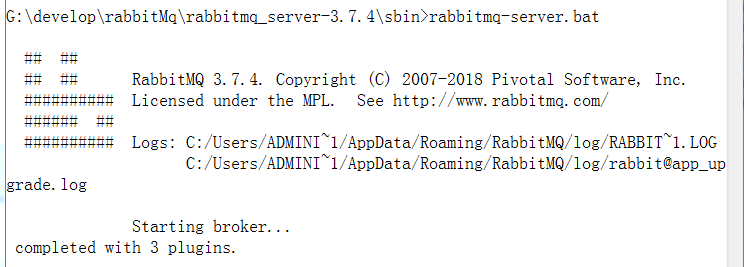
打开浏览器访问rabbitmq若出现这个界面说明可以正常使用了账号密码默认为guest

2.SpringBoot整合的RabbitMq(Direct模式)
1.首先创建maven工程并引入依赖坐标
2
3
4
5
6
7
8
9
10
11
12
13
14
15
16
17
18
19
20
21
22
23
24
25
26
27
28
29
30
2<project xmlns="http://maven.apache.org/POM/4.0.0"
3 xmlns:xsi="http://www.w3.org/2001/XMLSchema-instance"
4 xsi:schemaLocation="http://maven.apache.org/POM/4.0.0 http://maven.apache.org/xsd/maven-4.0.0.xsd">
5 <modelVersion>4.0.0</modelVersion>
6
7 <groupId>com.paic</groupId>
8 <artifactId>rabbitmq-producer</artifactId>
9 <version>1.0-SNAPSHOT</version>
10
11 <parent>
12 <groupId>org.springframework.boot</groupId>
13 <artifactId>spring-boot-starter-parent</artifactId>
14 <version>2.0.1.RELEASE</version>
15 </parent>
16
17 <dependencies>
18 <dependency>
19 <groupId>org.springframework.boot</groupId>
20 <artifactId>spring-boot-starter-amqp</artifactId>
21 <version>2.0.1.RELEASE</version>
22 </dependency>
23 <dependency>
24 <groupId>org.springframework.boot</groupId>
25 <artifactId>spring-boot-starter-web</artifactId>
26 </dependency>
27 </dependencies>
28</project>
29
30
2.创建配置文件
2
3
4
5
6
7
2spring.rabbitmq.host=127.0.0.1
3spring.rabbitmq.port=5672
4spring.rabbitmq.username=guest
5spring.rabbitmq.password=guest
6
7
3.创建一个启动类
2
3
4
5
6
7
8
9
10
11
12
13
14
15
16
17
18
19
20
21
2
3import org.springframework.boot.SpringApplication;
4import org.springframework.boot.autoconfigure.SpringBootApplication;
5
6/**
7 * @ProjectName: rabbitmq
8 * @Package: com.paic
9 * @ClassName: RabbitMqApplication
10 * @Author: Administrator
11 * @Description: ${description}
12 * @Version: 1.0
13 */
14@SpringBootApplication
15public class RabbitMqApplication {
16 public static void main(String[] args) {
17 SpringApplication.run(RabbitMqApplication.class);
18 }
19}
20
21
4.创建一个生产者
2
3
4
5
6
7
8
9
10
11
12
13
14
15
16
17
18
19
20
21
22
23
24
25
26
27
2
3import org.springframework.amqp.core.AmqpTemplate;
4import org.springframework.beans.factory.annotation.Autowired;
5import org.springframework.stereotype.Component;
6import java.util.Date;
7
8/**
9 * @ProjectName: rabbitmq
10 * @Package: com.paic.producer
11 * @ClassName: Producer
12 * @Author: Administrator
13 * @Description: ${description}
14 * @Version: 1.0
15 */
16@Component
17public class Producer {
18 @Autowired
19 private AmqpTemplate rabbitTemplate;
20
21 public void send(){
22 String sendMsg = "hello world"+ new Date();
23 this.rabbitTemplate.convertAndSend("one2one", sendMsg);
24 }
25}
26
27
5.创建一个消费者
2
3
4
5
6
7
8
9
10
11
12
13
14
15
16
17
18
19
20
21
22
23
24
2
3import org.springframework.amqp.rabbit.annotation.RabbitHandler;
4import org.springframework.amqp.rabbit.annotation.RabbitListener;
5import org.springframework.stereotype.Component;
6
7/**
8 * @ProjectName: rabbitmq
9 * @Package: com.paic.consumer
10 * @ClassName: Consumer
11 * @Author: Administrator
12 * @Description: ${description}
13 * @Version: 1.0
14 */
15@Component
16@RabbitListener(queues = "one2one")
17public class Consumer {
18 @RabbitHandler
19 public void process(String hello) {
20 System.out.println("one2one 消息消费者消费消息 : " + hello);
21 }
22}
23
24
6.创建配置类配置一个队列
2
3
4
5
6
7
8
9
10
11
12
13
14
15
16
17
18
19
20
21
22
23
24
25
2
3import org.springframework.amqp.core.Queue;
4import org.springframework.context.annotation.Bean;
5import org.springframework.stereotype.Component;
6
7/**
8 * @ProjectName: rabbitmq
9 * @Package: com.paic.config
10 * @ClassName: Config
11 * @Author: Administrator
12 * @Description: ${description}
13 * @Version: 1.0
14 */
15@Component
16public class Config {
17 final static String ONE2ONE = "one2one";
18
19 @Bean
20 public Queue queueOne2One() {
21 return new Queue(ONE2ONE);
22 }
23}
24
25
7.创建一个Controller进行调用
2
3
4
5
6
7
8
9
10
11
12
13
14
15
16
17
18
19
20
21
22
23
24
25
26
27
28
29
2
3import com.paic.producer.Producer;
4import org.springframework.beans.factory.annotation.Autowired;
5import org.springframework.web.bind.annotation.RequestMapping;
6import org.springframework.web.bind.annotation.RestController;
7
8/**
9 * @ProjectName: rabbitmq
10 * @Package: com.paic.controller
11 * @ClassName: One2OneController
12 * @Author: Administrator
13 * @Description: ${description}
14 * @Version: 1.0
15 */
16@RestController
17public class One2OneController {
18 @Autowired
19 private Producer oneProducer;
20
21 @RequestMapping("/one2one")
22 public String one2OneSend(){
23 oneProducer.send();
24 return "ok";
25 }
26}
27
28
29
8.测试
运行启动类然后在浏览器中输入请求路径
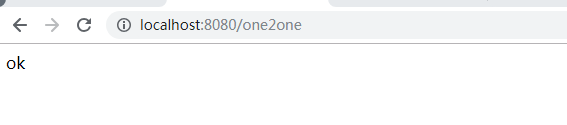
控制台输出如下

说明这个最简单的一对一的消息生产获取已经实现了
一对多模式与多对多模式与一对一模式区别就在于创建多个生产者、消费者
我们多对多的运行结果,这里创建2个生产者和2个消费者,生产20条消息,发现两个消费者各消费了10条消息

3.SpringBoot整合的RabbitMq(Topic模式)
1.编写配置类
2
3
4
5
6
7
8
9
10
11
12
13
14
15
16
17
18
19
20
21
22
23
24
25
26
27
28
29
30
31
32
33
34
35
36
37
38
39
40
41
42
43
44
45
46
47
48
49
50
51
52
53
54
55
56
57
58
59
60
61
62
63
2
3import org.springframework.amqp.core.Binding;
4import org.springframework.amqp.core.BindingBuilder;
5import org.springframework.amqp.core.Queue;
6import org.springframework.amqp.core.TopicExchange;
7import org.springframework.beans.factory.annotation.Qualifier;
8import org.springframework.context.annotation.Bean;
9import org.springframework.context.annotation.Configuration;
10
11/**
12 * @ProjectName: rabbitmq
13 * @Package: com.paic.config
14 * @ClassName: TopicConfig
15 * @Author: Administrator
16 * @Description: ${description}
17 * @Version: 1.0
18 */
19@Configuration
20public class TopicConfig {
21
22 final static String MESSAGE = "topic.message";
23 final static String MESSAGES = "topic.messages";
24
25 @Bean
26 public Queue queueMessage() {
27 return new Queue(MESSAGE);
28 }
29
30 @Bean
31 public Queue queueMessages() {
32 return new Queue(MESSAGES);
33 }
34
35 @Bean
36 TopicExchange exchange() {
37 return new TopicExchange("exchange");
38 }
39
40 /**
41 * 将队列topic.message与exchange绑定,binding_key为topic.message,就是完全匹配
42 * @param queueMessage
43 * @param exchange
44 * @return
45 */
46 @Bean
47 Binding bindingExchangeMessage(Queue queueMessage, TopicExchange exchange) {
48 return BindingBuilder.bind(queueMessage).to(exchange).with("topic.message");
49 }
50
51 /**
52 * 将队列topic.messages与exchange绑定,binding_key为topic.#,模糊匹配
53 * @param queueMessages
54 * @param exchange
55 * @return
56 */
57 @Bean
58 Binding bindingExchangeMessages(Queue queueMessages, TopicExchange exchange) {
59 return BindingBuilder.bind(queueMessages).to(exchange).with("topic.#");
60 }
61}
62
63
这里配置了一个完全匹配和一个模糊匹配
2.配置消息生产者
2
3
4
5
6
7
8
9
10
11
12
13
14
15
16
17
18
19
20
21
22
23
24
25
26
2
3import org.springframework.amqp.rabbit.core.RabbitTemplate;
4import org.springframework.beans.factory.annotation.Autowired;
5import org.springframework.stereotype.Component;
6
7/**
8 * @ProjectName: rabbitmq
9 * @Package: com.paic.producer
10 * @ClassName: TopicExchangeProducer
11 * @Author: Administrator
12 * @Description: ${description}
13 * @Version: 1.0
14 */
15@Component
16public class TopicExchangeProducer {
17 @Autowired
18 private RabbitTemplate rabbitTemplate;
19
20 public void send() {
21 rabbitTemplate.convertAndSend("exchange", "topic.message", "topic.message");
22 rabbitTemplate.convertAndSend("exchange", "topic.messages", "topic.messages");
23 }
24}
25
26
3.配置两个消息消费者
2
3
4
5
6
7
8
9
10
11
12
13
14
15
16
17
18
19
20
21
22
23
24
25
26
27
28
29
30
31
32
33
34
35
2
3import org.springframework.amqp.rabbit.annotation.RabbitHandler;
4import org.springframework.amqp.rabbit.annotation.RabbitListener;
5import org.springframework.stereotype.Component;
6
7/**
8 * @ProjectName: rabbitmq
9 * @Package: com.paic.consumer
10 * @ClassName: MessageCustomer
11 * @Author: Administrator
12 * @Description: ${description}
13 * @Version: 1.0
14 */
15@Component
16@RabbitListener(queues = "topic.message")
17public class MessageCustomer {
18
19 @RabbitHandler
20 public void process(String msg){
21 System.out.println("topicexchange message 消费者 : " +msg);
22 }
23}
24
25@Component
26@RabbitListener(queues = "topic.messages")
27public class MessagesCustomer {
28
29 @RabbitHandler
30 public void process(String msg){
31 System.out.println("topicexchange messages 消费者 : " +msg);
32 }
33}
34
35
4.创建controller
2
3
4
5
6
7
8
9
10
11
12
13
14
15
16
17
18
19
20
21
22
23
24
25
26
27
28
29
30
2
3import com.paic.producer.TopicExchangeProducer;
4import org.springframework.beans.factory.annotation.Autowired;
5import org.springframework.web.bind.annotation.RequestMapping;
6import org.springframework.web.bind.annotation.RestController;
7
8/**
9 * @ProjectName: rabbitmqproducer
10 * @Package: com.paic.controller
11 * @ClassName: TopicExchangeProducer
12 * @Author: Administrator
13 * @Description: ${description}
14 * @Date: 2019/6/23 17:53
15 * @Version: 1.0
16 */
17@RestController
18public class TopicExchangeController {
19
20 @Autowired
21 private TopicExchangeProducer topicExchangeProducer;
22
23 @RequestMapping("/topicexchange")
24 public String topicExchange(){
25 topicExchangeProducer.send();
26 return "ok";
27 }
28}
29
30
5.按上面方法进行测试

结果发现队列topic.messages为模糊匹配被消费了两次
4.SpringBoot整合的RabbitMq(Fanout Exchange模式)
1.老套路先来个配置类
2
3
4
5
6
7
8
9
10
11
12
13
14
15
16
17
18
19
20
21
22
23
24
25
26
27
28
29
30
31
32
33
34
35
36
37
38
39
40
41
42
43
44
45
46
47
48
49
50
51
52
53
54
55
56
57
2
3import org.springframework.amqp.core.Binding;
4import org.springframework.amqp.core.BindingBuilder;
5import org.springframework.amqp.core.FanoutExchange;
6import org.springframework.amqp.core.Queue;
7import org.springframework.context.annotation.Bean;
8import org.springframework.context.annotation.Configuration;
9
10/**
11 * @ProjectName: rabbitmq
12 * @Package: com.paic.config
13 * @ClassName: FanoutConfig
14 * @Author: Administrator
15 * @Description: ${description}
16 * @Version: 1.0
17 */
18@Configuration
19public class FanoutConfig {
20 @Bean
21 public Queue AMessage() {
22 return new Queue("fanout.A");
23 }
24
25 @Bean
26 public Queue BMessage() {
27 return new Queue("fanout.B");
28 }
29
30 @Bean
31 public Queue CMessage() {
32 return new Queue("fanout.C");
33 }
34
35 @Bean
36 FanoutExchange fanoutExchange() {
37 return new FanoutExchange("fanoutExchange");
38 }
39
40 @Bean
41 Binding bindingExchangeA(Queue AMessage, FanoutExchange fanoutExchange) {
42 return BindingBuilder.bind(AMessage).to(fanoutExchange);
43 }
44
45 @Bean
46 Binding bindingExchangeB(Queue BMessage, FanoutExchange fanoutExchange) {
47 return BindingBuilder.bind(BMessage).to(fanoutExchange);
48 }
49
50 @Bean
51 Binding bindingExchangeC(Queue CMessage, FanoutExchange fanoutExchange) {
52 return BindingBuilder.bind(CMessage).to(fanoutExchange);
53 }
54
55}
56
57
2.接下来是生产者
2
3
4
5
6
7
8
9
10
11
12
13
14
15
16
17
18
19
20
21
22
23
24
25
26
27
28
29
2
3import org.springframework.amqp.rabbit.core.RabbitTemplate;
4import org.springframework.beans.factory.annotation.Autowired;
5import org.springframework.stereotype.Component;
6
7/**
8 * @ProjectName: rabbitmq
9 * @Package: com.paic.producer
10 * @ClassName: FanoutProducer
11 * @Author: Administrator
12 * @Description: ${description}
13 * @Version: 1.0
14 */
15@Component
16public class FanoutProducer {
17
18 @Autowired
19 private RabbitTemplate rabbitTemplate;
20
21 public void send(){
22 //论证广播模式和routingkey参数无关
23 rabbitTemplate.convertAndSend("fanoutExchange","abcd.ee","--------------");
24 rabbitTemplate.convertAndSend("fanoutExchange","abcd.aa","==============");
25 rabbitTemplate.convertAndSend("fanoutExchange","***************");
26 }
27}
28
29
3.再创建3个消费者
2
3
4
5
6
7
8
9
10
11
12
13
14
15
16
17
18
19
20
21
22
23
24
25
26
27
28
29
30
31
32
33
34
35
36
37
38
39
40
41
42
43
44
45
46
47
48
49
2
3/**
4 * @ProjectName: rabbitmq
5 * @Package: com.paic.consumer
6 * @ClassName: FanoutCustomerA
7 * @Author: Administrator
8 * @Description: ${description}
9 * @Version: 1.0
10 */
11
12import org.springframework.amqp.rabbit.annotation.RabbitHandler;
13import org.springframework.amqp.rabbit.annotation.RabbitListener;
14import org.springframework.stereotype.Component;
15
16/**
17 * Fanout Exchange 消费者
18 */
19@Component
20@RabbitListener(queues = "fanout.A")
21public class FanoutCustomerA {
22
23 @RabbitHandler
24 public void process(String msg){
25 System.out.println("FanoutReceiverA : " + msg);
26 }
27}
28
29@Component
30@RabbitListener(queues = "fanout.B")
31public class FanoutCustomerB {
32
33 @RabbitHandler
34 public void process(String msg){
35 System.out.println("FanoutReceiverB : " + msg);
36 }
37}
38
39@Component
40@RabbitListener(queues = "fanout.C")
41public class FanoutCustomerC {
42
43 @RabbitHandler
44 public void process(String msg){
45 System.out.println("FanoutReceiverC : " + msg);
46 }
47}
48
49
4.最后是controller
2
3
4
5
6
7
8
9
10
11
12
13
14
15
16
17
18
19
20
21
22
23
24
25
26
27
28
29
2
3import com.paic.producer.FanoutProducer;
4import org.springframework.beans.factory.annotation.Autowired;
5import org.springframework.web.bind.annotation.RequestMapping;
6import org.springframework.web.bind.annotation.RestController;
7
8/**
9 * @ProjectName: rabbitmq
10 * @Package: com.paic.controller
11 * @ClassName: FanoutExchangeController
12 * @Author: Administrator
13 * @Description: ${description}
14 * @Version: 1.0
15 */
16@RestController
17public class FanoutExchangeController {
18
19 @Autowired
20 private FanoutProducer fanoutProducer;
21
22 @RequestMapping("/fanoutsend")
23 public String fanoutSend(){
24 fanoutProducer.send();
25 return "ok";
26 }
27}
28
29
5.测试结果
5.RabbitMq的回调函数使用
1.配置类
2
3
4
5
6
7
8
9
10
11
12
13
14
15
16
17
18
19
20
21
22
23
24
25
26
27
28
29
30
31
32
33
34
35
36
37
38
39
40
41
42
43
2
3import org.springframework.amqp.core.Queue;
4import org.springframework.amqp.rabbit.connection.ConnectionFactory;
5import org.springframework.amqp.rabbit.core.RabbitTemplate;
6import org.springframework.beans.factory.annotation.Autowired;
7import org.springframework.beans.factory.config.ConfigurableBeanFactory;
8import org.springframework.context.annotation.Bean;
9import org.springframework.context.annotation.Configuration;
10import org.springframework.context.annotation.Scope;
11
12/**
13 * @ProjectName: rabbitmq
14 * @Package: com.paic.config
15 * @ClassName: CallBackConfig
16 * @Author: Administrator
17 * @Description: ${description}
18 * @Version: 1.0
19 */
20@Configuration
21public class CallBackConfig {
22 final static String CALLBACK = "callback";
23
24 @Bean
25 public Queue callBackQueue() {
26 return new Queue(CALLBACK);
27 }
28
29 @Autowired
30 private ConnectionFactory connectionFactory;
31
32 @Bean
33 /** 因为要设置回调类,所以应是prototype类型,如果是singleton类型,则回调类为最后一次设置 */
34 @Scope(ConfigurableBeanFactory.SCOPE_PROTOTYPE)
35 public RabbitTemplate rabbitTemplatenew() {
36 RabbitTemplate template = new RabbitTemplate(connectionFactory);
37 return template;
38 }
39
40}
41
42
43
2.生产者
2
3
4
5
6
7
8
9
10
11
12
13
14
15
16
17
18
19
20
21
22
23
24
25
26
27
28
29
30
31
32
33
34
35
36
37
38
39
40
41
42
43
44
45
46
47
48
49
50
51
52
53
54
55
56
57
2
3import org.springframework.amqp.core.Message;
4import org.springframework.amqp.rabbit.core.RabbitTemplate;
5import org.springframework.amqp.rabbit.support.CorrelationData;
6import org.springframework.beans.factory.annotation.Autowired;
7import org.springframework.stereotype.Component;
8
9/**
10 * @ProjectName: rabbitmq
11 * @Package: com.paic.producer
12 * @ClassName: CallBackProducer
13 * @Author: Administrator
14 * @Description: ${description}
15 * @Version: 1.0
16 */
17@Component
18public class CallBackProducer implements RabbitTemplate.ConfirmCallback, RabbitTemplate.ReturnCallback {
19
20 @Autowired
21 private RabbitTemplate rabbitTemplate;
22
23 public void send() {
24 rabbitTemplate.setReturnCallback(this);
25 rabbitTemplate.setConfirmCallback(this);
26 rabbitTemplate.convertAndSend("callback", "回调函数:生产者发出的消息");
27 }
28
29 /**
30 * 发送后的回调函数
31 *
32 * @param correlationData
33 * @param b
34 * @param s
35 */
36 @Override
37 public void confirm(CorrelationData correlationData, boolean b, String s) {
38 System.out.println("回调函数:" + "b=" + b);
39 }
40
41 /**
42 * 消息发送失败的回调函数(未测试)
43 *
44 * @param message
45 * @param replyCode
46 * @param replyText
47 * @param exchange
48 * @param routingKey
49 */
50 @Override
51 public void returnedMessage(Message message, int replyCode, String replyText, String exchange, String routingKey) {
52 System.out.println("发送消息失败");
53 }
54}
55
56
57
3.消费者
2
3
4
5
6
7
8
9
10
11
12
13
14
15
16
17
18
19
20
21
22
23
24
25
26
2
3import org.springframework.amqp.rabbit.annotation.RabbitHandler;
4import org.springframework.amqp.rabbit.annotation.RabbitListener;
5import org.springframework.stereotype.Component;
6
7/**
8 * @ProjectName: rabbitmq
9 * @Package: com.paic.consumer
10 * @ClassName: CallBackCustomer
11 * @Author: Administrator
12 * @Description: ${description}
13 * @Version: 1.0
14 */
15@Component
16public class CallBackCustomer {
17 @RabbitListener(queues = "callback")
18 @RabbitHandler
19 public void process(String msg){
20 System.out.println("回调函数-消费者:"+msg);
21 }
22 }
23
24
25
26
4.controller
2
3
4
5
6
7
8
9
10
11
12
13
14
15
16
17
18
19
20
21
22
23
24
25
26
27
28
2
3import com.paic.producer.CallBackProducer;
4import org.springframework.beans.factory.annotation.Autowired;
5import org.springframework.web.bind.annotation.RequestMapping;
6import org.springframework.web.bind.annotation.RestController;
7
8/**
9 * @ProjectName: rabbitmq
10 * @Package: com.paic.controller
11 * @ClassName: CallBackController
12 * @Author: Administrator
13 * @Description: ${description}
14 * @Version: 1.0
15 */
16@RestController
17public class CallBackController {
18 @Autowired
19 private CallBackProducer callBackProducer;
20
21 @RequestMapping("/callback")
22 public void send(){
23 callBackProducer.send();
24 }
25}
26
27
28
