最近公司要做一台nginx缓存服务器供测试用,为了使用高版本的nginx和公司业务要求,这里使用编译安装的方法进行nginx的安装。缓存服务器的配置会在下一篇文章中介绍。
下载安装包,这里下载的是1.16.1版本,更多版本去官网查看http://nginx.org/en/download.html,并解压:
2
3
4
2[root@node4 ~]# ls
3anaconda-ks.cfg nginx-1.16.1.tar.gz
4
安装依赖包,这里用的是阿里的源,源地址为 https://mirrors.aliyun.com/epel/7Server/x86_64/
:
2
2
编译安装:
2
3
4
5
2[root@node4 nginx]# ls
3anaconda-ks.cfg nginx-1.16.1
4[root@node4 nginx]# cd nginx-1.16.1/ [root@node4 nginx-1.16.1]# ./configure --prefix=/usr/share/nginx --sbin-path=/usr/sbin/nginx --conf-path=/etc/nginx/nginx.conf --error-log-path=/var/log/nginx/error.log --http-log-path=/var/log/nginx/access.log --pid-path=/var/run/nginx.pid --lock-path=/var/run/nginx.lock --http-client-body-temp-path=/var/cache/nginx/client_temp --http-proxy-temp-path=/var/cache/nginx/proxy_temp --http-fastcgi-temp-path=/var/cache/nginx/fastcgi_temp --http-uwsgi-temp-path=/var/cache/nginx/uwsgi_temp --http-scgi-temp-path=/var/cache/nginx/scgi_temp --user=nginx --group=nginx --with-http_ssl_module --with-http_realip_module --with-http_addition_module --with-http_sub_module --with-http_dav_module --with-http_flv_module --with-http_mp4_module --with-http_gunzip_module --with-http_gzip_static_module --with-http_random_index_module --with-http_secure_link_module --with-http_stub_status_module --with-http_auth_request_module --with-mail --with-mail_ssl_module --with-file-aio --with-ipv6 --with-cc-opt='-O2 -g -pipe -Wp,-D_FORTIFY_SOURCE=2 -fexceptions -fstack-protector --param=ssp-buffer-size=4 -m64 -mtune=generic' --with-http_perl_module --with-http_v2_module --with-http_xslt_module --with-http_slice_module --add-module=/usr/local/ngx_cache_purge-2.3 --with-threads
5
若编译时无法添加ngx_cache_purge模块,可以先将该模块下载下来,然后解压到相应的路径:
2
3
4
5
2[root@node4 ~]# ls
3anaconda-ks.cfg nginx-1.16.1.tar.gz ngx_cache_purge-2.3.tar.gz
4[root@node4 ~]# tar zxf ngx_cache_purge-2.3.tar.gz -C /usr/local
5
添加完ngx_cache_purge模块后进行安装nginx:
2
2
添加nginx用户:
2
2
创建缓存目录:
2
2
启动nginx:
2
3
4
2[root@node4 sbin]# ./nginx
3[root@node4 sbin]#
4
nginx检查:
2
3
4
2nginx: the configuration file /etc/nginx/nginx.conf syntax is ok
3nginx: configuration file /etc/nginx/nginx.conf test is successful
4
查看nginx版本:
2
3
2nginx version: nginx/1.16.1
3
将nginx加入到/etc/init.d/环境,这里我使用脚本实现配置,脚本文件为nginx,在/etc/init.d目录下,赋予执行权限:
2
3
4
5
6
7
8
9
10
11
12
13
14
15
16
17
18
19
20
21
22
23
24
25
26
27
28
29
30
31
32
33
34
35
36
37
38
39
40
41
42
43
44
45
46
47
48
49
50
51
52
53
54
55
56
57
58
59
60
61
62
63
64
65
66
67
68
69
70
71
72
73
74
75
76
77
78
79
80
81
82
83
84
85
86
87
88
89
90
91
92
93
94
95
96
97
98
99
100
101
102
103
104
105
106
107
108
109
110
111
112
113
114
115
116
117
118
119
120
121
122
123
124
125
126
127
128
129
130
131
132
133
134
135
136
137
138
139
140
141
142
143
144
145
146
147
148
149
150
151
152
153
154
155
156
157
2[root@node4 init.d]# vim nginx
3#!/bin/sh
4#
5# nginx Startup script for nginx
6#
7# chkconfig: - 85 15
8# processname: nginx
9# config: /etc/nginx/nginx.conf
10# config: /etc/sysconfig/nginx
11# pidfile: /var/run/nginx.pid
12# description: nginx is an HTTP and reverse proxy server
13#
14### BEGIN INIT INFO
15# Provides: nginx
16# Required-Start: $local_fs $remote_fs $network
17# Required-Stop: $local_fs $remote_fs $network
18# Default-Start: 2 3 4 5
19# Default-Stop: 0 1 6
20# Short-Description: start and stop nginx
21### END INIT INFO
22
23# Source function library.
24. /etc/rc.d/init.d/functions
25
26if [ -L $0 ]; then
27 initscript=`/bin/readlink -f $0`
28else
29 initscript=$0
30fi
31
32sysconfig=`/bin/basename $initscript`
33
34if [ -f /etc/sysconfig/$sysconfig ]; then
35 . /etc/sysconfig/$sysconfig
36fi
37
38nginx=${NGINX-/usr/sbin/nginx}
39prog=`/bin/basename $nginx`
40conffile=${CONFFILE-/etc/nginx/nginx.conf}
41lockfile=${LOCKFILE-/var/lock/subsys/nginx}
42pidfile=${PIDFILE-/var/run/nginx.pid}
43SLEEPMSEC=${SLEEPMSEC-200000}
44UPGRADEWAITLOOPS=${UPGRADEWAITLOOPS-5}
45RETVAL=0
46
47start() {
48 echo -n $"Starting $prog: "
49
50 daemon --pidfile=${pidfile} ${nginx} -c ${conffile}
51 RETVAL=$?
52 echo
53 [ $RETVAL = 0 ] && touch ${lockfile}
54 return $RETVAL
55}
56
57stop() {
58 echo -n $"Stopping $prog: "
59 killproc -p ${pidfile} ${prog}
60 RETVAL=$?
61 echo
62 [ $RETVAL = 0 ] && rm -f ${lockfile} ${pidfile}
63}
64
65reload() {
66 echo -n $"Reloading $prog: "
67 killproc -p ${pidfile} ${prog} -HUP
68 RETVAL=$?
69 echo
70}
71
72upgrade() {
73 oldbinpidfile=${pidfile}.oldbin
74
75 configtest -q || return
76 echo -n $"Starting new master $prog: "
77 killproc -p ${pidfile} ${prog} -USR2
78 echo
79
80 for i in `/usr/bin/seq $UPGRADEWAITLOOPS`; do
81 /bin/usleep $SLEEPMSEC
82 if [ -f ${oldbinpidfile} -a -f ${pidfile} ]; then
83 echo -n $"Graceful shutdown of old $prog: "
84 killproc -p ${oldbinpidfile} ${prog} -QUIT
85 RETVAL=$?
86 echo
87 return
88 fi
89 done
90
91 echo $"Upgrade failed!"
92 RETVAL=1
93}
94
95configtest() {
96 if [ "$#" -ne 0 ] ; then
97 case "$1" in
98 -q)
99 FLAG=$1
100 ;;
101 *)
102 ;;
103 esac
104 shift
105 fi
106 ${nginx} -t -c ${conffile} $FLAG
107 RETVAL=$?
108 return $RETVAL
109}
110
111rh_status() {
112 status -p ${pidfile} ${nginx}
113}
114
115# See how we were called.
116case "$1" in
117 start)
118 rh_status >/dev/null 2>&1 && exit 0
119 start
120 ;;
121 stop)
122 stop
123 ;;
124 status)
125 rh_status
126 RETVAL=$?
127 ;;
128 restart)
129 configtest -q || exit $RETVAL
130 stop
131 start
132 ;;
133 upgrade)
134 rh_status >/dev/null 2>&1 || exit 0
135 upgrade
136 ;;
137 condrestart|try-restart)
138 if rh_status >/dev/null 2>&1; then
139 stop
140 start
141 fi
142 ;;
143 force-reload|reload)
144 reload
145 ;;
146 configtest)
147 configtest
148 ;;
149 *)
150 echo $"Usage: $prog {start|stop|restart|condrestart|try-restart|force-reload|upgrade|reload|status|help|configtest}"
151 RETVAL=2
152esac
153
154exit $RETVAL
155#保存退出
156[root@node4 init.d]# chmod +x nginx
157
此时可以使用systemctl(centos7)或者service(centos6)来操作nginx了。
若无法启动nginx,,可以尝试先将所有启动的nginx进程删掉,然后再重新启动。强制kill掉nginx可以使用命令pkill -9 nginx。
2
3
4
5
6
2[root@node4 ~]# ps -ef | grep nginx
3root 23389 1 0 16:10 ? 00:00:00 nginx: master process /usr/sbin/nginx -c /etc/nginx/nginx.conf
4nginx 23391 23389 0 16:10 ? 00:00:00 nginx: worker process
5root 23393 2305 0 16:10 pts/0 00:00:00 grep --color=auto nginx
6
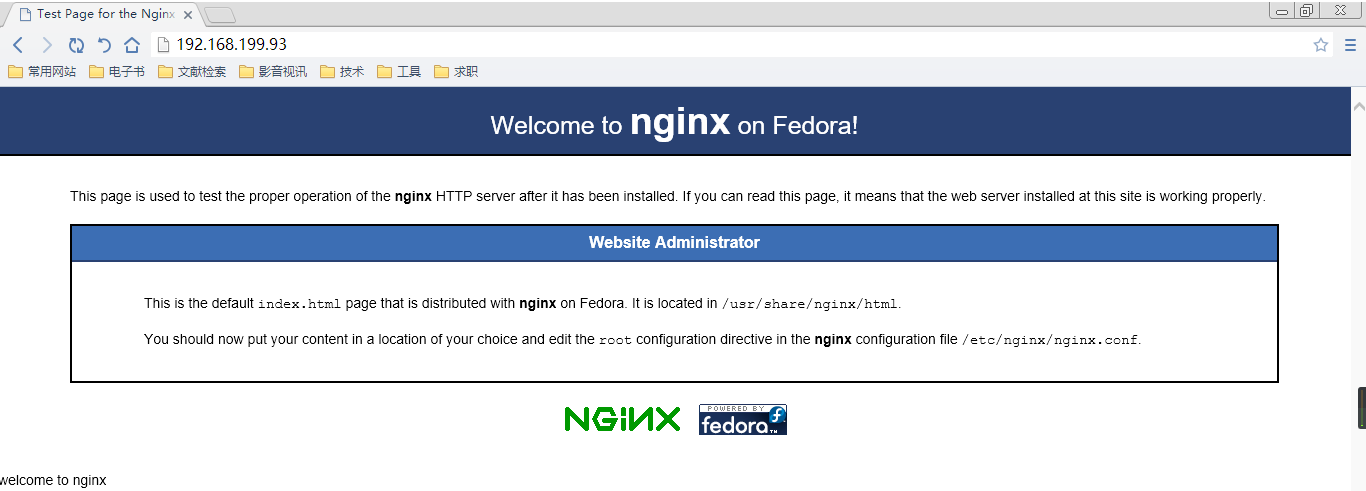
配置文件的进程参数是auto,nginx启动后再输入地址测试访问。
2
3
4
2#user nobody;
3worker_processes auto;
4

安装完毕,下一篇写缓存服务器配置及优化。
