当一个主服务器不能正常工作时, Sentinel 会开始一次自动故障迁移操作, 它会将失效主服务器的其中一个从服务器升级为新的主服务器, 并让失效主服务器的其他从服务器改为复制新的主服务器; 当客户端试图连接失效的主服务器时, 集群也会向客户端返回新主服务器的地址, 使得集群可以使用新主服务器代替失效服务器。Sentinel 也使得我们的Redis 拥有了高可用。Sentinel 架构我们配置好了,下面我们结合客户端来进行结合。
回顾:Redis 客户端:Jredis 和 spring-data-redis 整合 ,我们基于原来的上面升级成为 Sentinel 哨兵模式。
修改 RedisConfig ,增加 RedisSentinelConfiguration
- JedisConnectionFactory 的构造方法有,JedisConnectionFactory(RedisSentinelConfiguration sentinelConfig, JedisPoolConfig poolConfig)

-
因此,我们增加 RedisSentinelConfiguration 的配置就好
2
3
4
5
6
7
2 setRedisNode.add("121.42.157.181:26379");
3 setRedisNode.add("121.42.157.181:26380");
4 setRedisNode.add("121.42.157.181:26381");
5 RedisSentinelConfiguration redisSentinelConfiguration = new RedisSentinelConfiguration("mymaster", setRedisNode);
6
7
注意事项:mymaster 为你启动sentinel 里面conf 里面的master的名称,不一致会导致链接不上。
-
修改完整后的 RedisConfig
2
3
4
5
6
7
8
9
10
11
12
13
14
15
16
17
18
19
20
21
22
23
24
25
26
27
28
29
30
31
32
33
34
35
36
37
38
39
40
41
42
43
44
45
46
47
48
49
50
51
52
53
54
55
56
57
58
59
60
61
62
63
64
65
66
67
68
69
70
71
72
73
74
75
76
77
78
79
80
81
82
83
84
85
86
87
88
89
90
91
92
93
94
95
96
97
98
99
100
101
102
103
104
105
106
107
108
109
110
111
112
113
114
115
116
117
118
119
120
121
122
123
124
125
126
127
128
129
130
131
132
133
134
135
136
137
138
139
140
141
142
143
144
145
146
147
148
149
150
2
3import com.fasterxml.jackson.annotation.JsonAutoDetect;
4import com.fasterxml.jackson.annotation.PropertyAccessor;
5import com.fasterxml.jackson.databind.ObjectMapper;
6import lombok.Data;
7import org.springframework.beans.factory.annotation.Value;
8import org.springframework.context.annotation.Bean;
9import org.springframework.context.annotation.Configuration;
10import org.springframework.context.annotation.PropertySource;
11import org.springframework.core.annotation.Order;
12import org.springframework.data.redis.connection.RedisNode;
13import org.springframework.data.redis.connection.RedisSentinelConfiguration;
14import org.springframework.data.redis.connection.jedis.JedisConnectionFactory;
15import org.springframework.data.redis.connection.jedis.JedisSentinelConnection;
16import org.springframework.data.redis.connection.jredis.JredisPool;
17import org.springframework.data.redis.core.RedisTemplate;
18import org.springframework.data.redis.serializer.Jackson2JsonRedisSerializer;
19import org.springframework.data.redis.serializer.StringRedisSerializer;
20import redis.clients.jedis.JedisPoolConfig;
21
22import java.util.HashSet;
23import java.util.Set;
24
25@Data
26@Configuration
27@PropertySource("classpath:redis.properties")
28public class RedisConfig {
29
30 @Value("${redis.pool.maxTotal}")
31 private int maxTotal;
32
33 @Value("${redis.pool.maxIdle}")
34 private int maxIdle;
35
36 @Value("${redis.pool.numTestsPerEvictionRun}")
37 private int numTestsPerEvictionRun;
38
39 @Value("${redis.pool.timeBetweenEvictionRunsMillis}")
40 private int timeBetweenEvictionRunsMillis;
41
42 @Value("${redis.pool.minEvictableIdleTimeMillis}")
43 private int minEvictableIdleTimeMillis;
44
45 @Value("${redis.pool.softMinEvictableIdleTimeMillis}")
46 private int softMinEvictableIdleTimeMillis;
47
48 @Value("${redis.pool.maxWaitMillis}")
49 private int maxWaitMillis;
50
51 @Value("${redis.pool.testOnBorrow}")
52 private boolean testOnBorrow;
53
54 @Value("${redis.pool.testWhileIdle}")
55 private boolean testWhileIdle;
56
57 @Value("${redis.pool.blockWhenExhausted}")
58 private boolean blockWhenExhausted;
59
60
61 @Value("${redis.hostName}")
62 private String hostName;
63
64 @Value("${redis.port}")
65 private int port;
66
67 @Value("${redis.timeout}")
68 private int timeout;
69
70 @Value("${redis.password}")
71 private String password;
72
73 @Value("${redis.dbIndex}")
74 private int dbIndex;
75
76 @Value("${redis.usePool}")
77 private boolean usePool;
78
79
80 @Bean
81 @Order(1)
82 public JedisConnectionFactory jedisConnectionFactory() {
83
84 Set<String> setRedisNode = new HashSet<>();
85 setRedisNode.add("121.42.157.181:26379");
86 setRedisNode.add("121.42.157.181:26380");
87 setRedisNode.add("121.42.157.181:26381");
88 RedisSentinelConfiguration redisSentinelConfiguration = new RedisSentinelConfiguration("mymaster", setRedisNode);
89
90 JedisPoolConfig config = new JedisPoolConfig();
91
92 //设置链接池的信息
93 config.setMaxTotal(maxTotal);
94 config.setMaxIdle(maxIdle);
95 config.setNumTestsPerEvictionRun(numTestsPerEvictionRun);
96 config.setTimeBetweenEvictionRunsMillis(timeBetweenEvictionRunsMillis);
97 config.setMinEvictableIdleTimeMillis(minEvictableIdleTimeMillis);
98 config.setSoftMinEvictableIdleTimeMillis(softMinEvictableIdleTimeMillis);
99 config.setMaxWaitMillis(maxWaitMillis);
100 config.setTestOnBorrow(testOnBorrow);
101 config.setTestWhileIdle(testWhileIdle);
102 config.setBlockWhenExhausted(blockWhenExhausted);
103
104 JedisConnectionFactory connectionFactory = new JedisConnectionFactory(redisSentinelConfiguration,config);
105 //设置链接的基本信息
106// connectionFactory.setHostName(hostName);
107// connectionFactory.setPort(port);
108 connectionFactory.setTimeout(timeout);
109 connectionFactory.setPassword(password);
110 connectionFactory.setDatabase(dbIndex);
111 connectionFactory.setUsePool(usePool);
112
113 return connectionFactory;
114 }
115
116
117 @Bean
118 @Order(2)
119 public RedisTemplate<String, Object> redisTemplate(JedisConnectionFactory jedisConnectionFactory) {
120 RedisTemplate<String, Object> template = new RedisTemplate<>();
121 // 配置连接工厂
122 template.setConnectionFactory(jedisConnectionFactory);
123
124 //使用Jackson2JsonRedisSerializer来序列化和反序列化redis的value值(默认使用JDK的序列化方式)
125 Jackson2JsonRedisSerializer jacksonSeial = new Jackson2JsonRedisSerializer(Object.class);
126
127 ObjectMapper om = new ObjectMapper();
128 // 指定要序列化的域,field,get和set,以及修饰符范围,ANY是都有包括private和public
129 om.setVisibility(PropertyAccessor.ALL, JsonAutoDetect.Visibility.ANY);
130 // 指定序列化输入的类型,类必须是非final修饰的,final修饰的类,比如String,Integer等会跑出异常
131 om.enableDefaultTyping(ObjectMapper.DefaultTyping.NON_FINAL);
132 jacksonSeial.setObjectMapper(om);
133
134 // 值采用json序列化
135 template.setValueSerializer(jacksonSeial);
136 //使用StringRedisSerializer来序列化和反序列化redis的key值
137 template.setKeySerializer(new StringRedisSerializer());
138
139 // 设置hash key 和value序列化模式
140 template.setHashKeySerializer(new StringRedisSerializer());
141 template.setHashValueSerializer(jacksonSeial);
142 template.afterPropertiesSet();
143
144 return template;
145 }
146
147}
148
149
150
注意事项:这里我把 hostName 和 port 端口设置注释了,因为我们是通过sentinel来链接Redis的。
Redis 服务端的准备
-
redis_7000.conf 配置文件
2
3
4
5
6
7
8
2daemonize yes
3protected-mode no
4pidfile "/var/run/redis_7000.pid"
5dir "/home/redisRdbLog"
6logfile "/home/redisRdbLog/7000.log"
7
8
-
redis_7001.conf
2
3
4
5
6
7
8
9
2daemonize yes
3protected-mode no
4pidfile "/var/run/redis_7001.pid"
5dir "/home/redisRdbLog"
6logfile "/home/redisRdbLog/7001.log"
7replicaof 121.42.157.181 7000
8
9
-
redis_7002.conf
2
3
4
5
6
7
8
9
2daemonize yes
3protected-mode no
4pidfile "/var/run/redis_7002.pid"
5dir "/home/redisRdbLog"
6logfile "/home/redisRdbLog/7002.log"
7replicaof 121.42.157.181 7000
8
9
注意:replicaof 121.42.157.181 7000 ,这里不要使用127.0.0.1,在实验过程中,发现如果主节点断掉,sentinle会通知客户端链接127.0.0.1,然而程序和Redis不再一个服务器,导致链接不上。
Redis sentinel 配置文件
-
redis-sentinel-26379.conf
2
3
4
5
6
7
8
9
10
11
12
2daemonize yes
3pidfile /var/run/redis-sentinel-26379.pid
4dir /home/redisRdbLog/
5logfile "redis-sentinel-26379.log"
6sentinel monitor mymaster 121.42.157.181 7000 2
7sentinel down-after-milliseconds mymaster 30000
8sentinel parallel-syncs mymaster 1
9sentinel failover-timeout mymaster 180000
10sentinel deny-scripts-reconfig yes
11
12
-
redis-sentinel-26380.conf
2
3
4
5
6
7
8
9
10
11
12
2daemonize yes
3pidfile /var/run/redis-sentinel-26380.pid
4dir /home/redisRdbLog/
5logfile "redis-sentinel-26380.log"
6sentinel monitor mymaster 121.42.157.181 7000 2
7sentinel down-after-milliseconds mymaster 30000
8sentinel parallel-syncs mymaster 1
9sentinel failover-timeout mymaster 180000
10sentinel deny-scripts-reconfig yes
11
12
-
redis-sentinel-26381.conf
2
3
4
5
6
7
8
9
10
11
12
2daemonize yes
3pidfile /var/run/redis-sentinel-26381.pid
4dir /home/redisRdbLog/
5logfile "redis-sentinel-26381.log"
6sentinel monitor mymaster 121.42.157.181 7000 2
7sentinel down-after-milliseconds mymaster 30000
8sentinel parallel-syncs mymaster 1
9sentinel failover-timeout mymaster 180000
10sentinel deny-scripts-reconfig yes
11
12
注意:这里的 主节点的 Master 的IP 还是不能写成127.0.0.1。
启动Redis 服务和 sentinel 服务
2
3
4
5
6
7
8
9
10
11
12
13
14
15
16
17
18
19
20
21
22
23
24
25
26
27
28
29
30
2root@iZ28x8osxzxZ:/opt/redis/ect# redis-server redis_7001.conf
3root@iZ28x8osxzxZ:/opt/redis/ect# redis-server redis_7002.conf
4root@iZ28x8osxzxZ:/opt/redis/ect# redis-sentinel redis-sentinel-26379.conf
5root@iZ28x8osxzxZ:/opt/redis/ect# redis-sentinel redis-sentinel-26380.conf
6root@iZ28x8osxzxZ:/opt/redis/ect# redis-sentinel redis-sentinel-26381.conf
7root@iZ28x8osxzxZ:/opt/redis/ect# redis-cli -p 7000 info replication
8# Replication
9role:master
10connected_slaves:2
11slave0:ip=121.42.157.181,port=7001,state=online,offset=20483,lag=1
12slave1:ip=121.42.157.181,port=7002,state=online,offset=20483,lag=1
13master_replid:015a8e7e78486c184e04c0f040f0f56f06dedc2c
14master_replid2:0000000000000000000000000000000000000000
15master_repl_offset:20626
16second_repl_offset:-1
17repl_backlog_active:1
18repl_backlog_size:1048576
19repl_backlog_first_byte_offset:1
20repl_backlog_histlen:20626
21root@iZ28x8osxzxZ:/opt/redis/ect# redis-cli -p 26379 info sentinel
22# Sentinel
23sentinel_masters:1
24sentinel_tilt:0
25sentinel_running_scripts:0
26sentinel_scripts_queue_length:0
27sentinel_simulate_failure_flags:0
28master0:name=mymaster,status=ok,address=121.42.157.181:7000,slaves=2,sentinels=3
29
30
启动项目测试
启动日志可以看到,链接的 JedisSentinePool 里面的 master 121.42.157.181:7000

编写测试代码
2
3
4
5
6
7
8
9
10
11
12
13
14
15
16
17
18
19
20
21
22
23
24
25
26
27
28
29
30
31
32
33
2import org.springframework.beans.factory.annotation.Autowired;
3import org.springframework.data.redis.core.RedisTemplate;
4import org.springframework.data.redis.core.ValueOperations;
5import org.springframework.web.bind.annotation.RequestMapping;
6import org.springframework.web.bind.annotation.RestController;
7
8@RequestMapping("/redis")
9@RestController
10@Slf4j
11public class RedisTest {
12
13 @Autowired
14 private RedisTemplate<String,Object> redisTemplate;
15
16 @RequestMapping("/index.do")
17 public String redisIndex(){
18
19 while (true){
20 try{
21 ValueOperations valueOperations = redisTemplate.opsForValue();
22 for (int i = 0 ;i<10000;i++){
23 valueOperations.set("k-"+i,"v-"+i);
24 log.info("{} 的值是:{}","k-"+i,valueOperations.get("k-"+i));
25 }
26 }catch (Exception e){
27 log.info("Redis 链接异常,请速度检查Redis");
28 }
29 }
30 }
31}
32
33
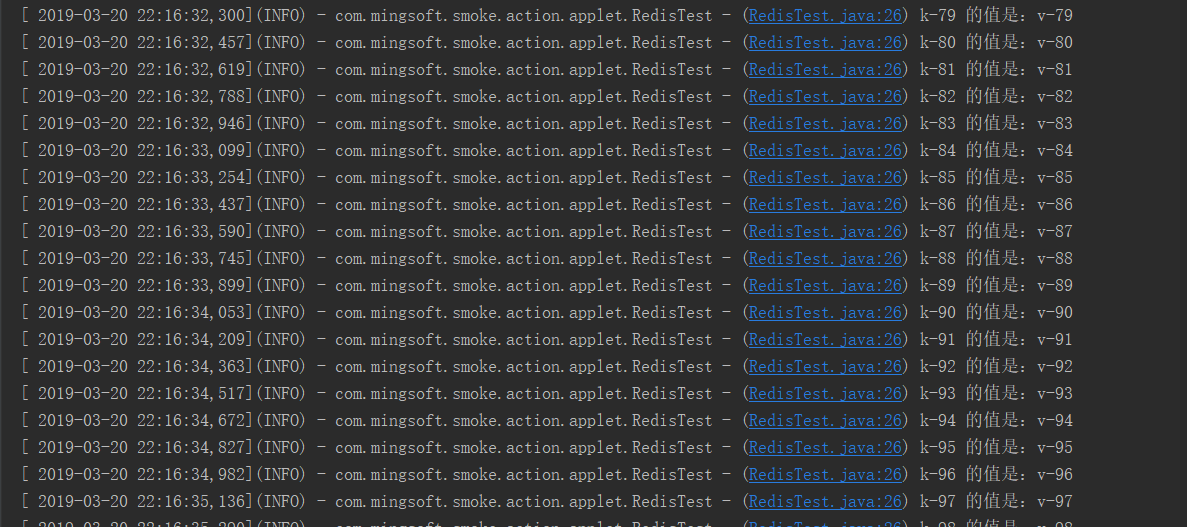
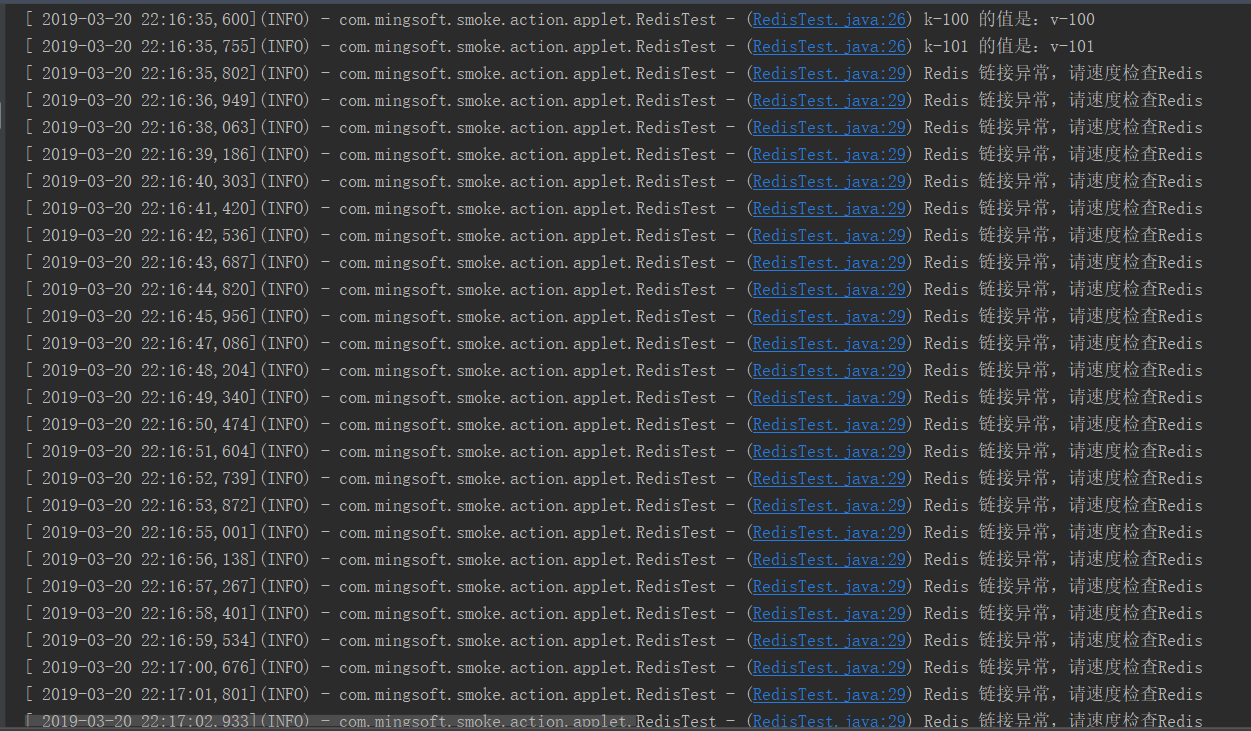
访问对应的接口,中途kill 7000端口服务,模拟故障
刚开始运行

关闭 7000 端口服务,redis 瞬间崩溃
2
3
4
5
6
7
8
9
10
11
2root 22222 1 0 22:08 ? 00:00:00 redis-server *:7000
3root 22227 1 0 22:08 ? 00:00:00 redis-server *:7001
4root 22233 1 0 22:08 ? 00:00:00 redis-server *:7002
5root 22336 1 0 22:15 ? 00:00:00 redis-sentinel *:26379 [sentinel]
6root 22341 1 0 22:15 ? 00:00:00 redis-sentinel *:26380 [sentinel]
7root 22346 1 0 22:15 ? 00:00:00 redis-sentinel *:26381 [sentinel]
8root 22354 22042 0 22:15 pts/0 00:00:00 grep --color=auto redis-
9root@iZ28x8osxzxZ:/opt/redis/ect# kill -9 22222
10
11

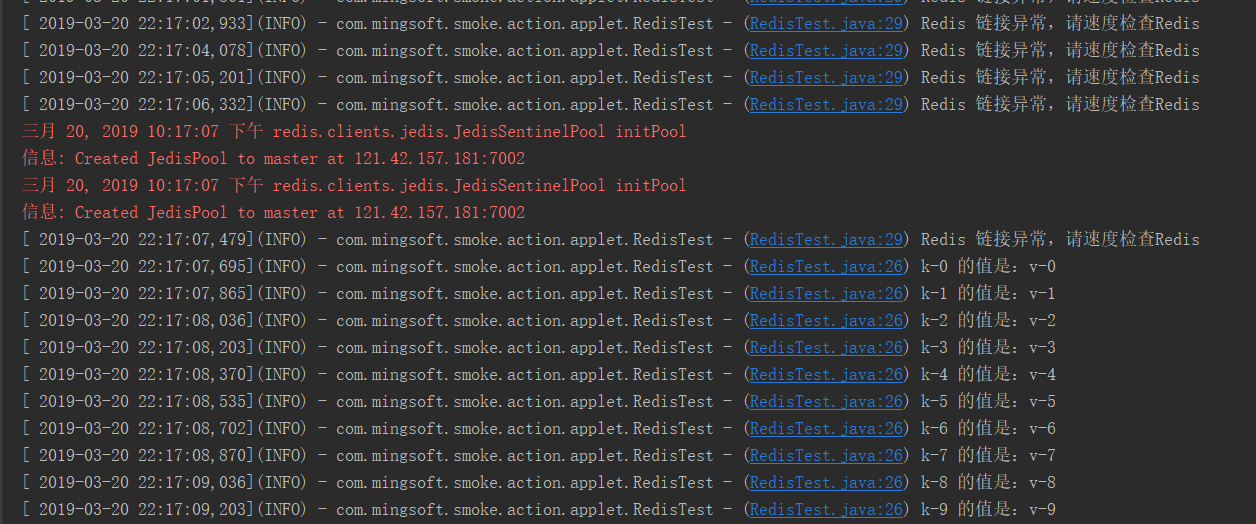
sentinel 发现 master 挂掉,推荐新的slave 节点为master
从日志可以看出,sentinel 推荐了 端口为7002 为新的Master

最后,重新启动 7000 端口的服务
2
3
2
3
查看redis 对应的日志来深度了解sentinel机制
-
redis_7000 对应的日志 7000.log
2
3
4
5
6
7
8
9
10
11
12
13
14
222222:M 20 Mar 2019 22:08:34.771 * Background saving started by pid 22231
322231:C 20 Mar 2019 22:08:34.774 * DB saved on disk
422231:C 20 Mar 2019 22:08:34.775 * RDB: 4 MB of memory used by copy-on-write
522222:M 20 Mar 2019 22:08:34.782 * Background saving terminated with success
622222:M 20 Mar 2019 22:08:34.782 * Synchronization with replica 121.42.157.181:7001 succeeded
722222:M 20 Mar 2019 22:08:37.238 * Replica 121.42.157.181:7002 asks for synchronization
822222:M 20 Mar 2019 22:08:37.238 * Partial resynchronization request from 121.42.157.181:7002 accepted. Sending 0 bytes of backlog starting from offset 1.
922319:C 20 Mar 2019 22:14:34.313 # oO0OoO0OoO0Oo Redis is starting oO0OoO0OoO0Oo
1022319:C 20 Mar 2019 22:14:34.313 # Redis version=5.0.3, bits=64, commit=00000000, modified=0, pid=22319, just started
1122319:C 20 Mar 2019 22:14:34.313 # Configuration loaded
1222320:M 20 Mar 2019 22:14:34.316 # Could not create server TCP listening socket *:7000: bind: Address already in use
13
14
结论:我没有执行kill 的时候 master 已经开始 主从复制了,执行 bgsave 然后异步的同步给7001,和7002,执行kill 后,已经不能链接 7000 端口了。
-
redis_7001 对应的日志 7001.log
2
3
4
5
6
7
8
9
10
11
12
13
14
15
16
17
222227:S 20 Mar 2019 22:16:35.695 * Caching the disconnected master state.
322227:S 20 Mar 2019 22:16:35.822 * Connecting to MASTER 121.42.157.181:7000
422227:S 20 Mar 2019 22:16:35.822 * MASTER <-> REPLICA sync started
522227:S 20 Mar 2019 22:16:35.822 # Error condition on socket for SYNC: Connection refused
622227:S 20 Mar 2019 22:16:36.823 * Connecting to MASTER 121.42.157.181:7000
722227:S 20 Mar 2019 22:16:36.824 * MASTER <-> REPLICA sync started
822227:S 20 Mar 2019 22:16:36.824 # Error condition on socket for SYNC: Connection refused
922227:S 20 Mar 2019 22:16:37.826 * Connecting to MASTER 121.42.157.181:7000
10
11====== 分割线 ======
1222227:S 20 Mar 2019 22:17:07.048 * REPLICAOF 121.42.157.181:7002 enabled (user request from 'id=10 addr=121.42.157.181:43006 fd=13 name=sentinel-a6d57c03-cmd age=108 idle=0 flags=x db=0 sub=0 psub=0 multi=3 qbuf=297 qbuf-free=32471 obl=36 oll=0 omem=0 events=r cmd=exec')
1322227:S 20 Mar 2019 22:17:07.048 # CONFIG REWRITE executed with success.
1422227:S 20 Mar 2019 22:17:07.881 * Connecting to MASTER 121.42.157.181:7002
1522227:S 20 Mar 2019 22:17:07.882 * MASTER <-> REPLICA sync started
16
17
结论:当从节点发现连接不上主节点Master后,后有一段时间不断地去ping,当判断Master 挂掉了,7001 端口,收到了一个请求,让他去从 7002 来 复制数据(REPLICAOF 121.42.157.181:7002),成为了 7002 的从节点slave(Connecting to MASTER 121.42.157.181:7002)。
-
redis_7002 对应的日志 7002.log
2
3
4
5
6
7
8
9
10
11
12
13
14
15
16
17
18
19
20
21
22
222233:S 20 Mar 2019 22:16:35.695 * Caching the disconnected master state.
322233:S 20 Mar 2019 22:16:36.322 * Connecting to MASTER 121.42.157.181:7000
422233:S 20 Mar 2019 22:16:36.322 * MASTER <-> REPLICA sync started
522233:S 20 Mar 2019 22:16:36.322 # Error condition on socket for SYNC: Connection refused
622233:S 20 Mar 2019 22:16:37.324 * Connecting to MASTER 121.42.157.181:7000
722233:S 20 Mar 2019 22:16:37.324 * MASTER <-> REPLICA sync started
822233:S 20 Mar 2019 22:16:37.324 # Error condition on socket for SYNC: Connection refused
9==== 分割线====
1022233:M 20 Mar 2019 22:17:06.044 * MASTER MODE enabled (user request from 'id=10 addr=121.42.157.181:52667 fd=13 name=sentinel-a6d57c03-cmd age=107 idle=0 flags=x db=0 sub=0 psub=0 multi=3 qbuf=140 qbuf-free=32628 obl=36 oll=0 omem=0 events=r cmd=exec')
1122233:M 20 Mar 2019 22:17:06.044 # CONFIG REWRITE executed with success.
1222233:M 20 Mar 2019 22:17:07.882 * Replica 121.42.157.181:7001 asks for synchronization
1322233:M 20 Mar 2019 22:17:07.882 * Partial resynchronization request from 121.42.157.181:7001 accepted. Sending 980 bytes of backlog starting from offset 20838.
1422233:M 20 Mar 2019 22:17:44.688 * Replica 121.42.157.181:7000 asks for synchronization
1522233:M 20 Mar 2019 22:17:44.688 * Partial resynchronization not accepted: Replication ID mismatch (Replica asked for '12250c76b43cfd7ba461d4e8718a777645140ea9', my replication IDs are '7382e3174ca88ecdcec62d124c173d1c9a63094f' and 'c073c47da0a6b936732431e460c70b61f6863d2a')
1622233:M 20 Mar 2019 22:17:44.688 * Starting BGSAVE for SYNC with target: disk
1722233:M 20 Mar 2019 22:17:44.689 * Background saving started by pid 22367
1822367:C 20 Mar 2019 22:17:44.692 * DB saved on disk
1922367:C 20 Mar 2019 22:17:44.692 * RDB: 2 MB of memory used by copy-on-write
2022233:M 20 Mar 2019 22:17:44.752 * Background saving terminated with success
21
22
结论:前面和7001 一致,后面也收到成为主节点的请求,成为了主节点,收到了 7001 的请求(Replica 121.42.157.181:7001 asks for synchronization)后,执行 bgsave 备份的命令,进行主从复制。
-
redis-sentinel-26379 的日志,redis-sentinel-26379.log
2
3
4
222139:X 20 Mar 2019 21:59:19.393 # +odown master mymaster 121.42.157.181 7000 #quorum 3/2
3
4
这里 sdown 发现了 7000 端口已经失联了,odown 触发了投票机制,3 个sentinel 有2 个认为 7000挂掉了,就决定 7000端口失联了。(之前 sentinel.conf 对应里面配置的2)
2
3
4
5
6
7
8
222139:X 20 Mar 2019 21:59:19.395 # +vote-for-leader 468c594a838f9ffc1e40408982afbc3a460282ea 1
322139:X 20 Mar 2019 21:59:19.399 # 4b3f32a20c31b87bebc4e970284abba38d49d31b voted for 468c594a838f9ffc1e40408982afbc3a460282ea 1
422139:X 20 Mar 2019 21:59:19.399 # 95aa787a23d699a9dd3243a21299e99c6e3a6202 voted for 468c594a838f9ffc1e40408982afbc3a460282ea 1
522139:X 20 Mar 2019 21:59:19.462 # +elected-leader master mymaster 121.42.157.181 7000
622139:X 20 Mar 2019 21:59:19.462 # +failover-state-select-slave master mymaster 121.42.157.181 7000
7
8
sentinel-26379 发起了投票,希望成为领导者,后面sentinel-26380和sentinel26381 都投票给了26379.
2
3
4
222139:X 20 Mar 2019 21:59:19.528 * +failover-state-send-slaveof-noone slave 121.42.157.181:7002 121.42.157.181 7002 @ mymaster 121.42.157.181 7000
3
4
选择 slave 7002 成为 master,并且执行 slaveof no one 成为 Master(+failover-state-send-slaveof-noone slave 121.42.157.181:7002)
2
3
4
5
6
222139:X 20 Mar 2019 21:59:20.254 # +promoted-slave slave 121.42.157.181:7002 121.42.157.181 7002 @ mymaster 121.42.157.181 7000
322139:X 20 Mar 2019 21:59:20.254 # +failover-state-reconf-slaves master mymaster 121.42.157.181 7000
422139:X 20 Mar 2019 21:59:20.303 * +slave-reconf-sent slave 121.42.157.181:7001 121.42.157.181 7001 @ mymaster 121.42.157.181 7000
5
6
成为 master 后,通知 7001 成为 7002 的slave
2
3
4
5
6
7
222336:X 20 Mar 2019 22:15:12.470 * +slave slave 121.42.157.181:7001 121.42.157.181 7001 @ mymaster 121.42.157.181 7000
322336:X 20 Mar 2019 22:15:12.472 * +slave slave 121.42.157.181:7002 121.42.157.181 7002 @ mymaster 121.42.157.181 7000
422336:X 20 Mar 2019 22:15:18.012 * +sentinel sentinel 4571876f76677c1be4b340ea6823bb88c4c9f68d 121.42.157.181 26380 @ mymaster 121.42.157.181 7000
522336:X 20 Mar 2019 22:15:20.519 * +sentinel sentinel a6d57c039f42241fda388f37c6bfaab9c7dee1d1 121.42.157.181 26381 @ mymaster 121.42.157.181 7000
6
7
后面发现 7000 复活了,又通知 7000 成为 7002 的 slave。
-
redis-sentinel-26380 的日志,redis-sentinel-26380.log
2
3
4
5
6
222144:X 20 Mar 2019 21:59:19.397 # +new-epoch 1
322144:X 20 Mar 2019 21:59:19.399 # +vote-for-leader 468c594a838f9ffc1e40408982afbc3a460282ea 1
422144:X 20 Mar 2019 21:59:19.399 # +odown master mymaster 121.42.157.181 7000 #quorum 2/2
5
6
也是发现 7000 挂掉了,进行投票后,推举新的 leader
2
3
2
3
收到leader 的通知,7002 成为新的master
其实 sentinel 有问题会推举一个leader,然后交给一个leader去完成操作,其他的等待leader 的通知就好了。 26381 和 26380 差不多。
最后,我们查看一下redis 服务的配置文件
-
redis_7000.conf
2
3
4
5
6
7
8
9
10
11
2port 7000
3daemonize yes
4protected-mode no
5pidfile "/var/run/redis_7000.pid"
6dir "/home/redisRdbLog"
7logfile "/home/redisRdbLog/7000.log"
8# Generated by CONFIG REWRITE
9replicaof 121.42.157.181 7002
10
11
一开始是 Master,后面进程被终止后,被sentinel发现,竞选了新的master,后面重新启动,成为了7002的slave。
-
redis_7001.conf
2
3
4
5
6
7
8
9
10
2port 7001
3daemonize yes
4protected-mode no
5pidfile "/var/run/redis_7001.pid"
6dir "/home/redisRdbLog"
7logfile "/home/redisRdbLog/7001.log"
8replicaof 121.42.157.181 7002
9
10
master 由 7000 变成了 7002
-
redis_7002.conf
2
3
4
5
6
7
8
9
2port 7002
3daemonize yes
4protected-mode no
5pidfile "/var/run/redis_7002.pid"
6dir "/home/redisRdbLog"
7logfile "/home/redisRdbLog/7002.log"
8
9
从节点的 replicaof 的命令已经被删除了。
从 客户端的操作,再到分析对应的日志,最后查看变化后的配置,可以更加深刻的了解 Redis 的 Sentinel。
之前准备学习的时候写博客,可是都没有坚持下去,希望这次可以有始有终。
Redis 坚持第一天 :为什么要使用 redis ?
Redis 坚持第二天 :Redis 的安装与启动
Redis 坚持第三天 :Redis 使用配置文件启动,常见配置学习。
Redis 坚持第四天 :
- Redis 五种常见的数据结构:String
- Redis 五种常见的数据结构:Hash
- Redis 五种常见的数据结构:List
- Redis 五种常见的数据结构:Set
- Redis 五种常见的数据结构:zset
Redis 坚持第五天 :Redis 客户端:Jredis 和 spring-data-redis 整合。
Redis 坚持第六天 :Redis 慢查询日志。
Redis 坚持第七天 :Redis pipeline。
Redis 坚持第八天 :Redis 发布订阅。
Redis 坚持第九天 :Redis bitmp。
Redis 坚持第十天 :Redis HyperLogLogs。
Redis 坚持第十一天 :Redis GEO。
Redis 坚持第十二天 :Redis 持久化:RDB。
Redis 坚持第十三天 :Redis 持久化 :AOF。
Redis 坚持第十四天 :Redis :主从复制。
Redis 坚持第十五天 :Redis Sentinel 架构配置!!!
Redis 坚持第十六天 :Redis 客户端整合:spring + redis + sentinel(注解方式配置)
