1、首先关闭linux的防火墙,执行命令
2
2
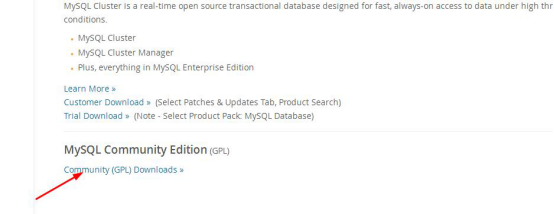
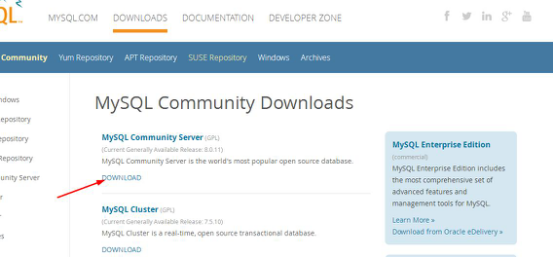
2、从mysql官网上下载自己适合的mysql版本https://dev.mysql.com/downloads/mysql/5.6.html\#downloads,进入mysql官网,依次点击


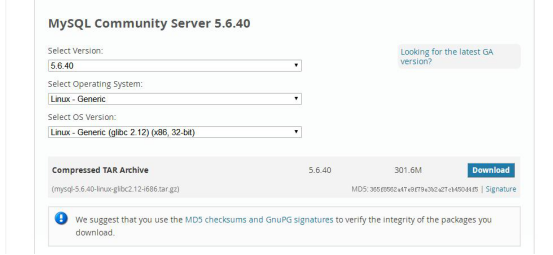
3、下载后的mysql文件
2
2
将下载好的mysql压缩文件放置在linux的/usr/local文件夹下,解压该压缩文件
2
2
将解压后的文件重命名为mysql
2
2
4、创建mysql用户组及用户
2
3
2useradd -r -g mysql mysql
3
5、进入到mysql目录,执行添加MySQL配置的操作
2
3
4
2或:
3cp support-files/my-default.cnf /etc/my.cnf
4
2
2
6、编辑/etc/my.cnf文件;
2
2
在my.cnf文件中添加或者修改相关配置,更改完成后保存退出
2
3
4
5
6
7
8
9
10
11
12
13
14
15
16
17
18
19
20
21
22
23
24
25
26
27
28
29
30
31
32
33
34
35
36
37
38
39
40
41
42
43
2# http://dev.mysql.com/doc/refman/5.6/en/server-configuration-defaults.html
3# *** DO NOT EDIT THIS FILE. It's a template which will be copied to the
4# *** default location during install, and will be replaced if you
5# *** upgrade to a newer version of MySQL.
6
7[mysqld]
8
9# Remove leading # and set to the amount of RAM for the most important data
10# cache in MySQL. Start at 70% of total RAM for dedicated server, else 10%.
11# innodb_buffer_pool_size = 128M
12
13# Remove leading # to turn on a very important data integrity option: logging
14# changes to the binary log between backups.
15log_bin = /usr/local/mysql/data/log
16
17# These are commonly set, remove the # and set as required.
18basedir = /usr/local/mysql
19datadir = /usr/local/mysql/data
20port = 3306
21server_id = 1
22socket = /tmp/mysql.sock
23pid_file = /usr/local/mysql/data/mysql.pid
24tmpdir = /tmp
25log_err = /usr/local/mysql/data/log/error.log
26#lower_case_table_names 大小写敏感设置的属性
27#lower_case_table_names=1:表名存储在磁盘是小写的,但是比较的时候是不区分大小写
28#lower_case_table_names=0:表名存储为给定的大小和比较是区分大小写的
29#lower_case_table_names=2:表名存储为给定的大小写但是比较的时候是小写的
30lower_case_table_names = 1
31character-set-server = utf8
32skip-name-resolve
33#bind_address = 127.0.0.1
34
35# Remove leading # to set options mainly useful for reporting servers.
36# The server defaults are faster for transactions and fast SELECTs.
37# Adjust sizes as needed, experiment to find the optimal values.
38# join_buffer_size = 128M
39# sort_buffer_size = 2M
40# read_rnd_buffer_size = 2M
41
42sql_mode=NO_ENGINE_SUBSTITUTION,STRICT_TRANS_TABLES
43
7、在mysql当前目录下设定目录的访问权限(注意后面的小点,表示当前目录)
2
3
4
5
6
2chgrp -R mysql .
3scripts/mysql_install_db --user=mysql
4chown -R root .
5chown -R mysql data (别忘记设置访问权限)
6
8、初始化数据(在mysql/bin或者mysql/scripts下有个 mysql_install_db 可执行文件初始化数据库),进入mysql/bin或者mysql/scripts目录下,执行下面命令
2
2
9、启动mysql,进入/usr/local/mysql/bin目录,执行下面命令
2
2
2
2
10、设置开机启动,新开启shell中断后,进入mysql目录,执行下面命令
2
3
4
2cp /usr/local/mysql/support-files/mysql.server /etc/rc.d/init.d/mysql
3
4
2
3
4
5
2chkconfig --add mysqld
3chkconfig --level 2345 mysqld on
4chown mysql:mysql -R /usr/local/mysql/
5
重启linux
2
2
查看mysql状态
2
2
如果mysql未启动则执行命令:service mysql start
执行命令:ps -ef|grep mysql 看到mysql服务是否启动成功
11、添加远程访问权限
(1)、添加mysql命令
2
2
(2)、更改访问权限
2
3
4
5
6
2mysql -uroot -p
3密码为空直接回车,运行以下两条命令(使用root/123456从任何主机连接到mysql服务器)
4GRANT ALL PRIVILEGES ON *.* TO 'root'@'%' IDENTIFIED BY '123456' with grant option;
5Flush privileges;
6
退出mysql
2
2
重启linux,就完成了
2
2
注:本机访问mysql,root账户默认是没有密码的,端口号默认3306,如果需要修改root账户密码,在/usr/local/mysql/bin目录下,执行下面命令
2
2
安装完后的使用
安装完以后,大家可以输入mysql -uroot -p,然后enter password来进入mysql。
进去后可以使用mysql的各种语法,首先可以查看database:show databases。
Linux下mysql的卸载:
1、查找以前是否装有mysql
命令:rpm -qa|grep -i mysql
可以看到mysql的两个包:
mysql-4.1.12-3.RHEL4.1
mysqlclient10-3.23.58-4.RHEL4.1
2、删除mysql
删除命令:rpm -e –nodeps 包名
( rpm -ev mysql-4.1.12-3.RHEL4.1 )
3、删除老版本mysql的开发头文件和库
检查各个mysql文件夹是否删除干净
find / -name mysql
结果如下:
/var/lib/mysql
/usr/local/mysql
/usr/lib/mysql
/usr/include/mysql
命令:
rm -fr /usr/lib/mysql
rm -fr /usr/include/mysql
注意:卸载后/var/lib/mysql中的数据及/etc/my.cnf不会删除,如果确定没用后就手工删除
rm -f /etc/my.cnf
rm -fr /var/lib/mysql
4.删除mysql用户及用户组
userdel mysql
groupdel mysql
Linux下创建和删除软链接:
1.先建立一个软连接
2
3
4
5
6
7
8
9
10
11
12
13
14
15
2 2 总计 0
3 3 1491138 -rw-r–r– 1 root root 48 07-14 14:17 file1
4 4 1491139 -rw-r–r– 2 root root 0 07-14 14:17 file2
5 5 1491139 -rw-r–r– 2 root root 0 07-14 14:17 file2hand
6 6 #建立file1和file1soft软连接
7 7 [root@rekfan.com test]# ln -s file1 file1soft
8 8 [root@rekfan.com test]# ls -il
9 9 总计 0
1010 1491138 -rw-r–r– 1 root root 48 07-14 14:17 file1
1111 1491140 lrwxrwxrwx 1 root root 5 07-14 14:24 file1soft -> file1
1212 1491139 -rw-r–r– 2 root root 0 07-14 14:17 file2
1313 1491139 -rw-r–r– 2 root root 0 07-14 14:17 file2hand
14
15
其中,ln -s file1 filesoft 中的file1就是源文件,file1soft就是目标链接文件名,其作用是当进入filesoft目录,实际上是链接进入了file1目录
2.删除上面建立的软连接
2
3
4
5
6
7
8
9
10
11
12
13
14
15
2 2 总计 0
3 3 1491138 -rw-r–r– 1 root root 0 07-14 14:17 file1
4 4 1491140 lrwxrwxrwx 1 root root 5 07-14 14:24 file1soft -> file1
5 5 1491139 -rw-r–r– 2 root root 0 07-14 14:17 file2
6 6 1491139 -rw-r–r– 2 root root 0 07-14 14:17 file2hand
7 7 #删除软连接
8 8 [root@rekfan.com test]# rm -rf file1soft
9 9 [root@rekfan.com test]# ls -il
1010 总计 0
1111 1491138 -rw-r–r– 1 root root 0 07-14 14:17 file1
1212 1491139 -rw-r–r– 2 root root 0 07-14 14:17 file2
1313 1491139 -rw-r–r– 2 root root 0 07-14 14:17 file2hand
14
15
启动mysql时显示:/tmp/mysql.sock 不存在的解决方法
2
3
4
5
6
7
8
9
10
22 bin/mysqladmin: connect to server at 'localhost' failed
33 error: 'Can't connect to local MySQL server through socket '/tmp/mysql.sock' (2)'
44 Check that mysqld is running and that the socket: '/tmp/mysql.sock' exists!
55 [root@localhost mysql]# bin/mysql -u root -p
66 Enter password:
77 ERROR 2002 (HY000): Can't connect to local MySQL server through socket '/tmp/mysql.sock' (2)
88 分析:是/tmp/mysql.sock 不存在
9
10
由于搜索的mysql.sock路径是在/tmp下,而mysql安装的mysql.sock在/var/lib/mysql下,所以选择建立符号(软)连接:
2
3
4
5
6
7
8
9
22 # bin/mysql -u root
33 Welcome to the MySQL monitor. Commands end with ; or g.
44 Your MySQL connection id is 1
55 Server version: 5.0.45 MySQL Community Server (GPL)
66 Type 'help;' or 'h' for help. Type 'c' to clear the buffer.
77 mysql>
8
9
安装mysql报错:FATAL ERROR: please install the following Perl modules before executing ./scripts/mysql_install_db:Data::Dumper
解决方法 :安装autoconf库
命令:yum-y install autoconf //此包安装时会安装Data:Dumper模块
启动mysql报错:Starting MySQL. ERROR! The server quit without updating PID file (/var/lib/mysql/cnsz22VLK15556.pid).
1、可能是/usr/local/mysql/data/mysql.pid文件没有写的权限
解决方法 :给予权限,执行 “chown -R mysql:mysql /var/data” “chmod -R 755 /usr/local/mysql/data” 然后重新启动mysqld!
2、可能进程里已经存在mysql进程
解决方法:用命令“ps -ef|grep mysqld”查看是否有mysqld进程,如果有使用“kill -9 进程号”杀死,然后重新启动mysqld!
3、可能是第二次在机器上安装mysql,有残余数据影响了服务的启动。
解决方法:去mysql的数据目录/data看看,如果存在mysql-bin.index,就赶快把它删除掉吧,它就是罪魁祸首了。
4、mysql在启动时没有指定配置文件时会使用/etc/my.cnf配置文件,请打开这个文件查看在[mysqld]节下有没有指定数据目录(datadir)。
解决方法:请在[mysqld]下设置这一行:datadir = /usr/local/mysql/data
5、skip-federated字段问题
解决方法:检查一下/etc/my.cnf文件中有没有没被注释掉的skip-federated字段,如果有就立即注释掉吧。
6、错误日志目录不存在。(本人是这个方法解决的)
解决方法:使用“chown” “chmod”命令赋予mysql所有者及权限
7、selinux惹的祸,如果是centos系统,默认会开启selinux
解决方法:关闭它,打开/etc/selinux/config,把SELINUX=enforcing改为SELINUX=disabled后存盘退出重启机器试试。
转自:https://www.cnblogs.com/fnlingnzb-learner/p/5830622.html
希望此文能够帮助到您!
