本篇继续来介绍Pipeline Utility Steps这个插件支持的特定的方法,前面介绍了读取JSON和读properties文件,这篇来介绍读写yaml类型文件。读取yaml的方法是readYaml,写yaml文件的方法是writeYaml,yaml配置类型文件在linux系统中还是很常见的。
1.方法readYaml
我在Eclipse项目中的/testdata目录下,提前做好了一个test.yaml的文件,并写入如下数据并保存。
2
3
4
5
2age : 18
3city: 'Beijing'
4isMale: true
5
module方法中readYaml方法,我写了支持参数传入的是一个yaml文件路径和直接传入一个yaml格式的字符串内容。这个module里面完整的方法,请看replay脚本框或者github上代码。
2
3
4
5
6
7
8
9
10
11
12
13
2 def datas = ""
3 if(yaml_file.toString().endsWith(".yml")){
4 datas = readYaml file : yaml_file
5
6 }else {
7 datas = readYaml text : yaml_file
8 }
9 datas.each {
10 println ( it.key + " = " + it.value )
11 }
12}
13
看到没,上面我为了打印读取的yaml内容,再次使用了groovy语言中的闭包语法,直接遍历里面元素的key和value。
我的pipeline stage 测试代码
2
3
4
5
6
7
8
9
10
11
12
13
14
15
16
17
18
19
20
21
22
23
24
25
26
27
28
29
30
31
32
33
34
35
36
37
38
2
3println env.JOB_NAME
4println env.BUILD_NUMBER
5
6pipeline{
7
8 agent any
9 stages{
10 stage("init") {
11 steps{
12 script{
13 model_test = load env.WORKSPACE + "/pipeline/module/pipeline-demo-module.groovy"
14 }
15 }
16 }
17 stage("read yaml file") {
18 steps{
19 script{
20 yaml_file = env.WORKSPACE + "/testdata/test.yml"
21 model_test.read_yaml_file(yaml_file)
22 println "=========================="
23 yaml_string = """
24 age: 18
25 city: 'Shanghai'
26 isMale: false
27 name: 'Lucy'
28 """
29 model_test.read_yaml_file(yaml_string)
30 }
31 }
32 }
33 }
34}
35
36
37
38
关于上面这个文档注释符里面的yaml格式内容,我要特意指出这里不能用tab来代替键盘空格键产生的空格,不然就会报错。
我的Jenkins测试job:http://65.49.216.200:8080/job/pipeline-project-demo/57/
或者http://65.49.216.200:8080/job/pipeline-project-demo/54/
2.方法writeYaml
继续介绍写yaml方法,下面介绍如何把一个字典类型数据写入到yaml文件中。
module方法
2
3
4
2 writeYaml file: yaml_path , data: map_data
3}
4
pipeline stage test代码
2
3
4
5
6
7
8
9
10
11
12
13
14
15
16
17
18
19
20
21
22
23
24
25
26
27
28
29
30
31
32
33
34
35
36
37
2
3println env.JOB_NAME
4println env.BUILD_NUMBER
5
6pipeline{
7
8 agent any
9 stages{
10 stage("init") {
11 steps{
12 script{
13 model_test = load env.WORKSPACE + "/pipeline/module/pipeline-demo-module.groovy"
14 }
15 }
16 }
17 stage("write into yaml file") {
18 steps{
19 script{
20 def amap = [name: 'Anthony',
21 age : 18,
22 city: 'Beijing',
23 isMale: true
24 ]
25 yaml_file = env.WORKSPACE + "/testdata/new.yml"
26 model_test.write_to_yaml(amap, yaml_file)
27 println "the contents of yaml file are: "
28 model_test.read_yaml_file(yaml_file)
29 }
30 }
31 }
32 }
33}
34
35
36
37
我的Jenkins 成功构建测试job:http://65.49.216.200:8080/job/pipeline-project-demo/59/console
看这个日志打印就说明了写入到yaml文件成功,或者你去自己jenkins构建的workspace下找到这个./testdata/new.yaml文件,验证里面的内容。
好了到这里,关于Pipeline Utility Steps这个插件的常用方法学习,介绍到这里。这个插件的官方网页地址是https://jenkins.io/doc/pipeline/steps/pipeline-utility-steps/
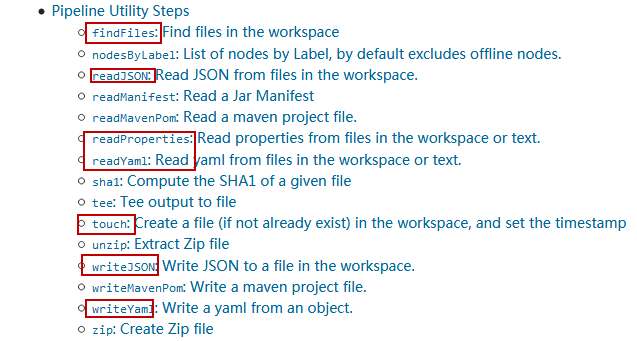
我已经介绍了这个插件里面一半以上方法,如下图红圈方法是我们前面介绍过的。

关于pipeline上不同插件支持不同方法,你可以打开这个页面查看https://jenkins.io/doc/pipeline/steps/。
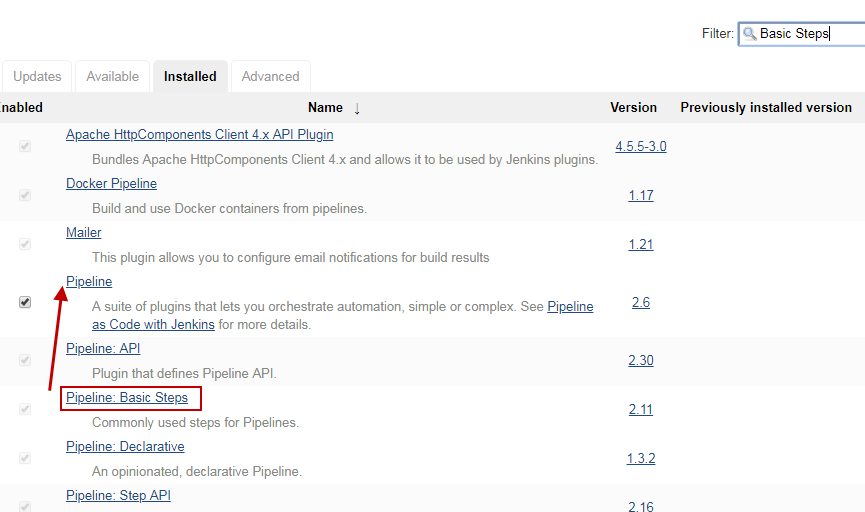
我也就是介绍一些基础常用的插件以及方法,其他可能是项目需要,到时候自己再跑过去看文档学习就可以。接下来,我要介绍在安装pipeline组件的时候,自动安装一个组件里面的方法,Pipeline:Basic Steps,这个方法你可以到插件管理,已安装界面看到。

也就是说,接下来学习的Basic Steps插件里面的方法,最好你都要掌握。只有basic steps里面方法不够用的时候,你才要考虑其他插件的方法。到这里,确实,我写文章顺序有点问题,应该先介绍basic steps插件下的方法。但是,前面插件学习应该也不难,有了这个基础,学习basic steps下的方法应该也是很容易。
