<<SpringBoot + Spring Security>>
每天更新一点。。。。
文章目录
-
第1章 初识Spring Security
-
1.1 Spring Security简介
* 1.2 创建简单项目
* 1.3 修改默认的登录名密码(基于内存用户) -
1.3.1 修改application.propeities
* 1.3.2 基于内存的多用户配置1
21 * 1.4 HttpSecurity认识
2 -
1.4.1 自定义登录页
* 1.4.2 登录详细配置
* 1.4.3 注销登录配置
* 1.4.4 配置多个HttpSecurity1
21 * 第2章 Spring Security详聊
2 -
2.1 密码加密演进
* 2.2 Spring Security的加密实践
* 2.3 配置数据库的用户
* 2.2 Spring Security的加密实践
* 2.3 配置数据库的用户
第1章 初识Spring Security
1.1 Spring Security简介
官网:https://spring.io/projects/spring-security 给出的解释:
Spring Security is a powerful and highly customizable authentication and access-control framework. It is the de-facto standard for securing Spring-based applications.
Spring Security is a framework that focuses on providing both authentication and authorization to Java applications. Like all Spring projects, the real power of Spring Security is found in how easily it can be extended to meet custom requirements.
Spring Security是一个功能强大、高度可定制的身份验证和访问控制框架。它实际上是保护基于Spring的应用程序的标准。
Spring Security是一个专注于为Java应用程序提供身份验证和授权的框架。与所有Spring项目一样,Spring安全的真正威力在于它可以很容易地被扩展以满足定制需求。
在现代网站中,安全可谓是尤其重要。一般企业项目中都会有严格法的认证和授权操作,尤其在金融行业中,对于不同用户具有不同角色和权限的操作。在一般的项目都能见到有普通用户和管理员等角色。在java开发领域中常见的有安全框架有Spring Security和Apache Shiro。Shiro是一个轻量级的安全管理框架,提供了认证、授权、会话管理、缓存管理等功能,相比于Spring Security,Spring Security是更复杂、功能更加强大、细粒度更高,对OAth2的支持也更加友好,Spring Security本身是Spring旗下的一个子项目,所以和Spring无缝集成,特别在Spring Boot中拔插即用。
注意:本学习都是基于Spring Boot项目,开发工具选Intellij IDEA
1.2 创建简单项目
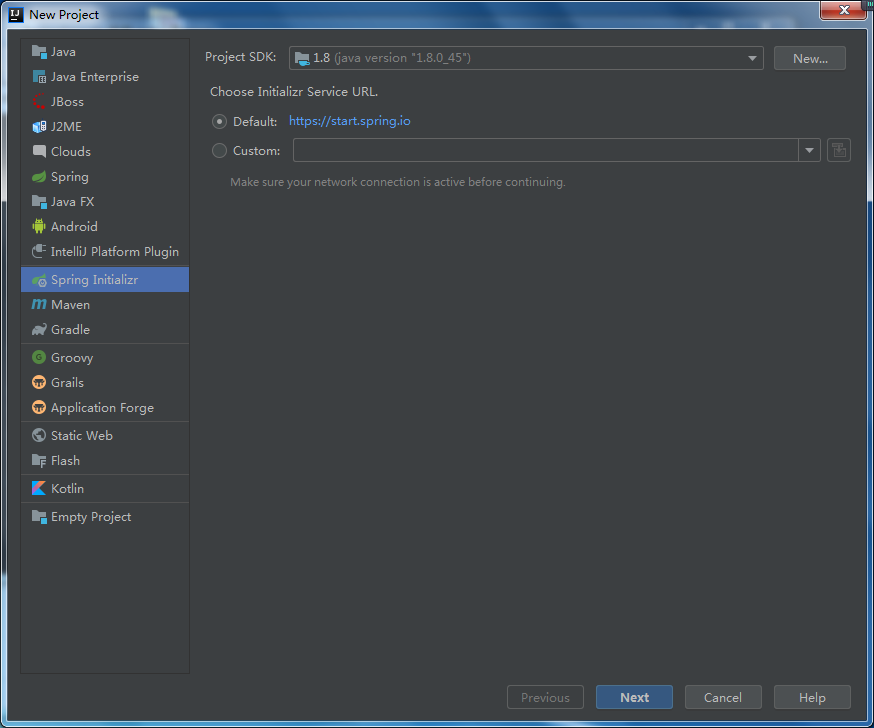
打开IDEA工具,新建项目,选择Spring Initializr,默认选择Default。点击Next按钮,
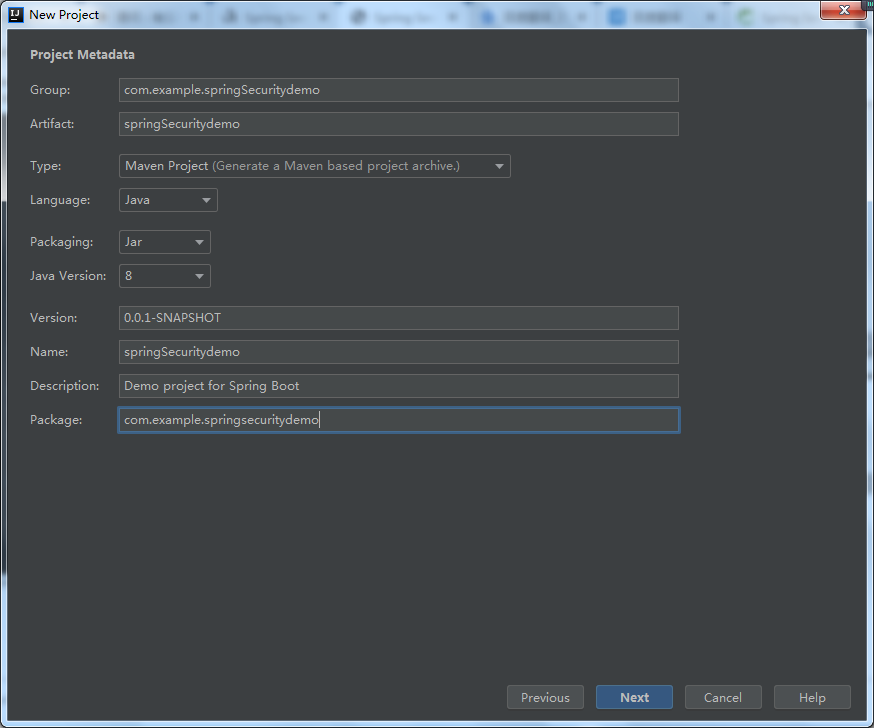
然后填写项目的基本信息,Type选择自己熟悉的项目仓库构建方式,默认有Maven Project和Gradle Project。本演示就选择Maven的构建方式。其他默认即可,点击Next按钮。
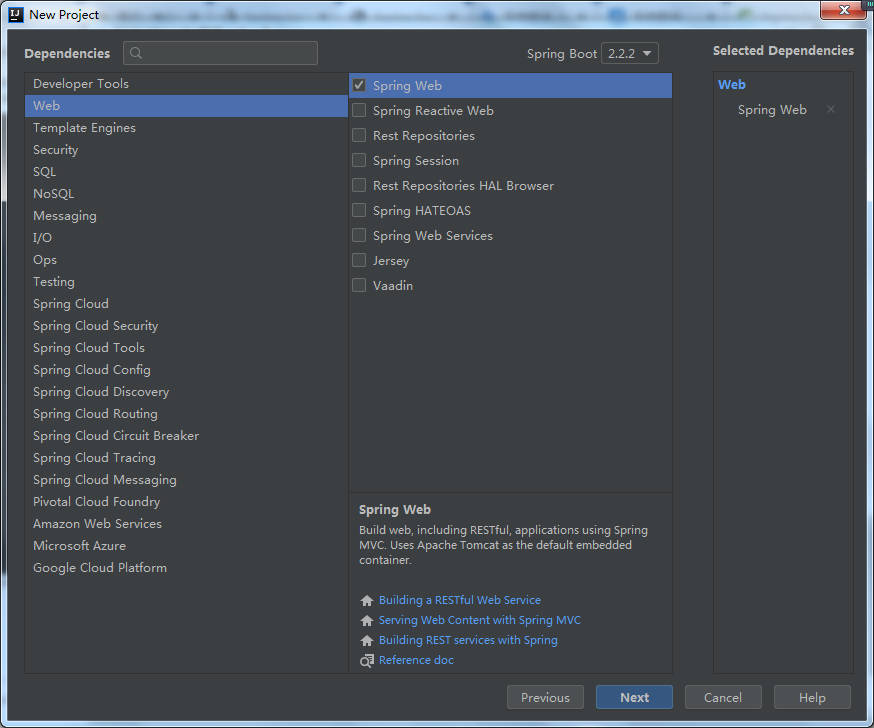
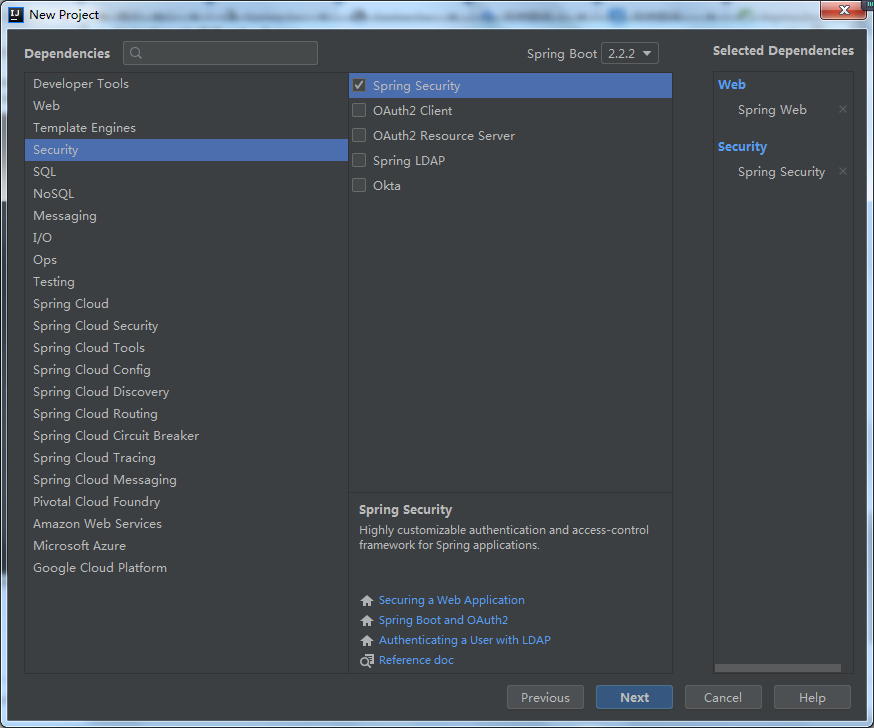
选择项目依赖,选择Web–>Spring Web 和Security–>Spring Security,然后点击Next按钮即可。
填写项目名称和路径,点击Finish。

查看项目的pom.xml发现pom.xml的Depedencies中加入相关依赖,代码如下:
2
3
4
5
6
7
8
9
10
11
2 <groupId>org.springframework.boot</groupId>
3 <artifactId>spring-boot-starter-security</artifactId>
4</dependency>
5<dependency>
6 <groupId>org.springframework.boot</groupId>
7 <artifactId>spring-boot-starter-web</artifactId>
8</dependency>
9
10
11
注意如果选择的构建方式是Gradle,那么项目的根目录下的bulid.gradle下同样会引入相关依赖,代码如下:
2
3
4
5
6
7
8
9
10
11
12
13
14
15
16
17
2
3 // 该依赖对于编译发行是必须的
4 compile('org.springframework.boot:spring-boot-starter-web')
5
6 // 添加 Spring Security 依赖
7 compile('org.springframework.boot:spring-boot-starter-security')
8
9 // 添加 Spring Boot 开发工具依赖
10 compile("org.springframework.boot:spring-boot-devtools")
11
12 // 该依赖对于编译测试是必须的,默认包含编译产品依赖和编译时依
13 testCompile('org.springframework.boot:spring-boot-starter-test')
14
15}
16
17
添加hello接口,代码如下:
2
3
4
5
6
7
8
9
2public class HelloController{
3 @GetMapping("/hello")
4 public String hello(){
5 return "hello springBoot,Spring Security";
6 }
7}
8
9
启动项目测试,项目默认运行在8080端口,打开浏览器输入http://localhost:8080/hello ,访问hello接口发现自动跳转一个登录页面,这个登录页面是Spring Security内嵌的登录页面,由Spring Security提供。如下图:
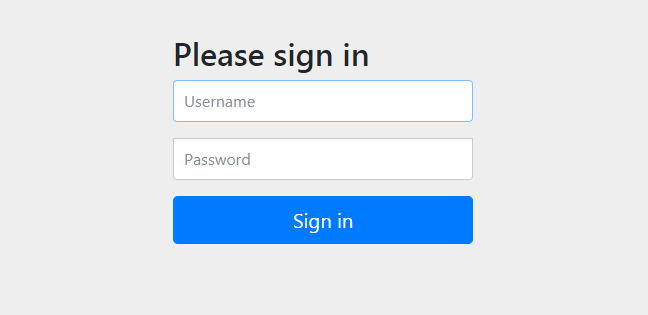
默认的用户名是user,默认的登录密码是在项目每次启动时随机生成的,在启动日志可以查看到,这个用户是Spring Security是项目启动时在内存中创建的内存用户,如下图:

输入日志的登录密码登录后,用户就可以访问hello接口。从这个demo中就可以看出,项目资源已经被Spring Security保护起来。
1.3 修改默认的登录名密码(基于内存用户)
1.3.1 修改application.propeities
如果用户对想修改默认的用户名和密码,可以在application.propeities中配置默认的用户名、密码以及角色信息,配置方式如下:
2
3
4
5
2spring.security.user.password=123456
3spring.security.user.roles=admin
4
5
项目重启后,该方式会覆盖默认的用户名和密码信息,控制台日志中也不会打印随机生成的密码。
1.3.2 基于内存的多用户配置
修改application.propeities可以配置一个内存用户,该方式比较简洁方便,但是实际的开发工作场景,一个用户满足需求,如果需要更多的内存用户和详细配置,需要用到如下方式:
在项目新建一个configuration包用于存放通用配置;然后,新建一个WebSecurityConfig类,使其继承WebSecurityConfigurerAdapter .
在给WebSecutiryConfig类中加上@EnableWebSecurity 注解后,便会自动被 Spring发现并注册(查看 @EnableWebSecurity 即可看到@Configuration 注解已经存在,所以此处不需要额外添加)。
常用方式一:
重写WebSecurityConfigurerAdapter类里的configure(AuthenticationManagerBuilder auth)方法
2
3
4
5
6
7
8
9
10
11
2public class WebSecurityConfig extends WebSecurityConfigurerAdapter {
3 @Override
4 protected void configure(AuthenticationManagerBuilder auth) throws Exception {
5 auth.inMemoryAuthentication().
6 withUser("user001").password("123456").roles("user").and().
7 withUser("admin").password("123456").roles("user","admin");
8 }
9}
10
11
代码解释:
- auth.inMemoryAuthentication() 开启内用用户配置
- withUser() 添加一个内存用户,方法参数是String,user001表示添加username为test001的用户,password()方法配置该用户的密码,roles()指定用户具有的角色,方法参数是一个可变长度的参数列表,可以传入多个角色名称。如下,配置user001和admin两个用户,密码都是123456,user001具有user的角色,admin具有user和admin两个角色
配置完成后重启SpringBoot项目,用这两个用户都可以进行登录认证。
常用方式二:
重写WebSecurityConfigurerAdapter类里的userDetailsService()方法,代码如下:
2
3
4
5
6
7
8
9
10
11
12
13
14
15
16
17
18
19
20
21
2public class WebSecurityConfig extends WebSecurityConfigurerAdapter {
3 @Override
4 @Bean
5 protected UserDetailsService userDetailsService() {
6 InMemoryUserDetailsManager manager = new InMemoryUserDetailsManager();
7 manager.
8 createUser(User.withUsername("user001").
9 password("123456").
10 roles("user").
11 build());
12 manager.
13 createUser(User.withUsername("admin").
14 password("123456").
15 roles("user","admin").
16 build());
17 return manager;
18 }
19}
20
21
注意要加上该方法上@Bean注解,该注解会被Spring Security发现并使用。Spring Security支持各种来源的用户
数据,包括内存、数据库、LDAP等。它们被抽象为一个UserDetailsService接口,任何实现了
UserDetailsService 接口的对象都可以作为认证数据源。在这种设计模式下,Spring Security显得尤为灵
活。
1.4 HttpSecurity认识
Spring Security默认把所有资源进行保护起来,都需要进行登录用户认证授权。但是实际场景,并不是所有资源都需要被拦截,比如首页还有些静态资源,例如图片,css,js等。Spring Security默认的登录页面如何设置为自己项目的的表单提交登录页面呢,那么就需要借助HttpSecurity。
重写WebSecurityConfigurerAdapter里的configure(HttpSecurity http)方法,可以自定义自己的路由规则,代码如下:
2
3
4
5
6
7
8
9
10
11
12
2public class WebSecurityConfig extends WebSecurityConfigurerAdapter {
3 @Override
4 protected void configure(HttpSecurity http) throws Exception {
5 http.authorizeRequests().
6 antMatchers(new String[] {"/css/**","/js/**","/img/**","/fonts/**"}).permitAll().
7 anyRequest().authenticated().and(). formLogin().loginPage("/loginPgae").loginProcessingUrl("/login").permitAll().and().
8 csrf().disable();
9 }
10}
11
12
代码解释:
-
http.authorizeRequests()方法是开启HttpSecurity的配置
-
antMatchers()是采用ANT模式的URL匹配。在ANT模式中:
2
3
4
5
2? : "匹配一个字符"
3** : "匹配 0 个或多个目录(如果模式以 ‘/’ 或 ‘’ 结尾,则会自动补上 **)"
4
5
该方法可以传入可变长度的参数列表。"/css/**"表示匹配到css目录下任意文件或目录
-
permitAll() 表示允许访问,该示例表示"/css/**"、"/js/**"…下的资源都是直接允许访问,不需要授权
-
anyRequest().authenticated() 表示出来前面定义的URL模式之外,用户访问其他的URL模式需要登录后授权才可以访问
-
formLogin() 方法表示开启表单登录
-
loginPage("/loginPgae") 指定自己自定义的登录页面,会覆盖Spring Security默认提供的登录页面,在未被匹配授权的用户就回重定向访问/loginPgae,当然也可以指定为静态页面,例如loginPage("/login.html"),那么需要在static目录下添加上该静态页面。
-
loginProcessingUrl("/login") 表示登录请求的处理接口,该接口的url一般需要和登录页面表单提交的action保持一致。后面加上permitAll(),表示和登录相关的接口都不需要认证即可访问
-
csrf().disable() 表示关闭csrf,csrf()跨站请求伪造防护功能,默认是开启
1.4.1 自定义登录页
第一步:自定义类继承WebSecurityConfigurerAdapter
2
3
4
5
6
7
8
9
10
11
12
13
14
15
16
17
18
19
20
21
22
23
24
25
26
27
28
29
30
31
32
33
34
35
36
37
38
39
40
41
42
2public class WebSecurityConfig extends WebSecurityConfigurerAdapter {
3
4 @Bean
5 PasswordEncoder passwordEncoder(){
6// return new BCryptPasswordEncoder();
7 return NoOpPasswordEncoder.getInstance();//密码不加密
8 }
9 @Override
10 @Bean
11 protected UserDetailsService userDetailsService() {
12 InMemoryUserDetailsManager manager = new InMemoryUserDetailsManager();
13 manager.
14 createUser(User.withUsername("user001").
15 password("123456").
16 roles("user").
17 build());
18 manager.
19 createUser(User.withUsername("admin").
20 password("123456").
21 roles("user","admin").
22 build());
23 return manager;
24 }
25
26 @Override
27 protected void configure(HttpSecurity http) throws Exception {
28 http.authorizeRequests().
29 antMatchers(new String[]
30 {"/css/**",
31 "/js/**",
32 "/img/**"}).permitAll().
33 anyRequest().authenticated().
34 and(). formLogin().loginPage("/loginPage").
35 loginProcessingUrl("/login").permitAll().
36 and().
37 csrf().disable();
38 }
39
40}
41
42
第二步:
在controller中添加登录处理请求
2
3
4
5
6
7
8
9
10
11
12
2public class MainController {
3
4 //登录页面
5 @GetMapping("/loginPage")
6 public String loginPage(){
7 return "login";
8 }
9
10}
11
12
第三步:
在项目templates添加login.html,本案例页面用的是一个开源的登录页面模板,注意需要把表单中用户名和密码的name属性指定为username和password,把表单的action路径保持和第一步中loginProcessingUrl("/login")要一致。
代码示例如下:
2
3
4
5
6
7
8
9
10
11
12
13
14
15
16
17
18
19
20
21
22
23
24
25
26
27
28
29
30
31
32
33
34
35
36
37
38
39
40
41
42
43
44
45
46
47
2<html lang="en" xmlns:th="http://www.thymeleaf.org"
3 xmlns:sec="http://www.thymeleaf.org/thymeleaf-extras-springsecurity4">
4
5<head>
6
7 <meta charset="utf-8">
8 <meta name="viewport" content="width=device-width, initial-scale=1.0">
9
10 <title>首页 | 登录</title>
11
12 <link href="css/bootstrap.min.css" rel="stylesheet">
13 <link href="font-awesome/css/font-awesome.css" rel="stylesheet">
14
15 <link href="css/animate.css" rel="stylesheet">
16 <link href="css/style.css" rel="stylesheet">
17
18</head>
19
20<body class="gray-bg"style="background: url(/img/bg.jpg) no-repeat;background-size: 100% 100%">
21
22 <div class="middle-box text-center loginscreen animated fadeInDown">
23 <div>
24 <h3 class="m-t-lg">欢迎登录</h3>
25 <p></p>
26 <form class="m-t-lg" role="form" th:action="@{/login}" method="post">
27 <div class="form-group">
28 <input type="username" name="username" class="form-control" placeholder="用户名" required="">
29 </div>
30 <div class="form-group">
31 <input type="password" name="password" class="form-control" placeholder="密码" required="">
32 </div>
33 <button type="submit" class="btn btn-primary block full-width m-b">登录</button>
34 </form>
35 <p class="m-t-lg"> <small>Copyright</strong> www.ujfan.com © 2017-2018</small> </p>
36 </div>
37 </div>
38
39 <!-- Mainly scripts -->
40 <script src="js/jquery-3.1.1.min.js"></script>
41 <script src="js/bootstrap.min.js"></script>
42</body>
43
44</html>
45
46
47
注意如果修改表单中的name属性,假设想把username和password改为name和passwd,那么需要在自定义的WebSecurityConfigurerAdapter类做如下配置,代码如下:
2
3
4
5
6
7
8
9
10
11
12
13
14
15
16
17
18
19
20
21
22
23
24
25
26
27
28
29
30
31
32
33
34
35
36
37
38
39
40
41
42
43
44
45
2public class WebSecurityConfig extends WebSecurityConfigurerAdapter {
3
4 @Bean
5 PasswordEncoder passwordEncoder(){
6// return new BCryptPasswordEncoder();
7 return NoOpPasswordEncoder.getInstance();//密码不加密
8 }
9 @Override
10 @Bean
11 protected UserDetailsService userDetailsService() {
12 InMemoryUserDetailsManager manager = new InMemoryUserDetailsManager();
13 manager.
14 createUser(User.withUsername("user001").
15 password("123456").
16 roles("user").
17 build());
18 manager.
19 createUser(User.withUsername("admin").
20 password("123456").
21 roles("user","admin").
22 build());
23 return manager;
24 }
25
26 @Override
27 protected void configure(HttpSecurity http) throws Exception {
28 http.authorizeRequests().
29 antMatchers(new String[]
30 {"/css/**",
31 "/js/**",
32 "/img/**"}).permitAll().
33 anyRequest().authenticated().
34 and(). formLogin().loginPage("/loginPage").
35 loginProcessingUrl("/login").
36 usernameParameter("name").//设置name
37 passwordParameter("passwd").//设置password
38 permitAll().
39 and().
40 csrf().disable();
41 }
42
43}
44
45
1.4.2 登录详细配置
在登录认证成功后,会跳转到原访问页面,但在系统越趋向前后端分离,在前后端分离的系统交互中,前端通过调用后端服务接口,后端处理逻辑后会把处理结果以某种格式(json,xml或者其他的序列化方式)数据返回给前端,大部分的数据格式是一段json数据。对于这种方式Spring Security也有良好的支持。需要对上面自定义的WebSecurityConfig类进行调整修改,假设以Gson为例,代码示例如下:
第一步:
项目引入Gson的jar包,springboot默认加入了jackson-databind作为JSON转换器,需要先去掉默认的Jackson-databind,然后引入Gson包,修改pom.xml:
2
3
4
5
6
7
8
9
10
11
12
13
14
15
16
17
18
19
20
21
22
23
24
25
26
27
28
29
30
31
32
33
34
35
36
37
38
39
40
41
42
43
44
2 <dependency>
3 <groupId>org.springframework.boot</groupId>
4 <artifactId>spring-boot-starter-web</artifactId>
5 <exclusions>
6 <exclusion>
7 <groupId>org.springframework.boot</groupId>
8 <artifactId>spring-boot-starter-json</artifactId>
9 </exclusion>
10 </exclusions>
11 </dependency>
12 <!--goole的Gson包 -->
13 <dependency>
14 <groupId>com.google.code.gson</groupId>
15 <artifactId>gson</artifactId>
16 </dependency>
17 <dependency>
18 <groupId>org.springframework.boot</groupId>
19 <artifactId>spring-boot-starter-security</artifactId>
20 </dependency>
21
22 <dependency>
23 <groupId>org.springframework.boot</groupId>
24 <artifactId>spring-boot-starter-thymeleaf</artifactId>
25 </dependency>
26 <dependency>
27 <groupId>org.springframework.boot</groupId>
28 <artifactId>spring-boot-starter-test</artifactId>
29 <scope>test</scope>
30 <exclusions>
31 <exclusion>
32 <groupId>org.junit.vintage</groupId>
33 <artifactId>junit-vintage-engine</artifactId>
34 </exclusion>
35 </exclusions>
36 </dependency>
37 <dependency>
38 <groupId>org.springframework.security</groupId>
39 <artifactId>spring-security-test</artifactId>
40 <scope>test</scope>
41 </dependency>
42 </dependencies>
43
44
由于Spring Boot中默认提供了Gson的自动转换类GsonHttpMessageConvertersConfiguration,因此添加了Gson的jar依赖,就可以自动使用Gson进行转换。如果需要对Gson其他的配置,例如Gson中对日期数据进行格式化,那么开发者需要自己去自定义HttpMessageConverter,示例如下:
2
3
4
5
6
7
8
9
10
11
12
13
14
15
2public class GsonConfig {
3 @Bean
4 GsonHttpMessageConverter gsonHttpMessageConverter(){
5 GsonHttpMessageConverter converter = new GsonHttpMessageConverter();
6 GsonBuilder gsonBuilder = new GsonBuilder();
7 gsonBuilder.setDateFormat("yyyy/MM/dd HH:mm:ss");//自定义日期格式
8 gsonBuilder.excludeFieldsWithModifiers(Modifier.PROTECTED);//protected字段被过滤
9 Gson gson = gsonBuilder.create();
10 converter.setGson(gson);
11 return converter;
12 }
13}
14
15
第二步:
修改WebSecurityConfig,代码如下:
2
3
4
5
6
7
8
9
10
11
12
13
14
15
16
17
18
19
20
21
22
23
24
25
26
27
28
29
30
31
32
33
34
35
36
37
38
39
40
41
42
43
44
45
46
47
48
49
50
51
52
53
54
55
56
57
58
59
60
61
62
63
64
65
66
67
68
69
70
71
72
73
74
75
76
77
78
79
80
81
82
83
84
85
86
87
88
89
90
91
92
93
94
2public class WebSecurityConfig extends WebSecurityConfigurerAdapter {
3
4 @Bean
5 PasswordEncoder passwordEncoder(){
6// return new BCryptPasswordEncoder();
7 return NoOpPasswordEncoder.getInstance();//密码不加密
8 }
9 @Override
10 @Bean
11 protected UserDetailsService userDetailsService() {
12 InMemoryUserDetailsManager manager = new InMemoryUserDetailsManager();
13 manager.
14 createUser(User.withUsername("user001").
15 password("123456").
16 roles("user").
17 build());
18 manager.
19 createUser(User.withUsername("admin").
20 password("123456").
21 roles("user","admin").
22 build());
23 return manager;
24 }
25
26 @Override
27 protected void configure(HttpSecurity http) throws Exception {
28 http.authorizeRequests().
29 antMatchers(new String[]
30 {"/css/**",
31 "/js/**",
32 "/img/**"}).permitAll().
33 anyRequest().authenticated().
34 and(). formLogin().loginPage("/loginPage").
35 loginProcessingUrl("/login").
36 usernameParameter("name").
37 passwordParameter("passwd").
38 successHandler(
39 new AuthenticationSuccessHandler() {
40 @Override
41 public void onAuthenticationSuccess(HttpServletRequest httpServletRequest,
42 HttpServletResponse httpServletResponse,
43 Authentication authentication)
44 throws IOException, ServletException {
45 PrintWriter out = httpServletResponse.getWriter();
46 httpServletResponse.
47 setContentType("application/json;charset=utf-8");
48 Gson gson = new Gson();
49 Map<String,Object> resultMap = new HashMap<>();
50 resultMap.put("status",200);
51 resultMap.put("msg","登录成功");
52 resultMap.put("data",authentication.getPrincipal());
53 out.write(gson.toJson(resultMap));
54 out.flush();
55 out.close();
56 }
57 }).
58 failureHandler(new AuthenticationFailureHandler() {
59 @Override
60 public void onAuthenticationFailure(HttpServletRequest httpServletRequest,
61 HttpServletResponse httpServletResponse,
62 AuthenticationException e)
63 throws IOException, ServletException {
64 PrintWriter out = httpServletResponse.getWriter();
65 httpServletResponse.setContentType("application/json;charset=utf-8");
66 Gson gson = new Gson();
67 Map<String,Object> resultMap = new HashMap<>();
68 resultMap.put("status",400);
69 if(e instanceof LockedException){
70 resultMap.put("msg","账户被锁定");
71 }else if(e instanceof BadCredentialsException){
72 resultMap.put("msg","账号或者密码错误");
73 }else if(e instanceof DisabledException){
74 resultMap.put("msg","账户被禁用");
75 }else if(e instanceof AccountExpiredException){
76 resultMap.put("msg","账号过期");
77 }else if(e instanceof CredentialsExpiredException){
78 resultMap.put("msg","密码过期");
79 }else{
80 resultMap.put("msg","登录失败");
81 }
82 out.write(gson.toJson(resultMap));
83 out.flush();
84 out.close();
85 }
86 }).
87 permitAll().
88 and().
89 csrf().disable();
90 }
91
92}
93
94
1.4.3 注销登录配置
Spring Security默认注销用户认证,需要请求"/logout",就会注销登录认证。如果需要自定义配置的话,示例如下:
2
3
4
5
6
7
8
9
10
11
12
13
14
15
16
17
18
19
20
21
22
23
24
25
26
27
28
29
30
31
32
33
34
35
36
37
38
39
40
41
42
43
44
45
46
47
48
49
50
51
52
53
54
55
56
57
58
59
60
61
62
63
64
65
66
67
68
69
70
71
72
73
74
75
76
77
78
79
80
81
82
83
84
85
86
87
88
89
90
91
92
93
94
95
96
97
98
99
100
101
102
103
104
105
106
107
108
109
110
111
112
113
114
115
116
117
118
119
120
121
122
123
124
125
2public class WebSecurityConfig extends WebSecurityConfigurerAdapter {
3
4 @Bean
5 PasswordEncoder passwordEncoder(){
6// return new BCryptPasswordEncoder();
7 return NoOpPasswordEncoder.getInstance();//密码不加密
8 }
9 @Override
10 @Bean
11 protected UserDetailsService userDetailsService() {
12 InMemoryUserDetailsManager manager = new InMemoryUserDetailsManager();
13 manager.
14 createUser(User.withUsername("user001").
15 password("123456").
16 roles("user").
17 build());
18 manager.
19 createUser(User.withUsername("admin").
20 password("123456").
21 roles("user","admin").
22 build());
23 return manager;
24 }
25
26 @Override
27 protected void configure(HttpSecurity http) throws Exception {
28 http.authorizeRequests().
29 antMatchers(new String[]
30 {"/css/**",
31 "/js/**",
32 "/img/**"}).permitAll().
33 anyRequest().authenticated().
34 and(). formLogin().loginPage("/loginPage").
35 loginProcessingUrl("/login").
36 usernameParameter("name").
37 passwordParameter("passwd").
38 successHandler(
39 new AuthenticationSuccessHandler() {
40 @Override
41 public void onAuthenticationSuccess(HttpServletRequest httpServletRequest,
42 HttpServletResponse httpServletResponse,
43 Authentication authentication)
44 throws IOException, ServletException {
45 PrintWriter out = httpServletResponse.getWriter();
46 httpServletResponse.
47 setContentType("application/json;charset=utf-8");
48 Gson gson = new Gson();
49 Map<String,Object> resultMap = new HashMap<>();
50 resultMap.put("status",200);
51 resultMap.put("msg","登录成功");
52 resultMap.put("data",authentication.getPrincipal());
53 out.write(gson.toJson(resultMap));
54 out.flush();
55 out.close();
56 }
57 }).
58 failureHandler(new AuthenticationFailureHandler() {
59 @Override
60 public void onAuthenticationFailure(HttpServletRequest httpServletRequest,
61 HttpServletResponse httpServletResponse,
62 AuthenticationException e)
63 throws IOException, ServletException {
64 PrintWriter out = httpServletResponse.getWriter();
65 httpServletResponse.setContentType("application/json;charset=utf-8");
66 Gson gson = new Gson();
67 Map<String,Object> resultMap = new HashMap<>();
68 resultMap.put("status",400);
69 if(e instanceof LockedException){
70 resultMap.put("msg","账户被锁定");
71 }else if(e instanceof BadCredentialsException){
72 resultMap.put("msg","账号或者密码错误");
73 }else if(e instanceof DisabledException){
74 resultMap.put("msg","账户被禁用");
75 }else if(e instanceof AccountExpiredException){
76 resultMap.put("msg","账号过期");
77 }else if(e instanceof CredentialsExpiredException){
78 resultMap.put("msg","密码过期");
79 }else{
80 resultMap.put("msg","登录失败");
81 }
82 out.write(gson.toJson(resultMap));
83 out.flush();
84 out.close();
85 }
86 }).
87 permitAll().
88 //加入注销登录配置
89 logout().//表示开启注销登录配置
90 logoutUrl("/logout").//配置注销登录请求的URL,默认是"/logout"
91 clearAuthentication(true).//是否清除身份认证信息
92 invalidateHttpSession(true).//是否使Session失效
93 addLogoutHandler(new LogoutHandler() {//在退出时处理某逻辑,如清除Cookie
94 @Override
95 public void logout(HttpServletRequest httpServletRequest,
96 HttpServletResponse httpServletResponse,
97 Authentication authentication) {
98 System.out.println("用户退出....");
99 Cookie[] cookies = httpServletRequest.getCookies();
100 if (cookies != null){
101 for (Cookie cookie : cookies) {
102 cookie.setValue("");
103 cookie.setPath("/");
104 cookie.setMaxAge(0);
105 httpServletResponse.addCookie(cookie);
106 }
107 }
108 }
109 }).
110 logoutSuccessHandler(new LogoutSuccessHandler() {
111 @Override
112 public void onLogoutSuccess(HttpServletRequest httpServletRequest,
113 HttpServletResponse httpServletResponse,
114 Authentication authentication)
115 throws IOException, ServletException {
116 httpServletResponse.sendRedirect("/loginPage");
117 }
118 }).
119 and().
120 csrf().disable();
121 }
122
123}
124
125
1.4.4 配置多个HttpSecurity
如果业务比较复杂,开发者可以多个HttpSecurity,进行多次扩展。示例代码如下:
2
3
4
5
6
7
8
9
10
11
12
13
14
15
16
17
18
19
20
21
22
23
24
25
26
27
28
29
30
31
32
33
34
35
36
37
38
39
40
41
42
43
44
45
46
47
48
49
50
51
52
53
54
55
56
57
58
59
60
2public class MutiHttpSecurityConfig {
3
4 @Bean
5 PasswordEncoder passwordEncoder(){
6// return new BCryptPasswordEncoder();
7 return NoOpPasswordEncoder.getInstance();
8 }
9
10 @Bean
11 protected UserDetailsService userDetailsService() {
12 InMemoryUserDetailsManager manager = new InMemoryUserDetailsManager();
13 manager.
14 createUser(User.withUsername("user001").
15 password("123456").
16 roles("user").
17 build());
18 manager.
19 createUser(User.withUsername("admin").
20 password("123456").
21 roles("user","admin").
22 build());
23 return manager;
24 }
25
26 @Configuration
27 @Order(1)
28 public static class FirstWebSecurityConfig extends WebSecurityConfigurerAdapter{
29 @Override
30 protected void configure(HttpSecurity http) throws Exception {
31 http.antMatcher("/admin/**").
32 authorizeRequests().anyRequest().hasRole("admin");
33 }
34 }
35 @Order(1)
36 @Configuration
37 public static class SecondWebSecurityConfig extends WebSecurityConfigurerAdapter{
38 @Override
39 protected void configure(HttpSecurity http) throws Exception {
40 http.antMatcher("/user/**").
41 authorizeRequests().anyRequest().hasRole("user");
42 }
43 }
44 @Order(3)
45 @Configuration
46 public static class ThirdWebSecurityConfig extends WebSecurityConfigurerAdapter{
47 @Override
48 protected void configure(HttpSecurity http) throws Exception {
49 http.authorizeRequests().anyRequest().authenticated().
50 and().
51 formLogin().loginPage("/loginPage").loginProcessingUrl("/login").
52 permitAll().
53 and().
54 csrf().disable();
55 }
56 }
57
58}
59
60
注意@Order注解表示配置的优先级,数字越小优先级越大,没加@Order注解的配置优先级最小。该类表示,
FirstWebSecurityConfig处理"/admin/**"模式匹配到的URL,同理SecondWebSecurityConfig等处理相应逻辑。
第2章 Spring Security详聊
2.1 密码加密演进
密码明文存储存在极大的安全隐患,一旦发生泄漏,用户信息存在极大的财产风险。 历史较大规模的密码明文泄漏事件:
- 据外媒报道,美国一家网络情报公司4iQ于2017年12月5日在暗网社区论坛上发现了一个大型汇总数据库,其中包含了14亿明文用户名和密码组合,牵涉LinkedIn,MySpace,Netflix等多家国际互联网巨头。研究人员表示,这或许是迄今为止在暗网中发现的最大明文数据库集合。
- 2011年12月,CSDN的安全系统遭到黑客攻击,600万用户的登录名、密码及邮箱遭到泄漏。随后,CSDN"密码外泄门"持续发酵,天涯、世纪佳缘等网站相继被曝用户数据遭泄密。天涯网于12月25日发布致歉信,称天涯4000万用户隐私遭到黑客泄露 。
因此可见对敏感数据进行加密是尤其重要的,常见我们听到的有MD5、SHA的信息摘要算法。对于像MD5算法,这是一种不可逆算法,那么什么是不可逆的呢?通俗地讲将明文密码经过一系列算法处理,生成某一长度(MD5是16位和32位)的信息摘要,俗称密文,通过密文无法可逆为明文,这样子就起到对密码起到保护作用,即使泄漏,不法分子也无法破解为明文。用户注册时把明文密码进行MD5运算后存储在数据库中,然后登陆时,取到用户提交的明文密码同样进行MD5运算和数据库存储的密码进行对比即可。MD5最多生成36的16次方个信息摘要,所以密文是有限的,理论上,不同明文经过MD5运算会可能生成同一密文,这就是俗称的碰撞问题。碰撞问题会产生安全问题,另外黑客也可以利用穷举法或者反查表的形式也可以很容易地破解MD5密文。
什么是穷举法呢?
比如密码是10位固定长度,由数字0-9和a-z组成,那么密码的组成就有10的36次方可能,假设计算机的计算能力为每秒100万亿次的运算,那么需要3.16×10^13秒的计算时间。随着计算机科技的发展,计算机的计算能力会越来越强大,在强大的计算机面前,破解密码似乎只是时间的长短问题
什么是反查表呢?
比如通过MD5加密,可以将123456生成32位长度的密文e10adc3949ba59abbe56e057f20f883e,每次经过MD5运算会发现将123456生成同一密文,这样子明文和密文具有一对一的关系。于是假设我们可以建一张表,假设为decode表,表中存两个字段,password和md5两个字段,password表示明文,md5表示密文。 然后密码是由10位组成,是从0-9个数字组成的,然后写个程序录取可能,共有10的36次可能,存到decode表中
…
…
1111111111
e11170b8cbd2d74102651cb967fa28e5
1111111112
2a7796ce858d1514242d628aff038992
…
…
1234567890
e807f1fcf82d132f9bb018ca6738a19f
…
…
这样子可以根据这个反查表,只要你的密文在这个表中,拿到密文,就可以直接查到明文,所以MD5加密看起来并不安全,并不是意义上的不可逆,只是起到对明文做掩盖作用。那是不是意味着有了反查表,所有密码就变得裸露无遗,只要反查表能收录到密文好像理论上是可以的,但实际上,要穷举所有可能,那么数据库存储的数据量是极其庞大,而数据库的存储依赖于硬件设备,所有受设备的限制(内存或者硬盘大小),假设表中存储100亿次可能的数据,那么需要的空间大小最小为4×10
36的字节,一个T的容量也就1.09×10¹²个字节,其存储需要的容量是惊人的。常见的反查表只收录简单常见的密码,例如纯数字形式的密码或者常见的密码,例如12345678、8888888、5201314、admin。所有常见的网站,要求密码设置由数字、字母和大小写组成,还有密码长的要求,这是要求密码组成比较复杂,那么就很难收录在反查表里,这样子能增加破解的难度。
起初黑客们通过字典穷举的方法进行破解,这对简单的密码和简单的密码系统是可行的,但对于复杂的密码和密码系统,则会产生无穷大的字典,那么所需要的空间是庞大的,那么有什么办法能解决或者优化空间大小的问题, 马丁·赫尔曼 借助了时间空间交换算法,于是诞生了彩虹表的技术,彩虹表在 密码学和网络安全 是非常有名的。它是 一个用于加密散列函数逆运算的预先计算好的表, 为破解密码的散列值(或称哈希值、微缩图、摘要、指纹、哈希密文)而准备。一般主流的彩虹表都在100G以上。 这样的表常常用于恢复由有限集字符组成的固定长度的纯文本密码 。具体彩虹表的原理具体请自行学习。
有了彩虹表,哈希加密显得十分脆弱,那是不是毫无办法呢,针对彩虹表,我们常见的手段是加盐。加盐是在原密码基础上加上一个随机值,这样子就打乱了加密方式,例如,由于用户名是固定不变且唯一的,我们就把用户名作为盐值附加在密码之上,例如用户名是user001,密码是123456,那么注册时,对user001&123456进行加密运算,再把生成的密文摘要存在数据库。登录时同样如此,和数据库对比即可。由于每个用户的盐值不一样,如此达到扰乱原有的加密方式,加大了破解的难度。常见的盐值我们可以取用户名,或者一个uuid,把对应的uuid一并存入数据库。
加盐是个不错的解决办法,那是不是就万无一失了呢,其实还是隐患的,假如我们的用户表数据库泄漏,由于通常盐值也一并存在用户表中,黑客同样根据盐值生成穷举法或者反查表进行破解。即使穷举法破解复杂的密码需要的时间在当今可能耗时较久,但是有时候还是可以接受的,尤其在未来计算机计算能力越来越强大,穷举法对其破解速度会越来快。那有没有一种解决办法,能加大其破解难度或者说使其破解时间长得无法接受。BCrypt正是这样一种算法。
2
3
4
5
6
7
8
9
2 PasswordEncoder passwordEncoder = new BCryptPasswordEncoder(10);//10表示迭代的次数
3 String password = "admin";//密码
4 String bcryptStr = passwordEncoder.encode(password);//加密后的密码
5 System.out.println(bcryptStr);
6 //输出为:$2a$10$6.V5fhoAhqNcULkYjcghiuinRRnAwLiaWKTZ//My5Htn/5U/5SdrK
7 }
8
9
上面程序多运行几次,即使同一明文,发现输出的密文都是不一样,其中密文,2a表明了算法的版本。2a版本加入了对非ASCII字符以及空终止符的处理,类似的版本号还有2x、2y、2b 等,都是在前面版本的基础上修复了某些缺陷或新增了某些特性。10是一个成本参数,它表明该密文需要迭代的次数。10是指2的10次方,即1024次。BCrypt依靠此参数来限制算法的速度。成本参数的理想取值是既让暴力破解无法忍受,又不会显著影响用户的实际体验(未来,计算能力会越来越强,成本参数也应相应调整)。$2a$10$之后的前22位是该密文的随机盐值,最后31位为真正的散列值。
如果我们在数据库中存储用户密码时用的是BCrypt密文,那么在用户登录时,需要同步取得用户输入的密码以及数据库存储中的BCrypt密文,从密文中提取盐值和成本参数,与用户的密码进行一次BCrypt加密,最后比较两个密文是否一致。
2.2 Spring Security的加密实践
Spring Security内置了密码加密机制,只需使用一个PasswordEncoder接口即可。通常在Spring Boot中,只用在上下文配置中声明PasswordEncoder的bean即可,这样Spring Security会自动识别使用,代码如下:
2
3
4
5
6
7
8
9
2public class MutiHttpSecurityConfig {
3 @Bean
4 PasswordEncoder passwordEncoder(){
5 return new BCryptPasswordEncoder(10);
6 }
7}
8
9
2.3 配置数据库的用户
上面基于内存用户仅仅适用于一些测试环境,而且无法持久化存储使用,并且灵活性很低。Spring Security同样也支持对数据库中的用户进行安全认证。
文都是不一样,其中密文,2a表明了算法的版本。2a版本加入了对非ASCII字符以及空终止符的处理,类似的版本号还有2x、2y、2b 等,都是在前面版本的基础上修复了某些缺陷或新增了某些特性。10是一个成本参数,它表明该密文需要迭代的次数。10是指2的10次方,即1024次。BCrypt依靠此参数来限制算法的速度。成本参数的理想取值是既让暴力破解无法忍受,又不会显著影响用户的实际体验(未来,计算能力会越来越强,成本参数也应相应调整)。$2a$10$之后的前22位是该密文的随机盐值,最后31位为真正的散列值。
如果我们在数据库中存储用户密码时用的是BCrypt密文,那么在用户登录时,需要同步取得用户输入的密码以及数据库存储中的BCrypt密文,从密文中提取盐值和成本参数,与用户的密码进行一次BCrypt加密,最后比较两个密文是否一致。
2.2 Spring Security的加密实践
Spring Security内置了密码加密机制,只需使用一个PasswordEncoder接口即可。通常在Spring Boot中,只用在上下文配置中声明PasswordEncoder的bean即可,这样Spring Security会自动识别使用,代码如下:
2
3
4
5
6
7
8
9
2public class MutiHttpSecurityConfig {
3 @Bean
4 PasswordEncoder passwordEncoder(){
5 return new BCryptPasswordEncoder(10);
6 }
7}
8
9
2.3 配置数据库的用户
上面基于内存用户仅仅适用于一些测试环境,而且无法持久化存储使用,并且灵活性很低。Spring Security同样也支持对数据库中的用户进行安全认证。
持续更新。。。。
