声明:此项目是本人为了学习而记录下来的 并不适用于每个人 如果有不懂得地方可以私信或者留言 最后祝大家敲代码永无BUG!
文章目录
-
项目背景
-
功能模块
-
项目技术架构
-
技术架构
- 技术栈
-
前台技术
* 后台架构 -
后端项目微服务原型搭建
-
搭建一个顶级父类 hrm_parent
- 搭建springcloud微服务支持模块 hrm_support_parent
- 搭建Eureka注册中心 hrm-eureka-1010
- 搭建一个Config Server模块 hrm-config-server-1020
- 搭建 Zuul GateWay模块 hrm-zuul-gateway-1030
- 搭建一个工具模块 hrm-basic-parent
项目背景
找工作的人:
现在社会竞争压力越来愈大,很多应届毕业生毕业后没法直接胜任某类工作,或者是一些已经工作的人慢慢丧失自己学习的能力,最终导致失业无法再次就业。
招聘的单位: 虽然求职者非常多,但是很多人的能力达不到用人企业的要求,他们期望一招聘进来马上就能使用,所以需要对求职候选人进行培养筛选。
培训机构: 很多培训机构虽然有能力培训人才但是,市场能力比较差,找不到合适的学员,让他们通过培训能找到工作
正是由于以上三类场景,所以我们开发一个人力资源系统(HRM),让找工作的人,能够选择特定机构的课程学习,并参与平台发布的招聘,而且还能参与一些活动。 让招聘单位入驻进来发布岗位进行招聘,甚至委托培训机构培训合适的人才。对于培训机构可以发布课程,吸收学员来完成学习并通过收取学费获取商业价值
功能模块
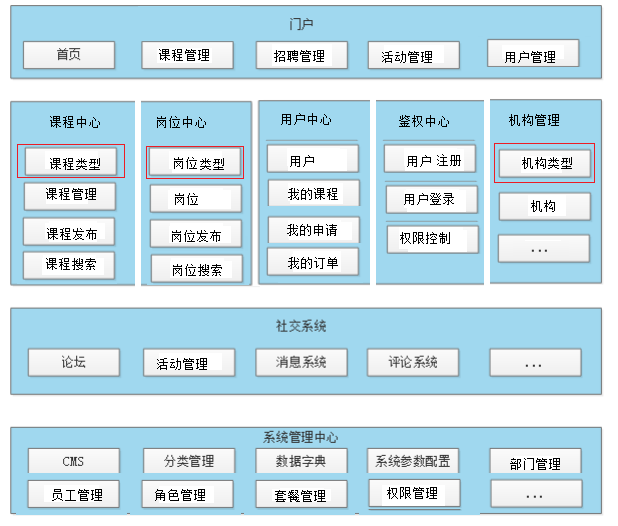
项目技术架构
技术架构
本项目采用的是前后端分离架构模式开发
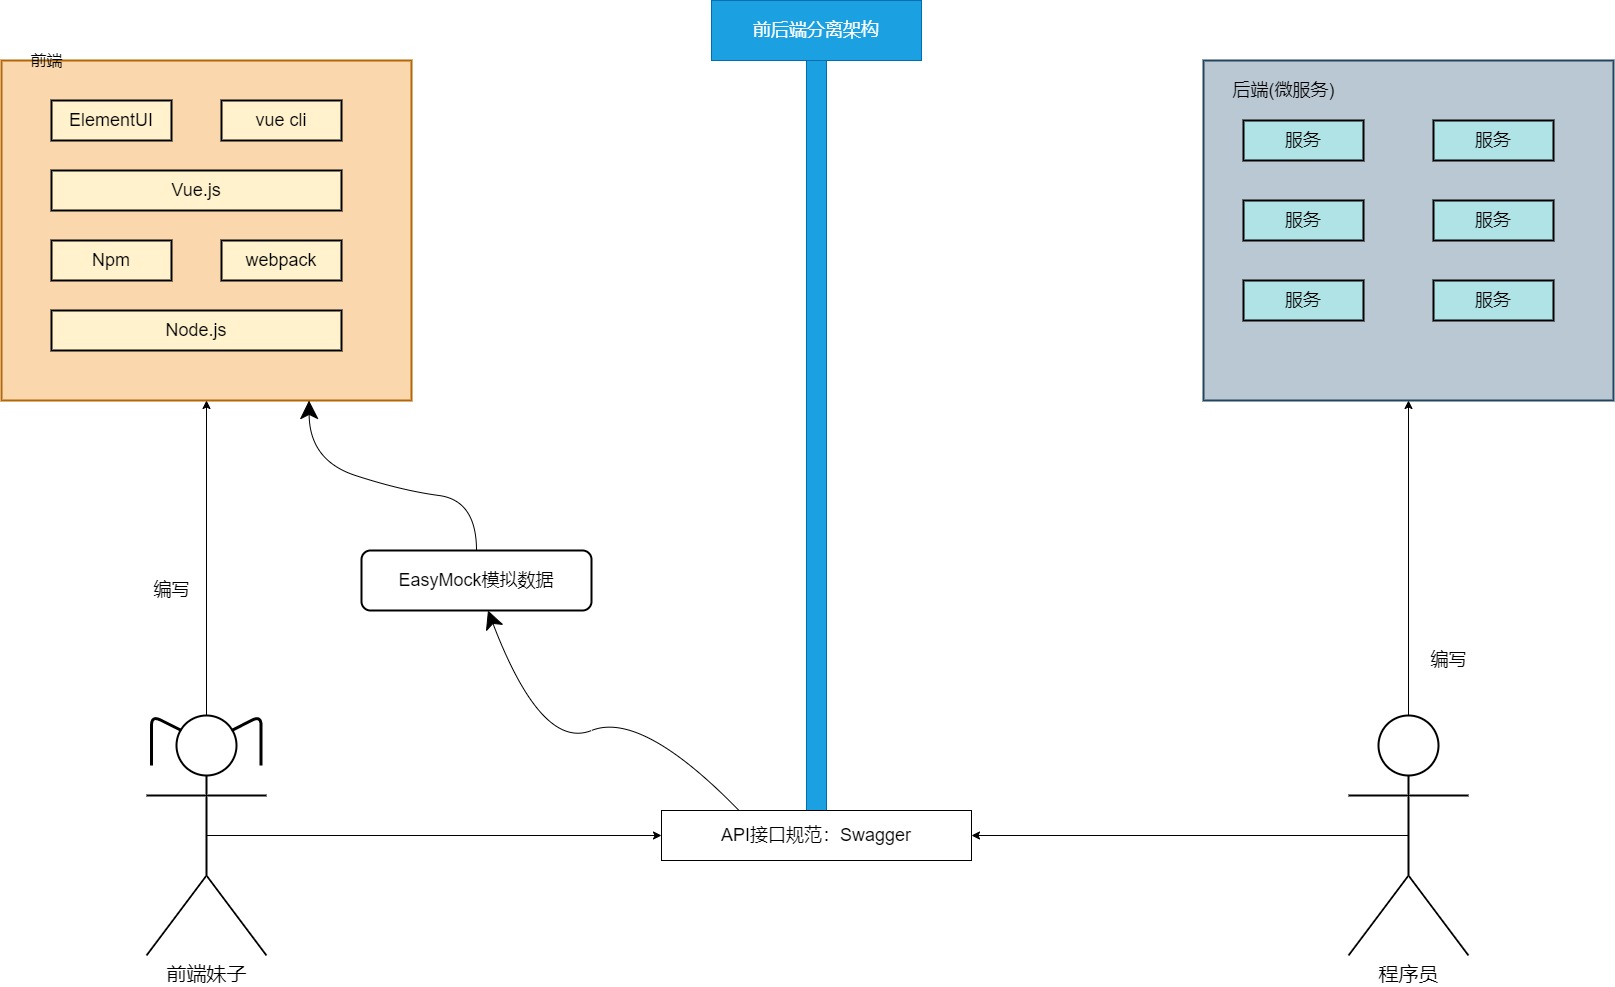
技术栈
前台技术
Node.js —— 一个基于 Chrome V8 引擎的 JavaScript 运行环境 >>>参考文章什么是 Nodejs ?
Npm —— 一款管理Node包的工具 >>>参考文章 npm 是干什么的?(非教程)
Vue.js —— 是一套用于构建用户界面的渐进式JavaScript框架 >>>参考文章 NPM是什么?
webpack —— 一款模块打包工具 >>>参考文章 什么是Webpack?怎么使用Webpack?
Vue-Cli —— Vue的脚手架 >>>参考文章 这可能是vue-cli最全的解析了
Element UI —— 一套为开发者、设计师和产品经理准备的基于 Vue 2.0 的桌面端组件库
后台架构
微服务架构:
按照功能拆分N多个服务,每个服务可以独立技术选型,独立开发,独立部署,独立运维.,单个服务使用基于ssm的springboot,服务间通过spring cloud协调.
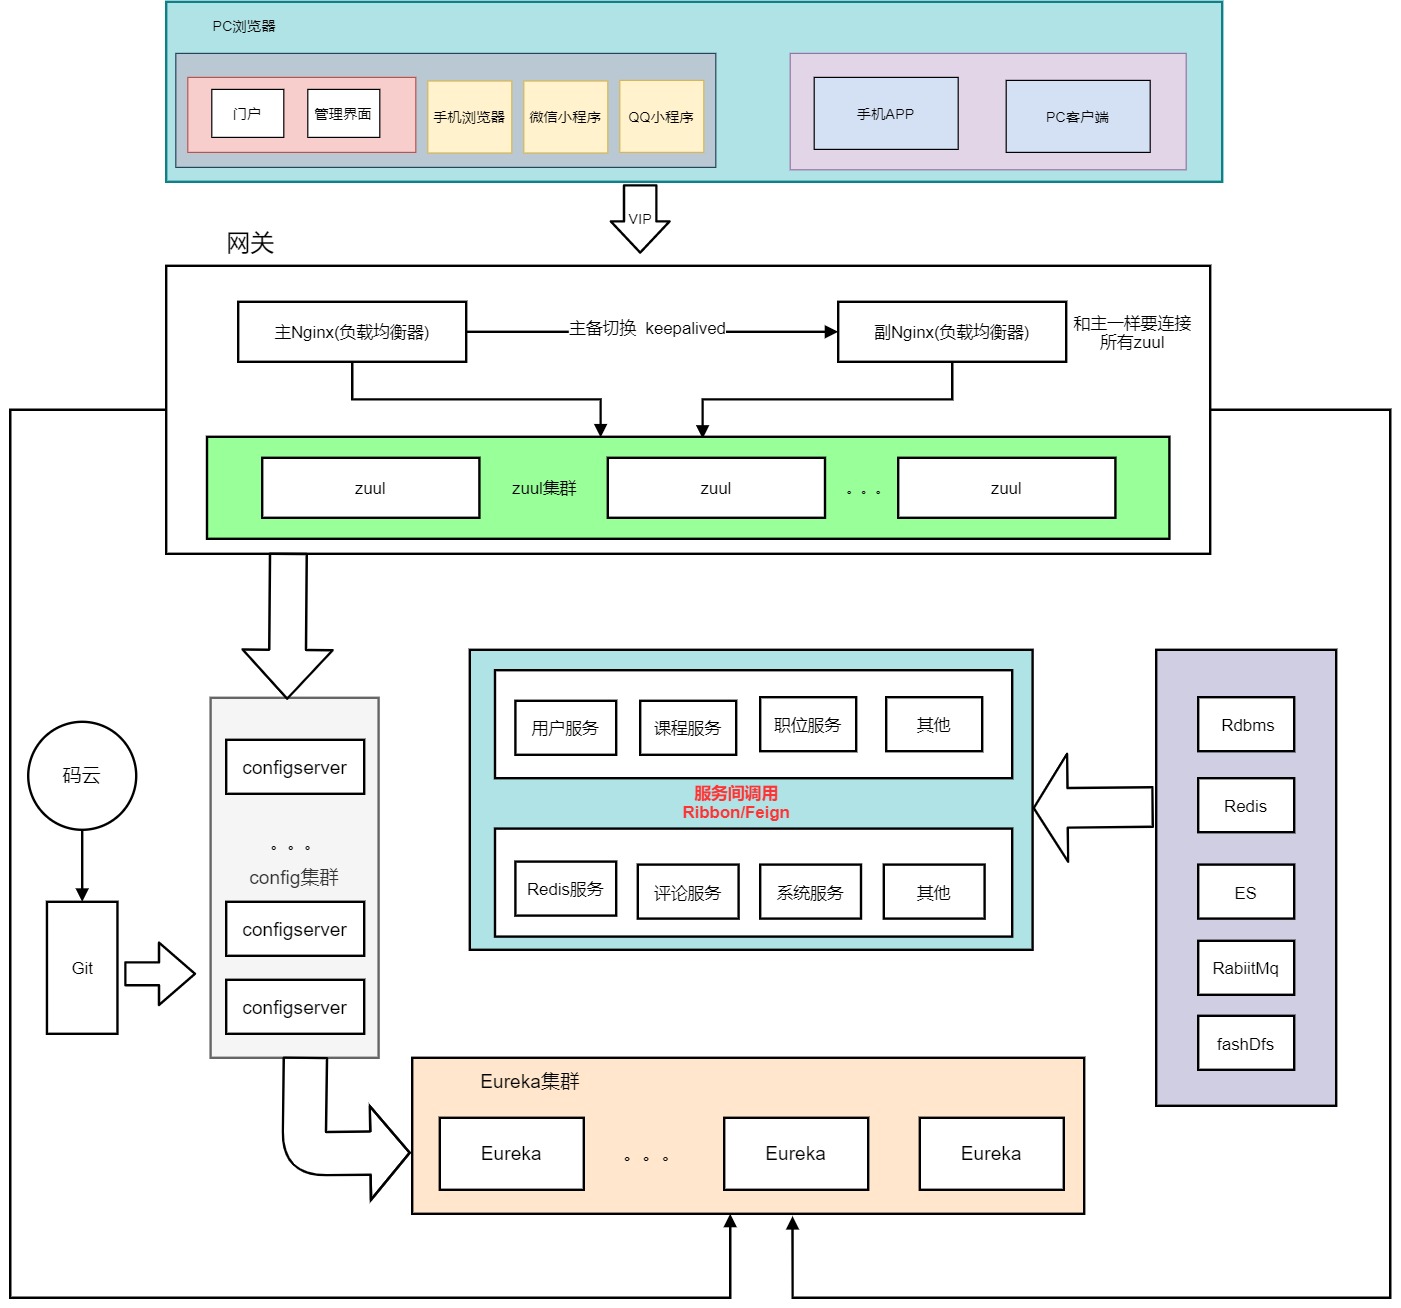
说明:
springcloud 协调多个服务
springboot 开发以一个一个微服务
Eureka 服务注册中心 可以做集群
Ribbon/Feign 负载均衡调用
Hystrix 断路器 高可用框架
zuul 网关可以做集群
不能使用Eureka做负载均衡器 调用者不能注册到Eureka 要用 Nginx
configServer:统一配置中心 可以做集群 直接注册到Eureka就行
Eureka和configServer不能做统一配置
业务服务想做集群非常简单 只需注册多个到注册中心就ok
项目采用了了分布式+集群的模式
后端项目微服务原型搭建
由于后面的项目还没写到 所以我们就先搭建我们一部分
搭建一个顶级父类 hrm_parent
首先在pom.xml中导入仲裁中心 之后就统一管理搜springboot的版本号
2
3
4
5
6
7
2 <groupId>org.springframework.boot</groupId>
3 <artifactId>spring-boot-starter-parent</artifactId>
4 <version>2.0.5.RELEASE</version>
5</parent>
6
7
还有jdk1.8版本
2
3
4
5
6
7
8
9
2 <project.build.sourceEncoding>UTF-8</project.build.sourceEncoding>
3 <project.reporting.outputEncoding>UTF-8</project.reporting.outputEncoding>
4 <java.version>1.8</java.version>
5 <spring-cloud.version>Finchley.SR1</spring-cloud.version>
6 <springboot.version>2.0.5.RELEASE</springboot.version>
7</properties>
8
9
但是springcloud的版本需要去管理
2
3
4
5
6
7
8
9
10
11
12
13
14
15
16
17
18
19
20
2 <dependencies>
3 <dependency>
4 <groupId>org.springframework.cloud</groupId>
5 <artifactId>spring-cloud-dependencies</artifactId>
6 <version>${spring-cloud.version}</version>
7 <type>pom</type>
8 <scope>import</scope>
9 </dependency>
10 <dependency>
11 <groupId>org.springframework.boot</groupId>
12 <artifactId>spring-boot-dependencies</artifactId>
13 <version>${springboot.version}</version>
14 <type>pom</type>
15 <scope>import</scope>
16 </dependency>
17 </dependencies>
18</dependencyManagement>
19
20
搭建springcloud微服务支持模块 hrm_support_parent
<packaging>pom</packaging>
pom 项目里没有java代码,也不执行任何代码,只是为了聚合工程或传递依赖用的。
搭建Eureka注册中心 hrm-eureka-1010
导入相关依赖
2
3
4
5
6
7
8
9
10
11
12
13
14
15
16
17
18
19
20
21
22
23
24
25
26
27
28
2 <dependency>
3 <groupId>org.springframework.boot</groupId>
4 <artifactId>spring-boot-starter-web</artifactId>
5
6 </dependency>
7 <dependency>
8 <groupId>org.springframework.boot</groupId>
9 <artifactId>spring-boot-starter-test</artifactId>
10 <scope>test</scope>
11 </dependency>
12 <dependency>
13 <groupId>org.springframework.cloud</groupId>
14 <artifactId>spring-cloud-starter-netflix-eureka-server</artifactId>
15 </dependency>
16</dependencies>
17
18<!--间接继承parent 所以不需要指定执行的入口类,和repackage-->
19<build>
20 <plugins>
21 <plugin>
22 <groupId>org.springframework.boot</groupId>
23 <artifactId>spring-boot-maven-plugin</artifactId>
24 </plugin>
25 </plugins>
26</build>
27
28
配置文件 application.yml
最开始我们只考虑单机模式
2
3
4
5
6
7
8
9
10
11
12
13
14
15
2 application:
3 name: hrm-eureka
4server:
5 port: 1010
6eureka:
7 instance:
8 hostname: localhost
9 client:
10 registerWithEureka: false
11 fetchRegistry: false
12 serviceUrl:
13 defaultZone: http://${eureka.instance.hostname}:${server.port}/eureka/ #单机配置
14
15
启动类:
2
3
4
5
6
7
8
9
2@EnableEurekaServer
3public class Eureka1010Application {
4 public static void main(String[] args) {
5 SpringApplication.run(Eureka1010Application.class, args);
6 }
7}
8
9
搭建一个Config Server模块 hrm-config-server-1020
导入相关依赖
2
3
4
5
6
7
8
9
10
11
12
13
14
15
16
17
18
19
20
21
22
23
2 <dependency>
3 <groupId>org.springframework.boot</groupId>
4 <artifactId>spring-boot-starter-web</artifactId>
5 </dependency>
6 <dependency>
7 <groupId>org.springframework.boot</groupId>
8 <artifactId>spring-boot-starter-test</artifactId>
9 </dependency>
10
11 <!--eureka客户端-->
12 <dependency>
13 <groupId>org.springframework.cloud</groupId>
14 <artifactId>spring-cloud-starter-netflix-eureka-client</artifactId>
15 </dependency>
16 <!--配置中心支持-->
17 <dependency>
18 <groupId>org.springframework.cloud</groupId>
19 <artifactId>spring-cloud-config-server</artifactId>
20 </dependency>
21</dependencies>
22
23
因为配置文件比较多 所以我们可以在码云上搭建配置库
但是在码云上编写配置文件是没有提示的 编写起来就比较麻烦 这我们怎么做呢
我们可以重新搭建一个项目 专门用来编写配置文件 hrm-config
首先我们需要在码云上搭建一个仓库
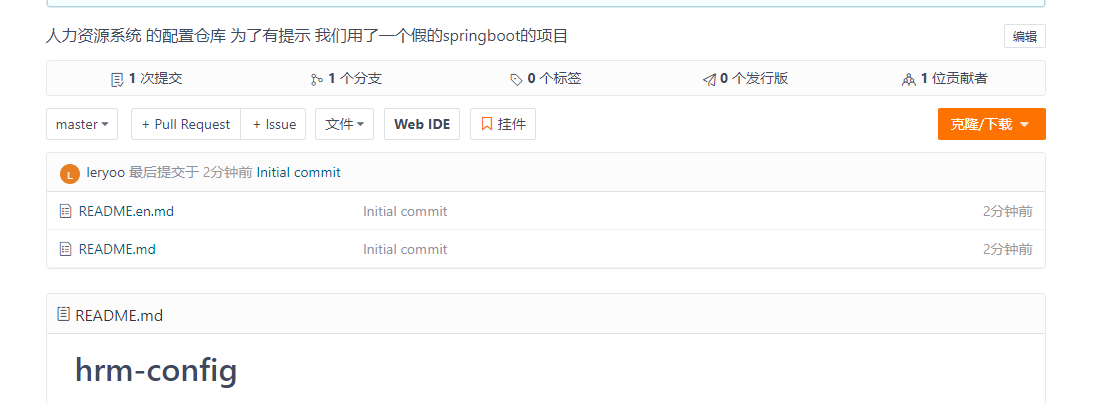
将这个项目clone到本地 然后将本地的项目的文件复制到这个文件中 并提交到码云
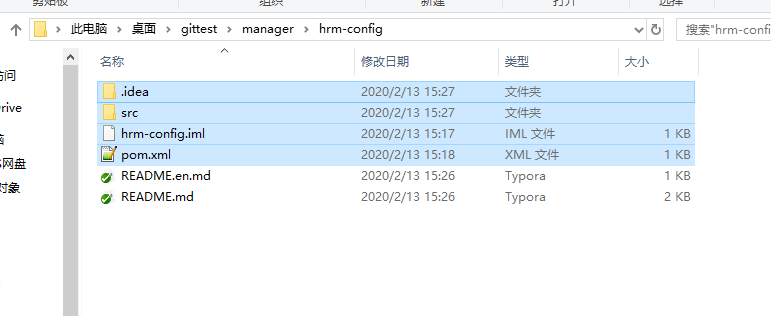
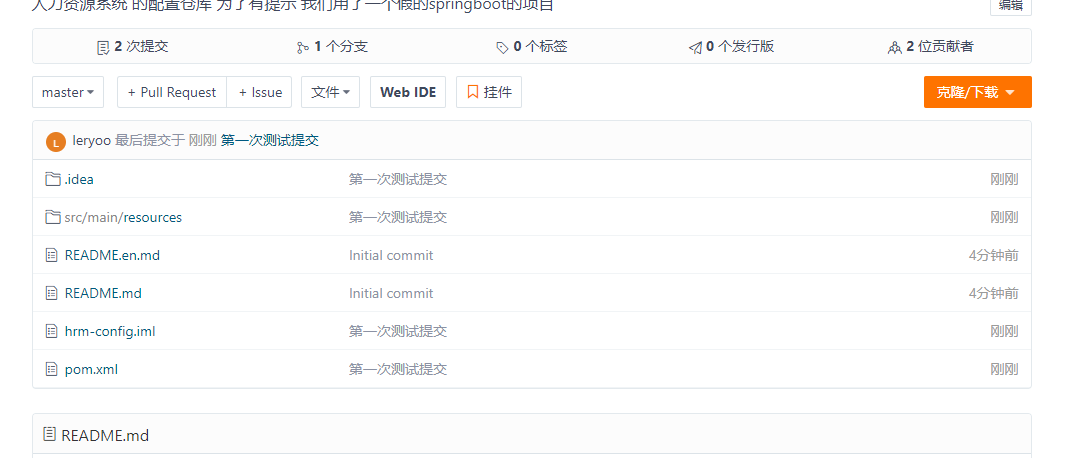
然后再在我们的idea环境中clone下来

这样我们就能直接在idea项目中编写配置文件然后提交到码云上了 我们来测试一下
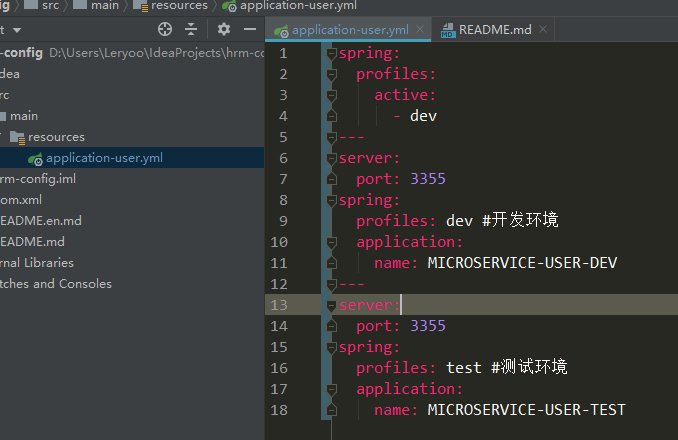
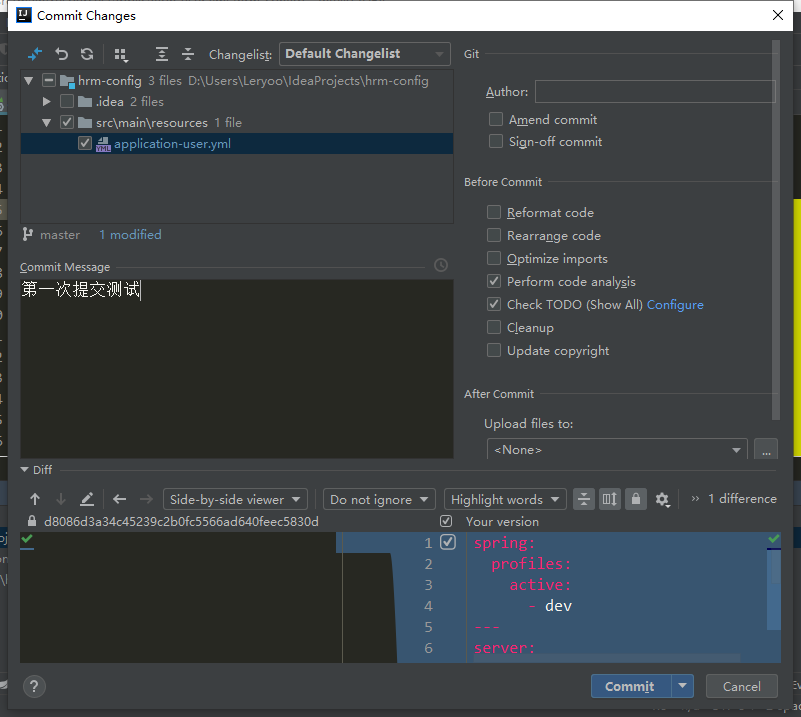
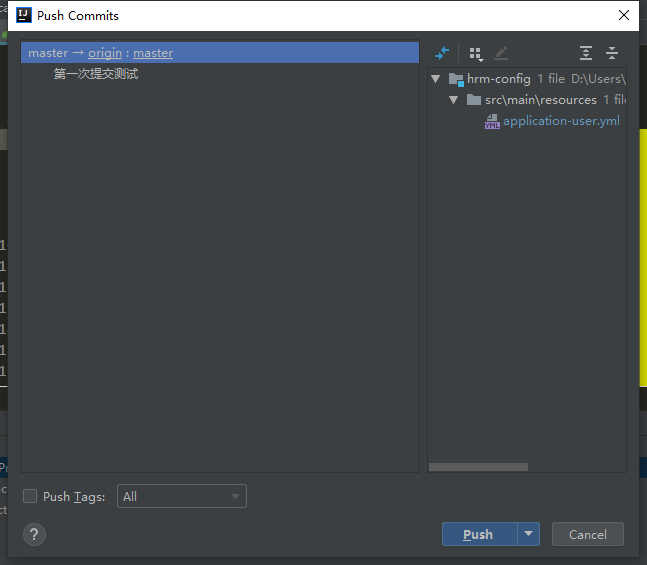
这也就能提交上来了 又会有提示 两全其美
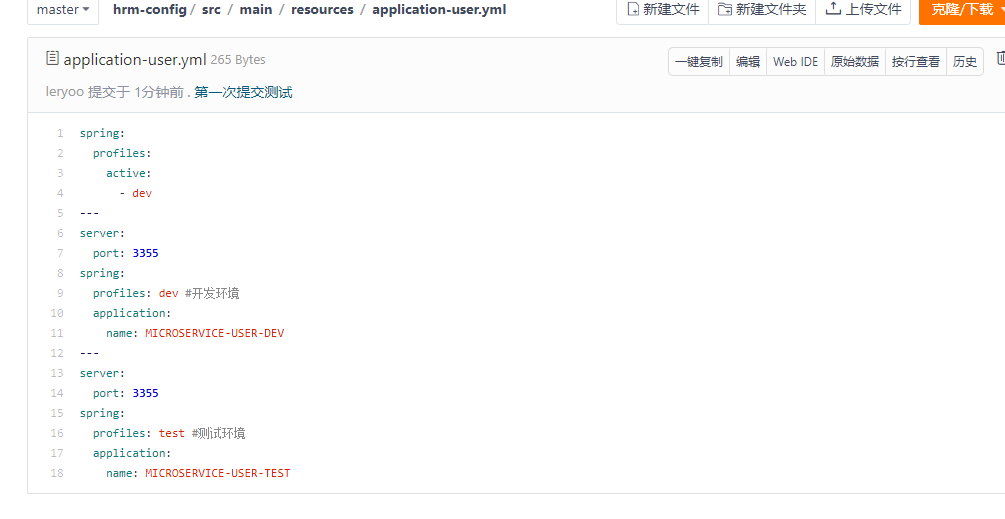
配置文件 application.yml
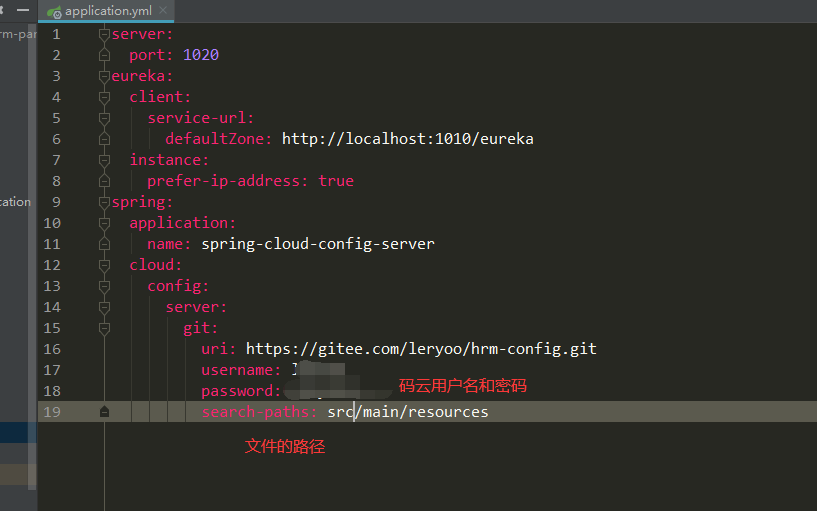
search-paths:如果不是在跟路径下 我们就需要加查找地址
这也就配置完成了 接下来我们启动项目
访问 http://localhost:1020/applicatiion-user.yml/dev

测试成功
搭建 Zuul GateWay模块 hrm-zuul-gateway-1030
依旧是先导入相关的依赖
2
3
4
5
6
7
8
9
10
11
12
13
14
15
16
17
18
19
20
21
22
23
24
25
26
27
28
29
30
2 <!-- springBoot支持 -->
3 <dependency>
4 <groupId>org.springframework.boot</groupId>
5 <artifactId>spring-boot-starter-web</artifactId>
6 </dependency>
7 <!-- spring boot 测试 -->
8 <dependency>
9 <groupId>org.springframework.boot</groupId>
10 <artifactId>spring-boot-starter-test</artifactId>
11 </dependency>
12 <!-- Eureka 客户端依赖 -->
13 <dependency>
14 <groupId>org.springframework.cloud</groupId>
15 <artifactId>spring-cloud-starter-netflix-eureka-client</artifactId>
16 </dependency>
17
18 <!-- zuul支持-->
19 <dependency>
20 <groupId>org.springframework.cloud</groupId>
21 <artifactId>spring-cloud-starter-netflix-zuul</artifactId>
22 </dependency>
23 <!--配置中心支持-->
24 <dependency>
25 <groupId>org.springframework.cloud</groupId>
26 <artifactId>spring-cloud-starter-config</artifactId>
27 </dependency>
28</dependencies>
29
30
配置文件:首先是局部配置
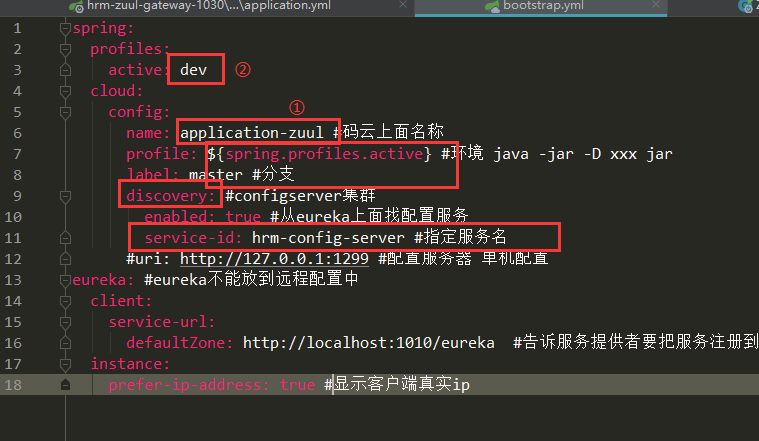
application.yml
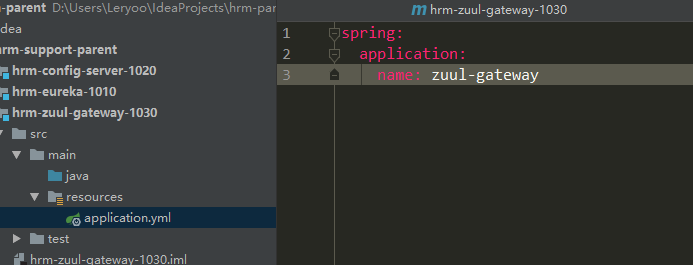
然后是全局的配置 bootstrap.yml
2
3
4
5
6
7
8
9
10
11
12
13
14
15
16
17
18
19
20
2 profiles:
3 active: dev
4 cloud:
5 config:
6 name: application-zuul #码云上面配置的名称
7 profile: ${spring.profiles.active} #环境 java -jar -D xxx jar
8 label: master #分支
9 discovery: #configserver集群
10 enabled: true #从eureka上面找配置服务
11 service-id: hrm-config-server #指定服务名
12 #uri: http://127.0.0.1:1299 #配置服务器 单机配置
13eureka: #eureka不能放到远程配置中
14 client:
15 service-url:
16 defaultZone: http://localhost:1010/eureka #告诉服务提供者要把服务注册到哪儿 #单机环境
17 instance:
18 prefer-ip-address: true #显示客户端真实ip
19
20
说明:
我们这里访问的配置文件就会在
discovery配置中去寻找一个服务名叫
hrm-config-server的服务 然后通过这个服务去查找 码云中master分支下路径为
src/main/resources中名字为
①和②的名字拼接起来的文件
application-zuul-dev.yml


启动类:
2
3
4
5
6
7
8
9
2@EnableZuulProxy
3public class Zuul1030Application {
4 public static void main(String[] args) {
5 SpringApplication.run(Zuul1030Application.class,args);
6 }
7}
8
9
然后启动服务 访问localhost:1010就会得到这么一个页面
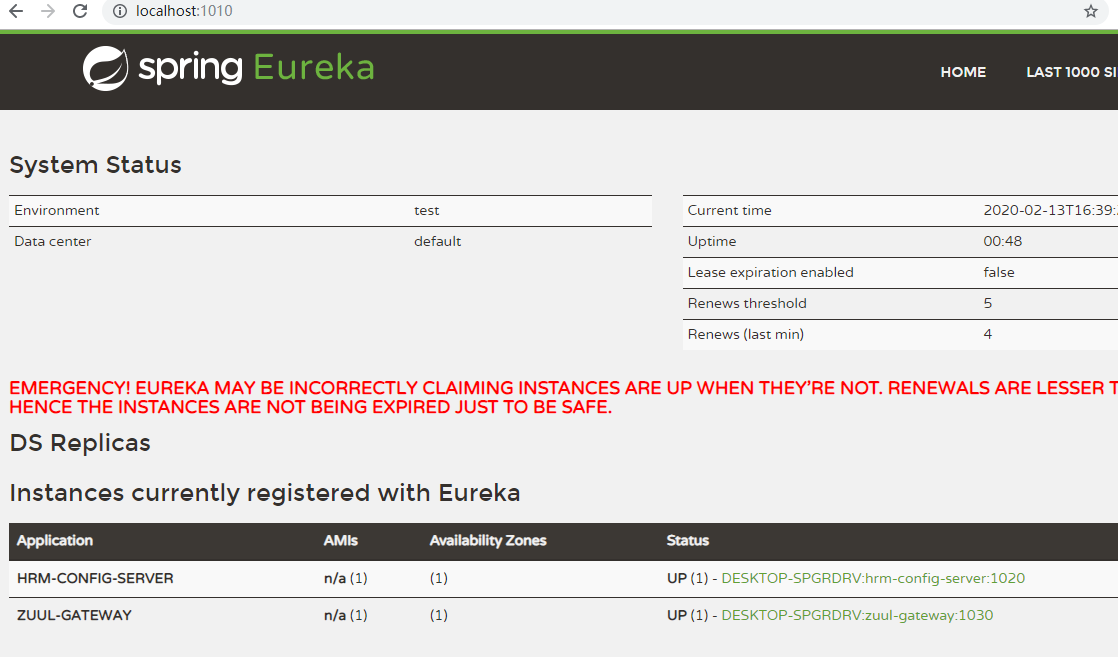
至此 zuul网关 集成完毕
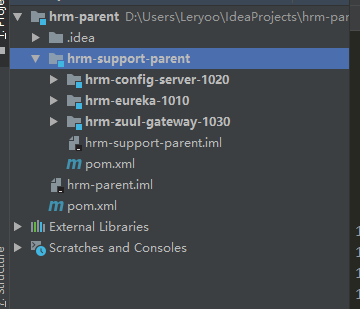
今天所搭建的架构的结构图
搭建一个工具模块 hrm-basic-parent
然后再在里面创建一个子模块
hrm-basic-parent
位置:
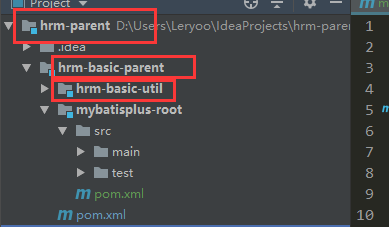
因为这个只是做一个工具模块 不会当做服务 所以没有端口号
将query和util的文件放在这里面

OK!!!
今天第一天就到这里 以后我们会陆陆续续的介绍其他相关的东西 最后谢谢大家的观看
